Connecting Custom Sources
editConnecting Custom Sources
editWorkplace Search provides a variety of popular content sources like GitHub, Google Drive, Salesforce, and Dropbox. It also offers a powerful and straightforward way to connect data sources for which a first-party integration does not exist, whther it is a modern homegrown data platform, a legacy system, or anything in-between. Enter Custom Sources and their extensive set of indexing and synchronization APIs.
This guide aims at guiding you through the high-level setup of Custom Sources, from data ingestion to tuning and display configuration:
A more concise and technical API reference can be found at Custom Sources Indexing API reference.
Understanding Custom Sources Basics
editLet’s start with a few key points:
- You can create any number of Custom Sources.
- Custom Sources are created as individual containers, for which a unique schema and relevance attributes can be defined.
- Custom Sources support any type of data, so long as it adheres to a schema of your choosing and some basic stylistic parameters.
- When configured correctly, Custom Sources inherit many of the features first-party source integrations do: automatic filtering at query time, source prioritization, customizable display of results, and more.
Creating a Custom Source
editA Custom Source is a first-class content source. It can be access controlled like any other content source.
Step 1. From the Workplace Search administrative dashboard’s Sources area, click Add a Shared Content Source, and select Custom API Source.
Step 2. Name the new source you want to create. The name will appear as-is in the various search experiences and management interfaces. Click Continue.
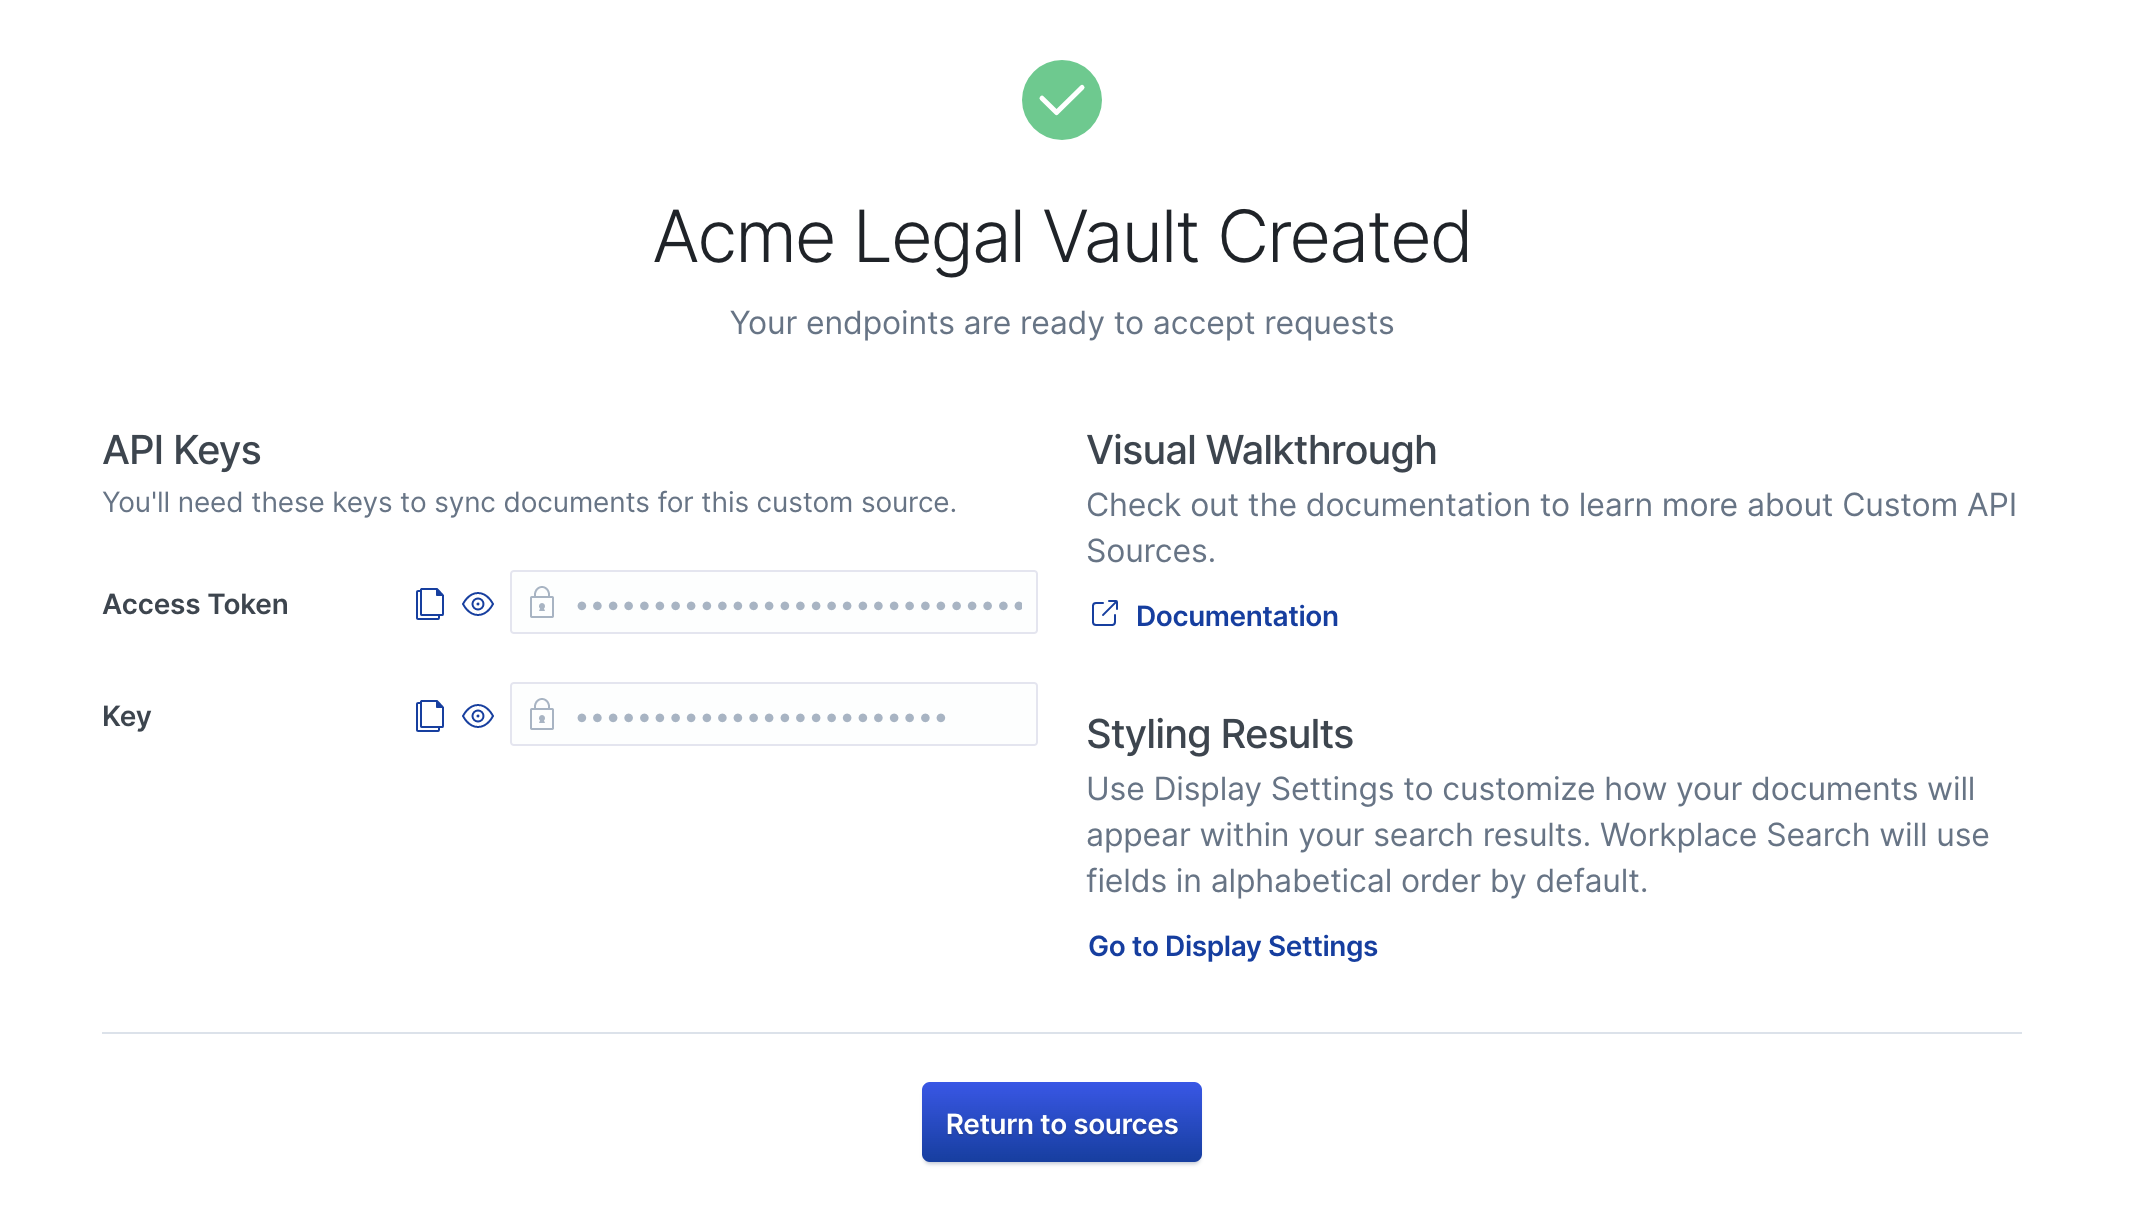
Step 3. It’s that simple, the source has now been created and the appropriate authentication (Auth Token) and source identification (Key) values have been generated.

We this new source created, we can now prepare it for incoming data.
Managing a Custom Source’s Schema
editEvery Custom Source has its own unique schema, allowing you to create document repositories that truly represent the nature of the information you want your team to access via Workplace Search.
There are two ways to approach schema creating with Workplace Search. You may either manually generate a schema from the the Schema configuration interface for the Custom Source, or Workplace Search can generate a schema automatically for you as you index new content into the source. Any new field added to a document will be picked up as an addition to the source’s schema, and all fields added via the document methid will be created as a text field. This can be updated later, so long that the field type selected abides by the type’s requirements (i.e. a date in the correct format).
To manually configure the schema for a source, or to update an existing schema field:
Step 1. From the Workplace Search administrative dashboard’s Sources area, locate the Custom Source you would like to configure, and click Details.
Step 2. Navigate to the Schema view from the sidebar menu.
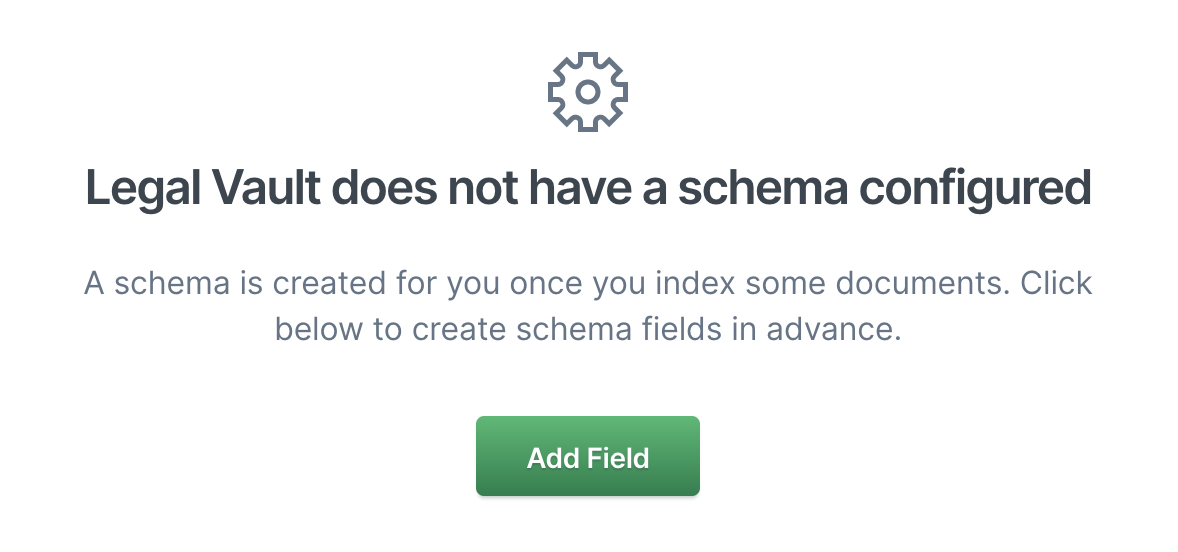
Step 3. If a schema exists, fields will appear with their associated field type values. If you are creating a snew schema, the Add Field action should be presented to you:

Step 4. Name the field and set its type accordingly. Click Add Field.
Step 5. Repeat the process for all fields you’d like to manually predefine.
For more information on schema configuration, including reserved fields, naming convention, and field types, refer to the Custom Sources Indexing API reference.
Managing Document-Level Permissions for Custom Sources
editCustom Sources allow you to define at the document level which user may or may not access the result as part of the search experience. Two reserved fields (_allow_permissions and _deny_permissions) accept array-type values. Using proper user mapping, you can generate sophisticated document access controls.
Deny permissions take precedence.
Read more in the Document permissions for Custom Sources guide.
Synchronizing Data via Custom Sources
editData ingestion with Custom Sources is straightforward. You may choose to push data to a Custom Source using any programming framework or language, but Workplace Search provides three official API clients should you work with the following technologies:
Indexing a Document
editTo index a document, simplyt issue a POST request to the Custom Source’s unique API endpoint, using both the key in the request path, and the auth_token in the authorization header.
curl -X POST http://localhost:3002/api/ws/v1/sources/[KEY]/documents/bulk_create \
-H "Authorization: Bearer [AUTH_TOKEN]" \
-H "Content-Type: application/json" \
-d '[
  {
    "_allow_permissions": ["permission1"],
    "_deny_permissions": [],
    "id" : 1234,
    "title" : "The Meaning of Time",
    "body" : "Not much. It is a made up thing.",
    "url" : "https://example.com/meaning/of/time",
    "created_at": "2019-06-01T12:00:00+00:00",
    "type": "list"
  },
  {
    "_allow_permissions": [],
    "_deny_permissions": ["permission2"],
    "id" : 1235,
    "title" : "The Meaning of Sleep",
    "body" : "Rest, recharge, and connect to the Ether.",
    "url" : "https://example.com/meaning/of/sleep",
    "created_at": "2019-06-01T12:00:00+00:00",
    "type": "list"
  },
  {
    "_allow_permissions": ["permission1"],
    "_deny_permissions": ["permission2"],
    "id" : 1236,
    "title" : "The Meaning of Life",
    "body" : "Be excellent to each other.",
    "url" : "https://example.com/meaning/of/life",
    "created_at": "2019-06-01T12:00:00+00:00",
    "type": "list"
  }
]'
It’s best to think of these objects as symbols, which represent the greater document to which they link. Fields should be descriptive enough that your users will be able to find what they need given loose querying attempts.
The id field is vital for keeping your custom source up to date as it will be used to update and delete any given document over time.
For more information on document manipulation and deletion, check out the Custom Sources Indexing API reference.
Configuring Display Settings for a Custom Source
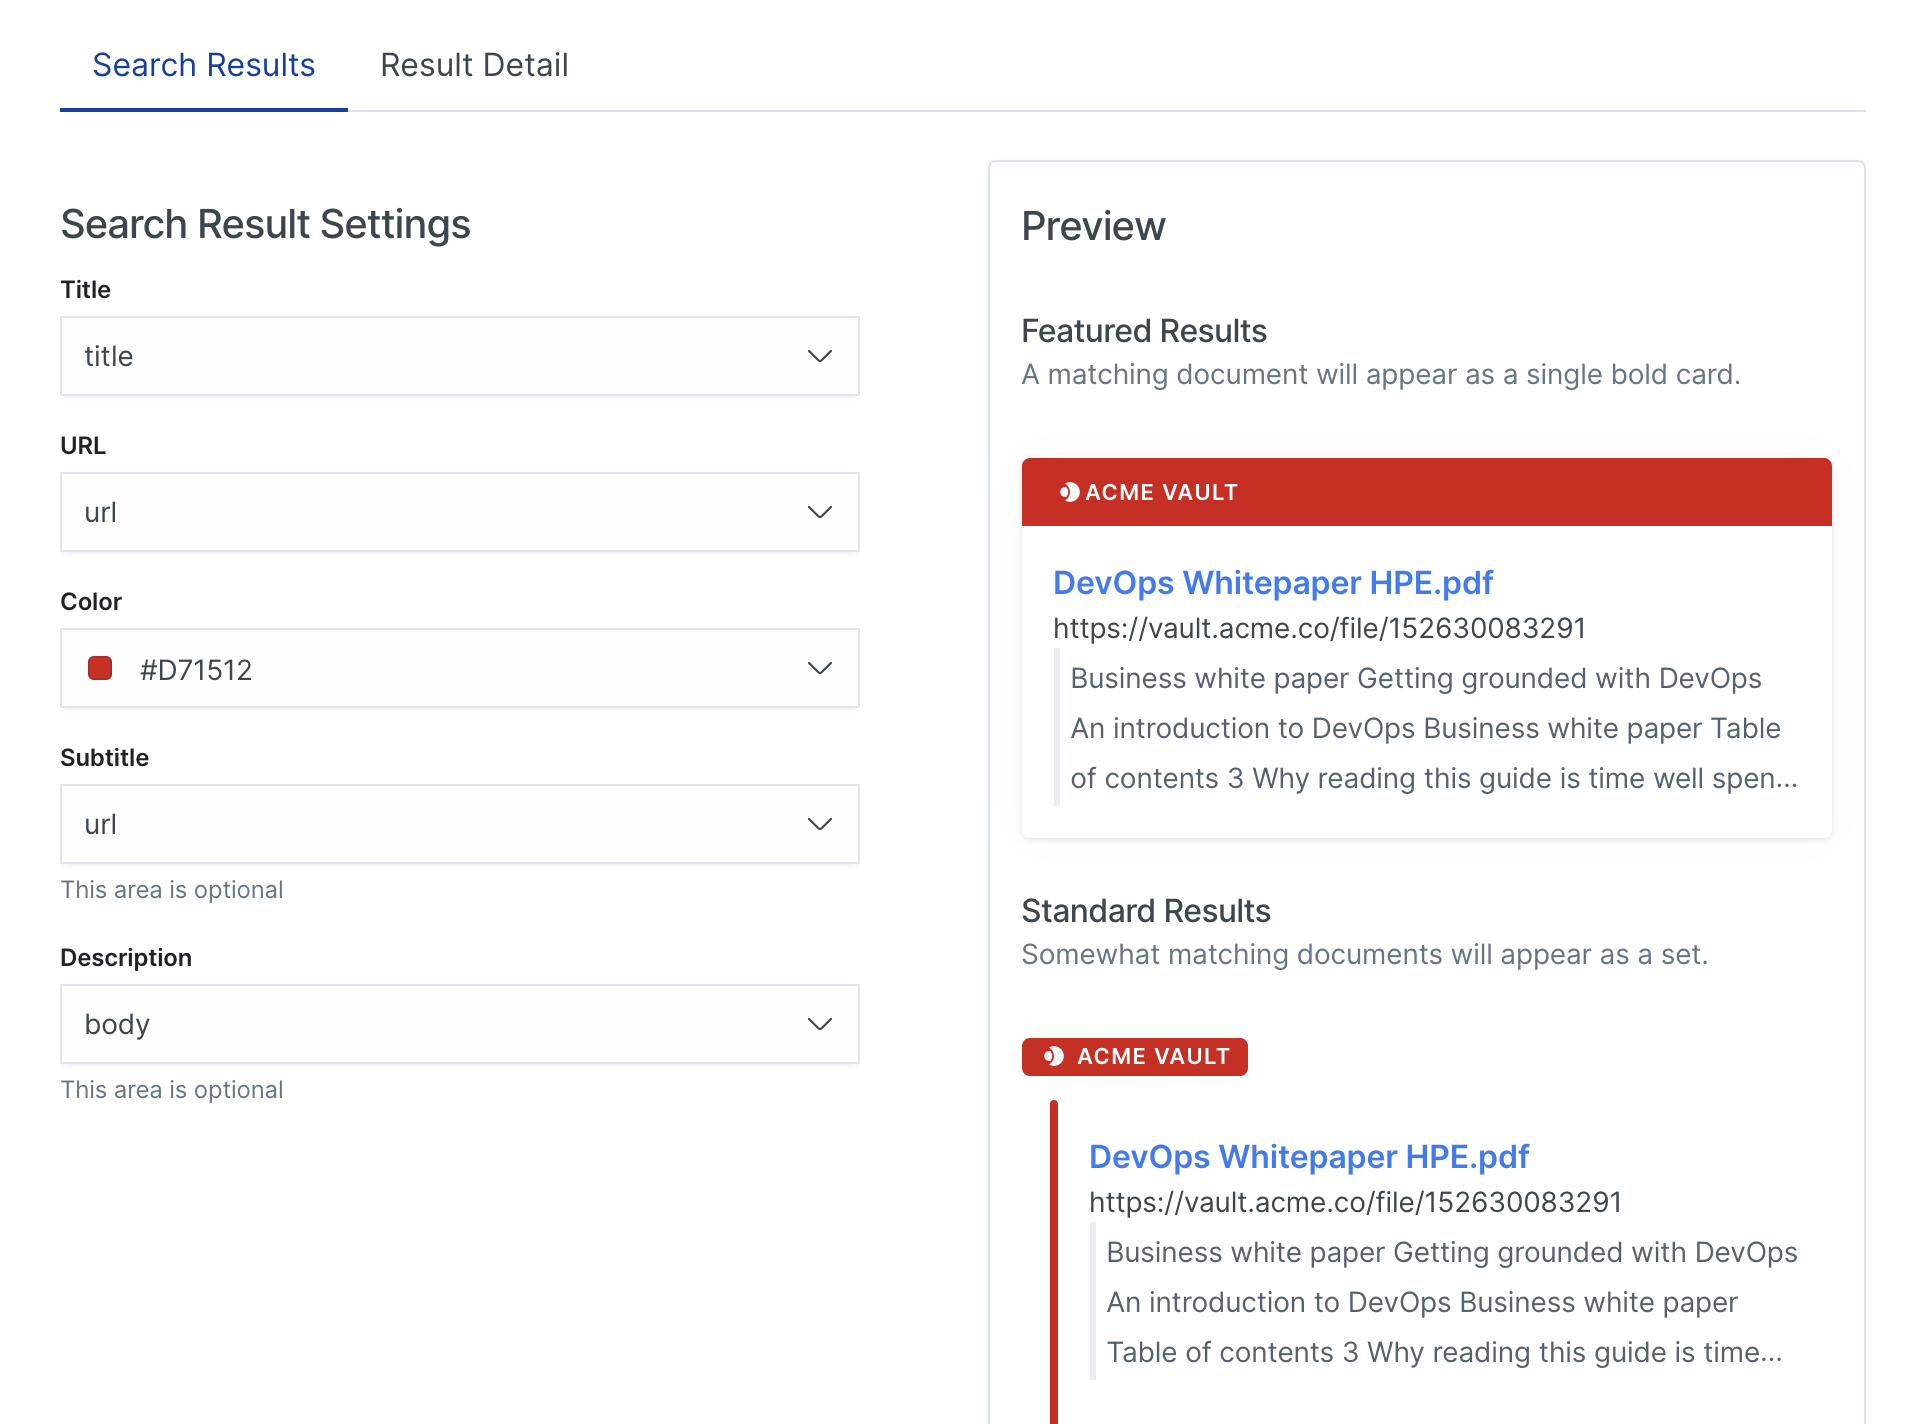
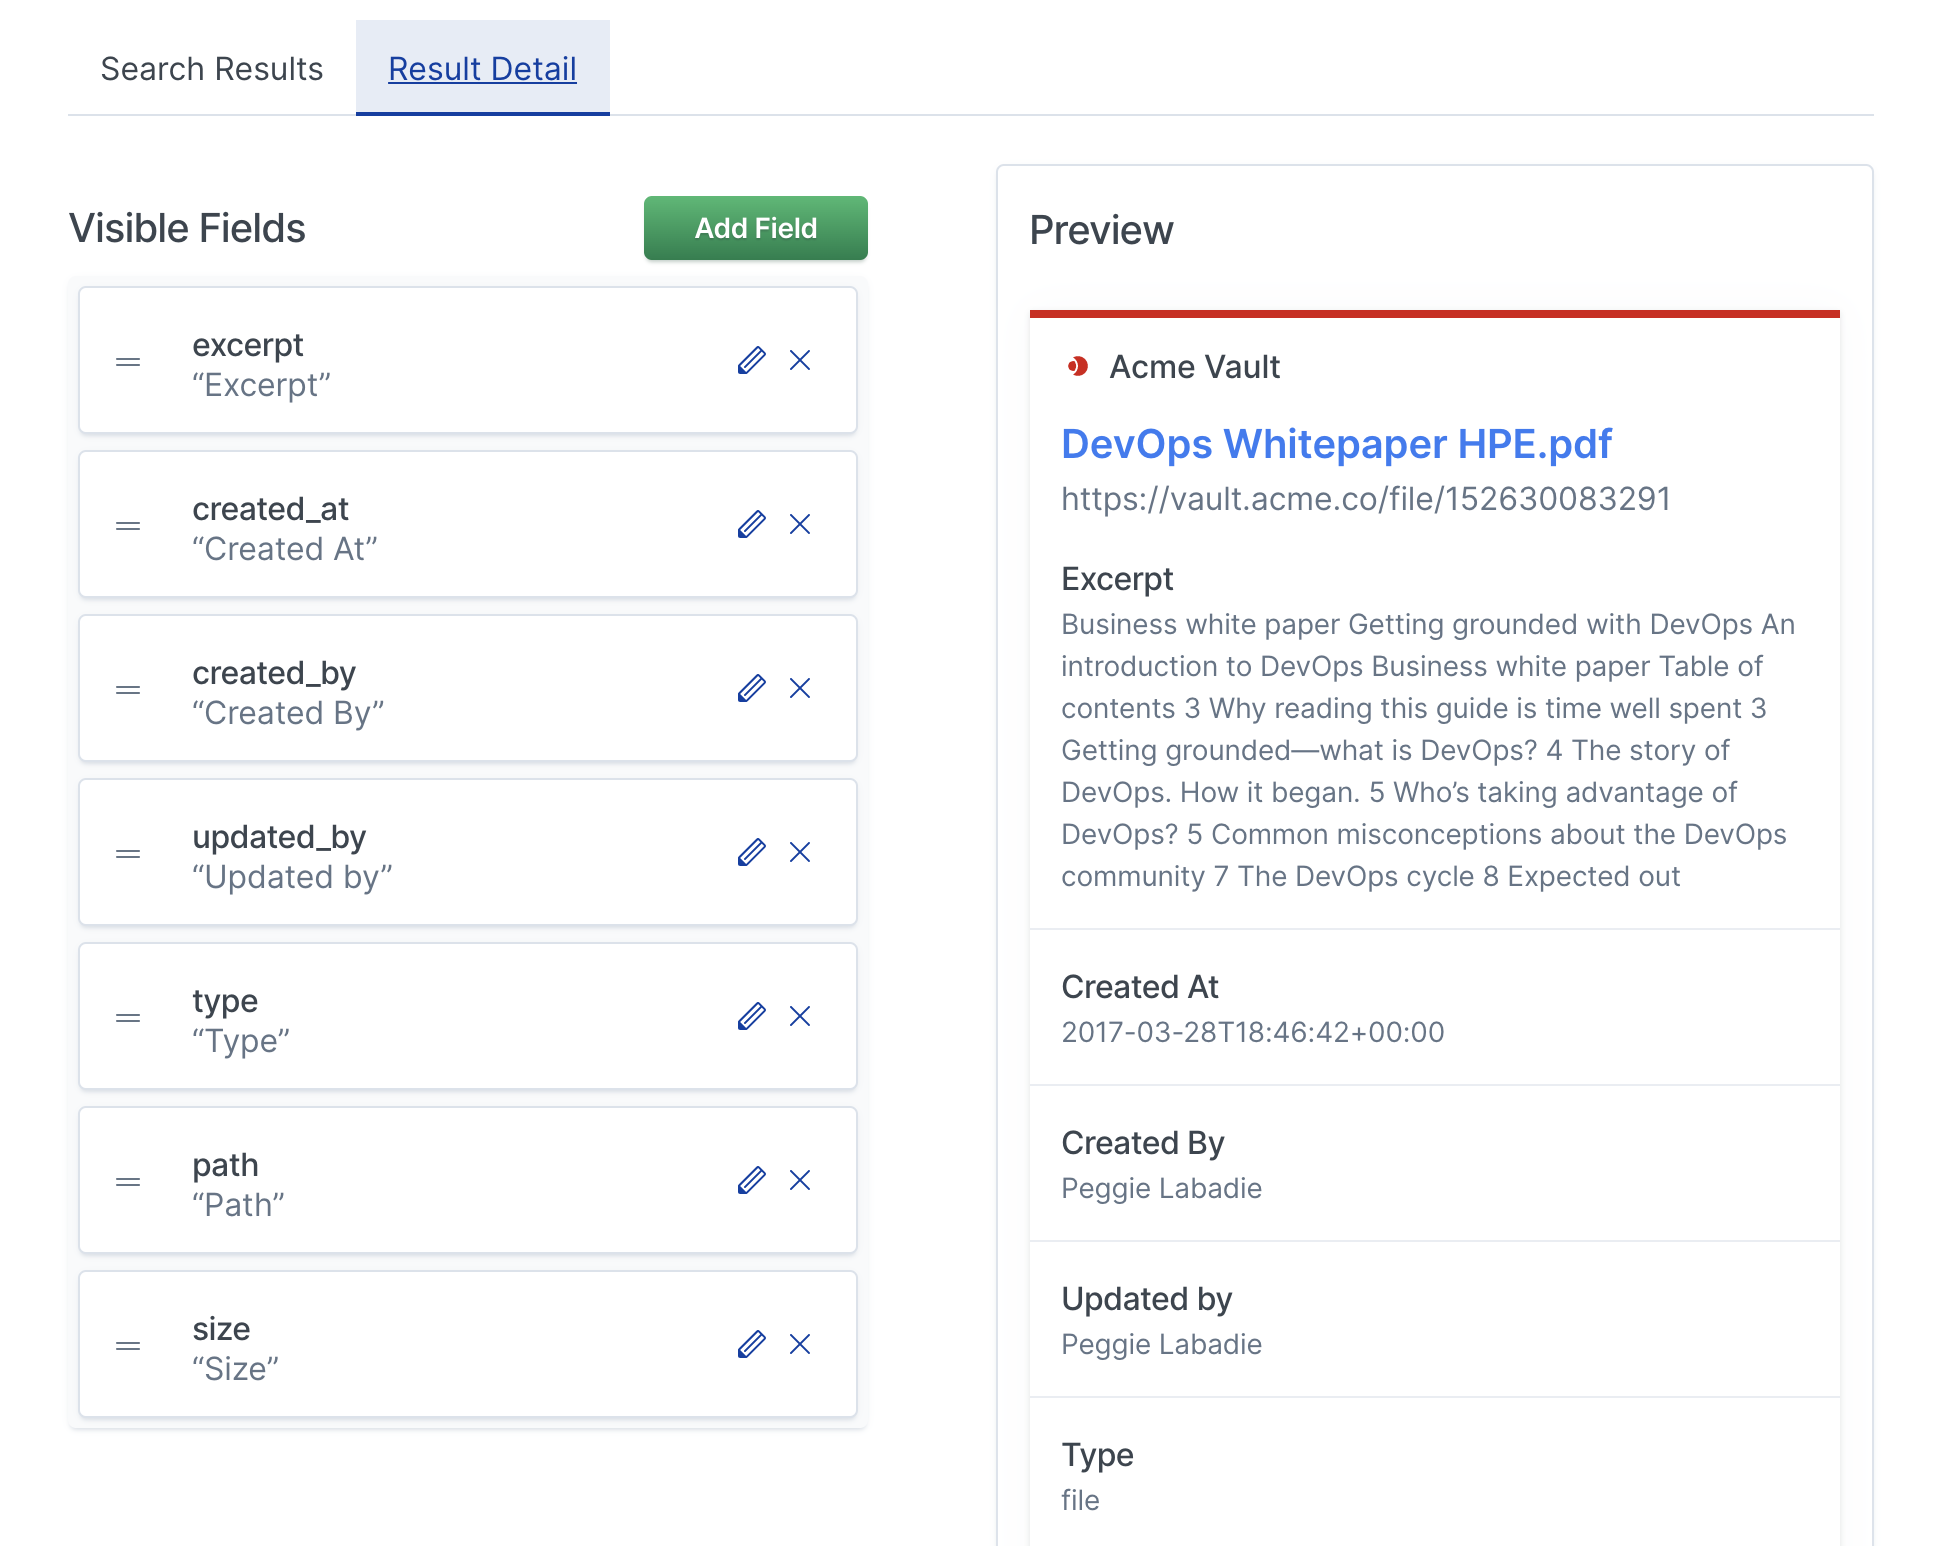
editDisplay Settings bring your documents to life with proper information architecture and evocative color schemes. To create a search experience that’s both relevant and easy to use, Workplace Search lets you adjust the visual representation of two types of results and their details view:
Standard Result: a result as it appears on the main results page Featured Result: usually a direct match on a search term, with high precision Details View: the panel that appears upon clicking a result, which provides a quick view of the document and may provide enough information from the search experience itself
The Display Settings area gives you control over 5 main components for results:
- Title: The result’s headline
- URL: The result’s target (usually the document’s location)
- Color: The color used to identify the results across the source
- Subtitle: Optional, often used for status or type
- Description: Optional, often used to display an excerpt of the document’s content

By default, the fields will be populated in alphabetical order according to schema.
The Display Settings area also allows you to add and reorder fields to the Details view.
