Configure reporting in Kibana
editConfigure reporting in Kibana
editKibana PNG/PDF Reporting uses a custom binary of headless Chromium, and support comes with special caveats:
- The functionality requires special OS dependencies which may not be available for all distributions and configurations of Linux.
- It is subject to system resource configurations such as the limited number of file descriptors, allowed processes, and types of processes.
- Linux versions that are in end-of-life phase are not supported.
- Linux systems with SELinux or fapolicyd are not supported.
Before upgrading Kibana in a production environment, we encourage you to test your screenshotting use cases in a pre-production environment to make sure your hosts support our latest build of Chromium. For the most reliable configuration of PDF/PNG reporting features, consider installing Kibana using Docker, or using Elastic Cloud.
For security, you grant users access to the reporting features and secure the reporting endpoints with TLS/SSL encryption. Additionally, you can install graphical packages into the operating system to enable the Kibana server to have screenshotting capabilities.
- Grant users access to reporting
- Grant access with the role API
- Grant users access with a Basic license
- Grant access using an external provider
- Secure the reporting endpoints
- Install the dependencies for the headless browser
-
Set the
server.hostfor the headless browser - Ensure Elasticsearch allows built-in templates
Grant users access to reporting
editWhen security is enabled, you grant users access to reporting features with Kibana application privileges, which allow you to create custom roles that control the spaces and applications where users generate reports.
-
Enable application privileges in Reporting. To enable, turn off the default user access control features in
kibana.yml:xpack.reporting.roles.enabled: false
If you use the default settings, you can still create a custom role that grants reporting privileges. The default role is
reporting_user. This behavior is being deprecated and does not allow application-level access controls for reporting features, and does not allow API keys or authentication tokens to authorize report generation. Refer to reporting security settings for information and caveats about the deprecated access control features. -
Create the reporting role.
- Go to the Roles management page using the navigation menu or the global search field.
- Click Create role.
-
Specify the role settings.
-
Enter the Role name. For example,
custom_reporting_user. -
Specify the Indices and Privileges.
Access to data is an index-level privilege. For each index that contains the data you want to include in reports, add a line, then give each index
readandview_index_metadataprivileges.If you use index aliases, you must also grant
readandview_index_metadataprivileges to underlying indices to generate CSV reports.For more information, refer to Security privileges.
-
Enter the Role name. For example,
-
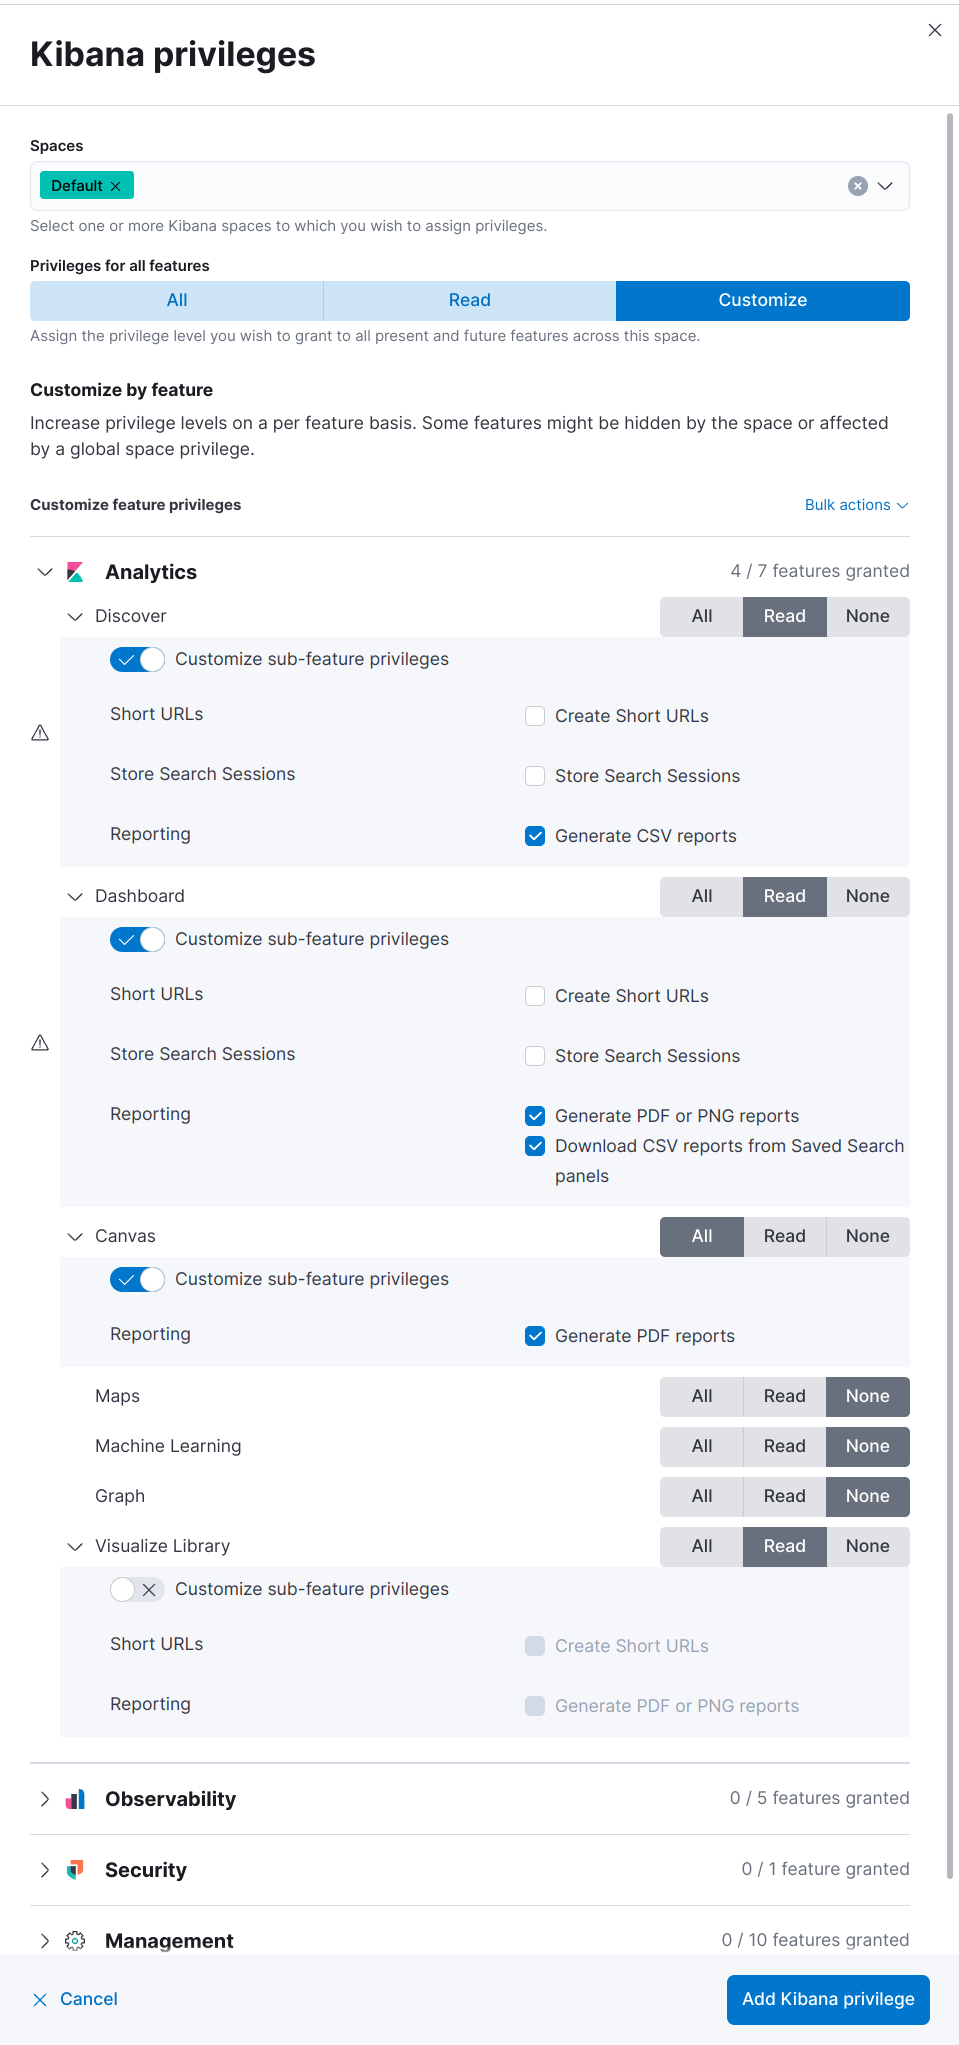
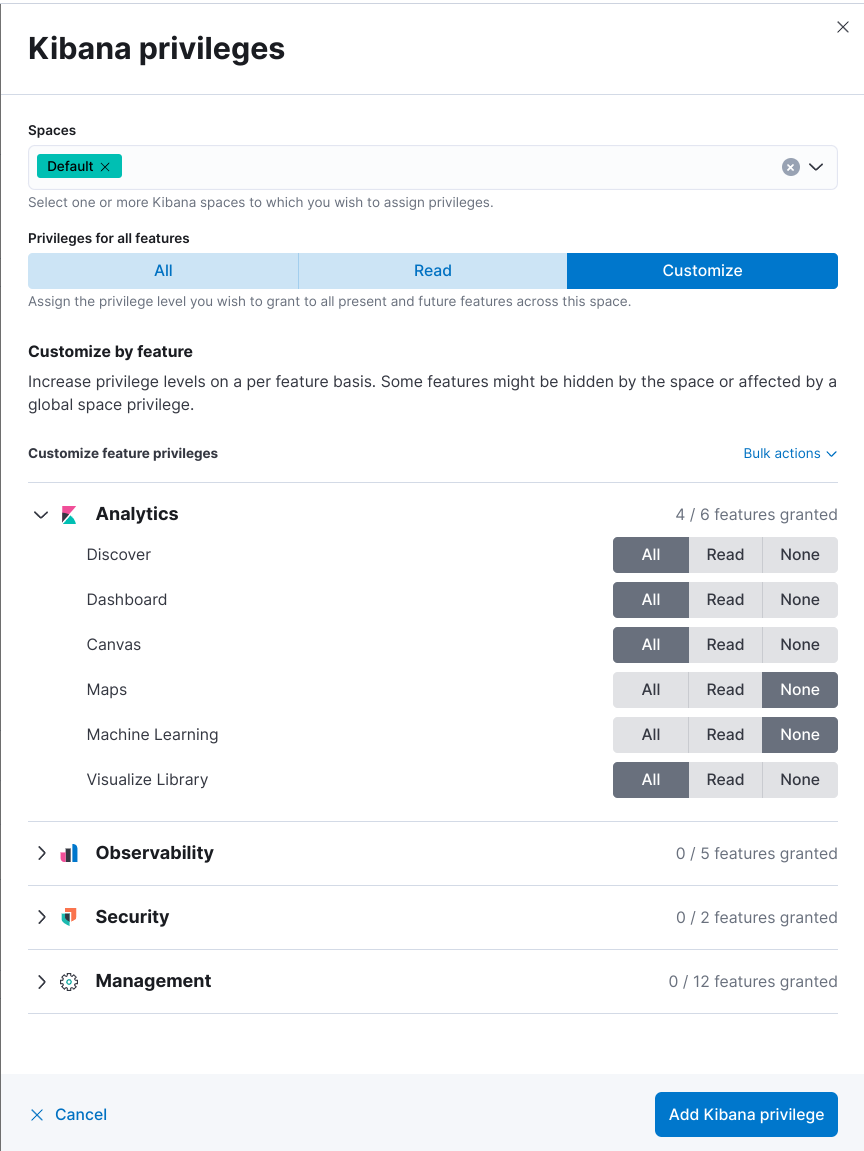
Add the Kibana privileges.
- Click Add Kibana privilege.
- Select one or more Spaces.
- Click Customize, then click Analytics.
-
For each application, select All, or to customize the privileges, select Read and Customize sub-feature privileges.
If you have a Basic license, sub-feature privileges are unavailable. For details, check out Grant users access with a Basic license.

If the Reporting options for application features are unavailable, and the cluster license is higher than Basic, contact your administrator, or check that
xpack.reporting.roles.enabledis set tofalsein kibana.yml. - Click Add Kibana privilege.
- Click Create role.
-
Assign the reporting role to a user.
- Go to the Users management page using the navigation menu or the global search field.
- Select the user you want to assign the reporting role to.
- From the Roles dropdown, select custom_reporting_user.
- Click Update user.
Granting the privilege to generate reports also grants the user the privilege to view their reports in Stack Management > Reporting. Users can only access their own reports.
Grant access with the role API
editWith Kibana application privileges enabled in Reporting, you can also use the role APIs to grant access to the reporting features, using All privileges, or sub-feature privileges.
This API request needs to be run against the Kibana API endpoint.
PUT <kibana host>:<port>/api/security/role/custom_reporting_user
{
	"elasticsearch": {
		"cluster": [],
		"indices": [],
		"run_as": []
	},
	"kibana": [{
		"spaces": ["*"],
		"base": [],
		"feature": {
			"dashboard": ["generate_report",
      "download_csv_report"],
      "discover": ["generate_report"],
			"canvas": ["generate_report"],
			"visualize": ["generate_report"]
		}
	}]
}
|
Grants access to generate PNG and PDF reports in Dashboard. |
|
|
Grants access to generate CSV reports from saved search panels in Dashboard. |
|
|
Grants access to generate CSV reports from saved searches in Discover. |
|
|
Grants access to generate PDF reports in Canvas. |
|
|
Grants access to generate PNG and PDF reports in Visualize Library. |
Grant users access with a Basic license
editWith a Basic license, you can grant users access with custom roles to reporting features with Kibana application privileges. However, with a Basic license, sub-feature privileges are unavailable. Create a role, then select All privileges for the applications where users can create reports.

With a Basic license, sub-feature application privileges are unavailable, but you can use the role API to grant access to CSV reporting features:
PUT localhost:5601/api/security/role/custom_reporting_user
{
  "elasticsearch": { "cluster": [], "indices": [], "run_as": [] },
  "kibana": [
    {
      "base": [],
      "feature": {
        "dashboard": [ "all" ],
        "discover": [ "all" ],
      },
      "spaces": [ "*" ]
    }
  ],
  "metadata": {} // optional
}
|
Grants access to generate CSV reports from saved searches in Discover. |
|
|
Grants access to generate CSV reports from saved search panels in Dashboard. |
Grant access using an external provider
editIf you are using an external identity provider, such as LDAP or Active Directory, you can assign roles to individual users or groups of users. Role mappings are configured in config/role_mapping.yml.
For example, assign the kibana_admin and reporting_user roles to the Bill Murray user:
kibana_admin:
  - "cn=Bill Murray,dc=example,dc=com"
reporting_user:
  - "cn=Bill Murray,dc=example,dc=com"
Secure the reporting endpoints
editTo automatically generate reports with Watcher, you must configure Watcher to trust the Kibana server certificate.
- Enable Elastic Stack security features on your Elasticsearch cluster. For more information, see Getting started with security.
- Configure TLS/SSL encryption for the Kibana server. For more information, see Encrypt TLS communications in Kibana.
-
Specify the Kibana server CA certificate chain in
elasticsearch.yml:If you are using your own CA to sign the Kibana server certificate, then you need to specify the CA certificate chain in Elasticsearch to properly establish trust in TLS connections between Watcher and Kibana. If your CA certificate chain is contained in a PKCS #12 trust store, specify it like so:
xpack.http.ssl.truststore.path: "/path/to/your/truststore.p12"
xpack.http.ssl.truststore.type: "PKCS12"
xpack.http.ssl.truststore.password: "optional decryption password"
Otherwise, if your CA certificate chain is in PEM format, specify it like so:
xpack.http.ssl.certificate_authorities: ["/path/to/your/cacert1.pem", "/path/to/your/cacert2.pem"]
For more information, see the Watcher HTTP TLS/SSL Settings.
-
Add one or more users who have access to the reporting features.
Once you’ve enabled SSL for Kibana, all requests to the reporting endpoints must include valid credentials.
For more information on sharing reports, direct links, and more, refer to Reporting and sharing.
Install the dependencies for the headless browser
editIf using PNG/PDF reporting features, make sure the Kibana server operating system has the appropriate packages installed for the distribution.
If you are using RHEL operating systems, install the following packages:
-
xorg-x11-fonts-100dpi -
xorg-x11-fonts-75dpi -
xorg-x11-utils -
xorg-x11-fonts-cyrillic -
xorg-x11-fonts-Type1 -
xorg-x11-fonts-misc -
vlgothic-fonts -
fontconfig -
freetype
If you are using Ubuntu/Debian systems, install the following packages:
-
fonts-liberation -
libfontconfig1 -
libnss3
The screenshotting plugin used for {reporting-features} has a built-in utility to check for common issues, such as missing dependencies. See Reporting diagnostics for more information.
Set the server.host for the headless browser
editIf using PNG/PDF reporting features in a production environment, it is preferred to use the setting of
server.host: 0.0.0.0 in the kibana.yml configuration file. This allows the headless browser used for
PDF/PNG reporting to reach Kibana over a local interface, while also allowing the Kibana server to listen on
outward-facing network interfaces, as it makes the Kibana server accessible from any network interface on the
machine. Make sure that no firewall rules or other routing rules prevent local services from accessing this
address.
Ensure Elasticsearch allows built-in templates
editReporting relies on Elasticsearch to install a mapping template for the data stream that stores reports. Ensure that Elasticsearch allows built-in
templates to be installed by keeping the stack.templates.enabled setting at the default value of true. For more information, see
Index management settings.