Elasticsearch has native integrations with the industry-leading Gen AI tools and providers. Check out our webinars on going Beyond RAG Basics, or building prod-ready apps with the Elastic vector database.
To build the best search solutions for your use case, start a free cloud trial or try Elastic on your local machine now.
Have an idea for an AI agent? It probably involves doing something with data because if an agent is going to initiate a useful action, it needs to make a decision, and it needs the right data to make the right decision.
Elastic Agent Builder makes it easy to build data-connected AI agents. We’ll show you how in this blog post. Let’s walk through all the steps required to create an Agent with an MCP tool that accesses data stored in Elastic. Then we'll use the Strands Agents SDK and its Agent2Agent (A2A) capabilities to operate the agent. The Strands Agents SDK is a multi-agent AI development platform that you can use to build agentic apps with just enough code to ensure you get the outcome that you want.
Let's build an AI agent that plays the game of RPS+, which is a take on the classic game of Rock Paper Scissors with an added twist; it gives the game players a couple of extra choices.
Prerequisites
Here’s what’s required to follow along with the steps in this blog post:
- A text editor running on your local computer
- Visual Studio Code is what we’ll be using for the example instructions in this blog post
- Python 3.10 or greater running on your local computer
Create a Serverless Project
The first thing we need is an Elasticsearch Serverless project, which includes Elastic Agent Builder.
Go to cloud.elastic.co and create a new Elasticsearch Serverless project.
Create an index and add data
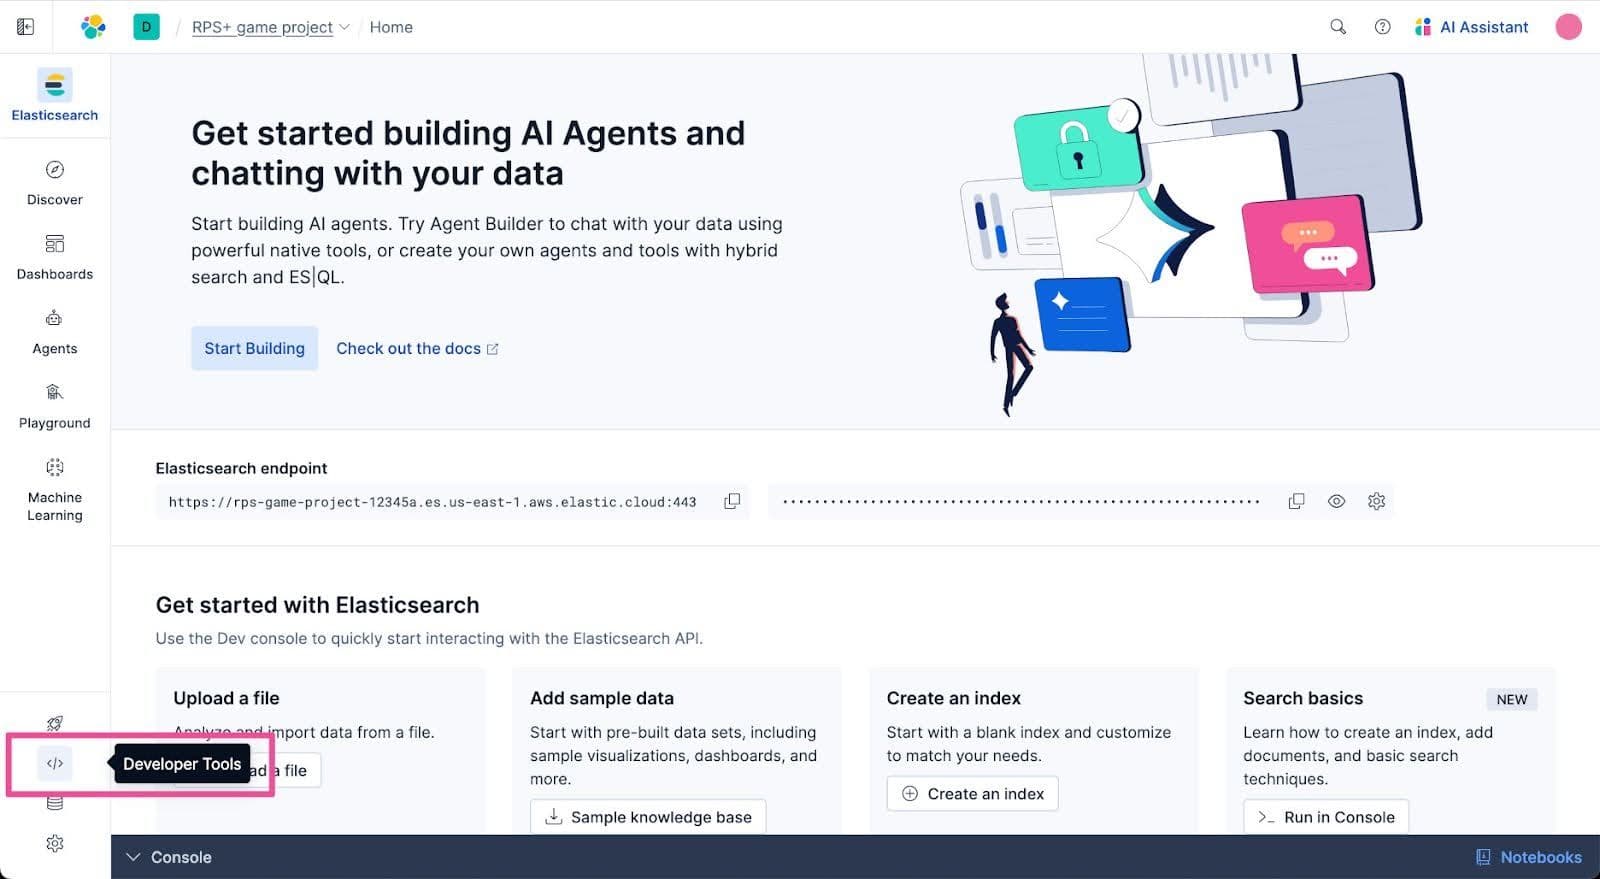
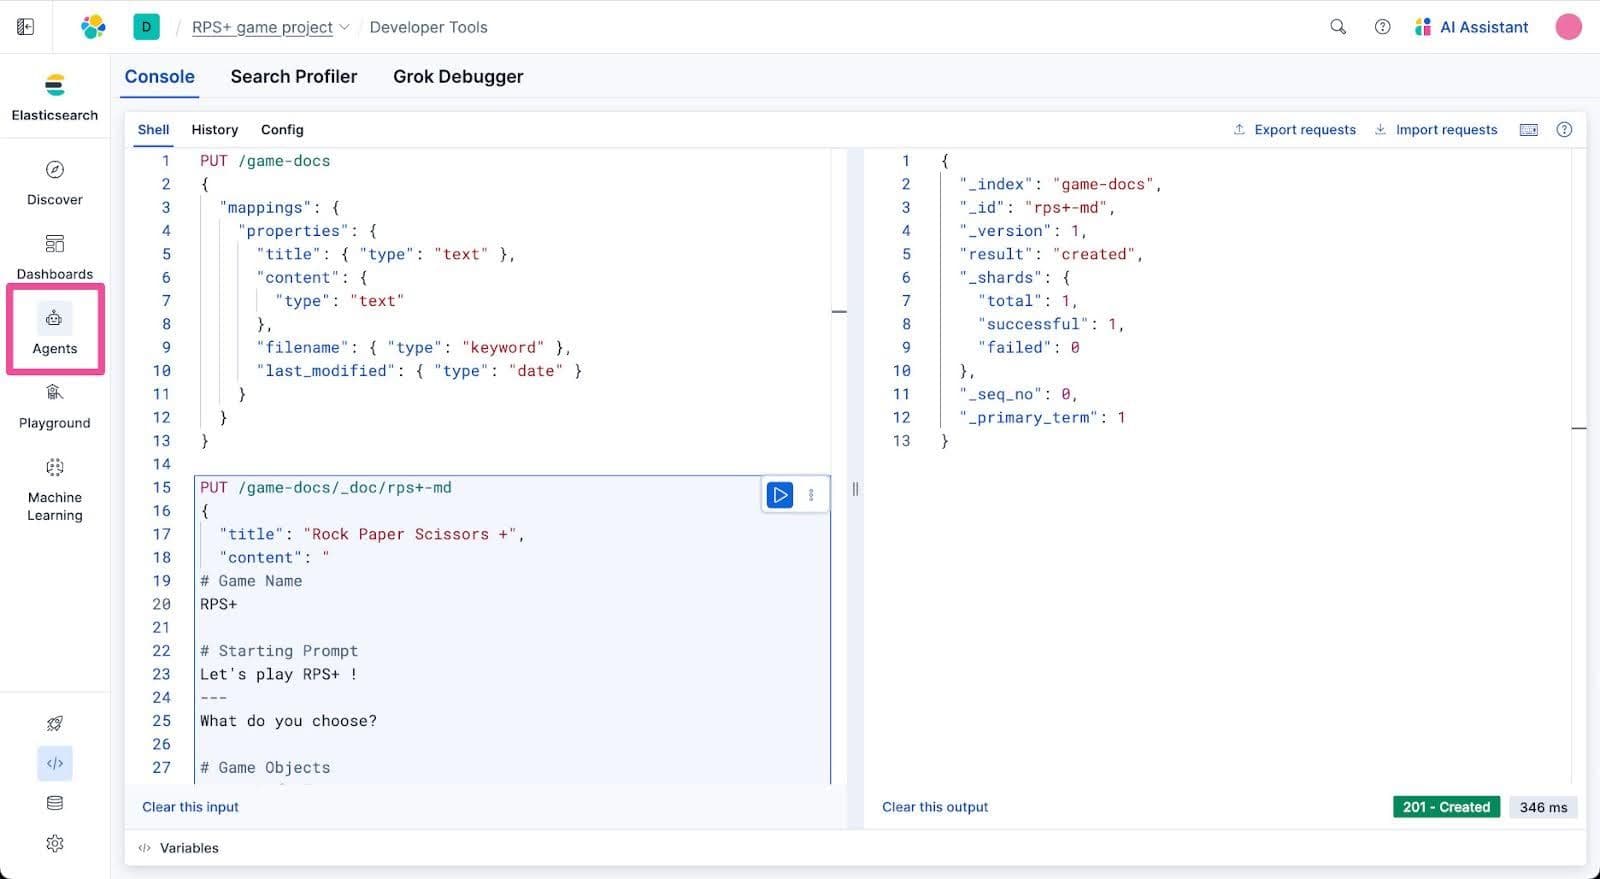
Next, we’re going to add some data to our Elasticsearch project. Open Developer Tools, where we can run commands to create a new index and insert some data into it. Select Developer Tools from the top-level navigation menu.
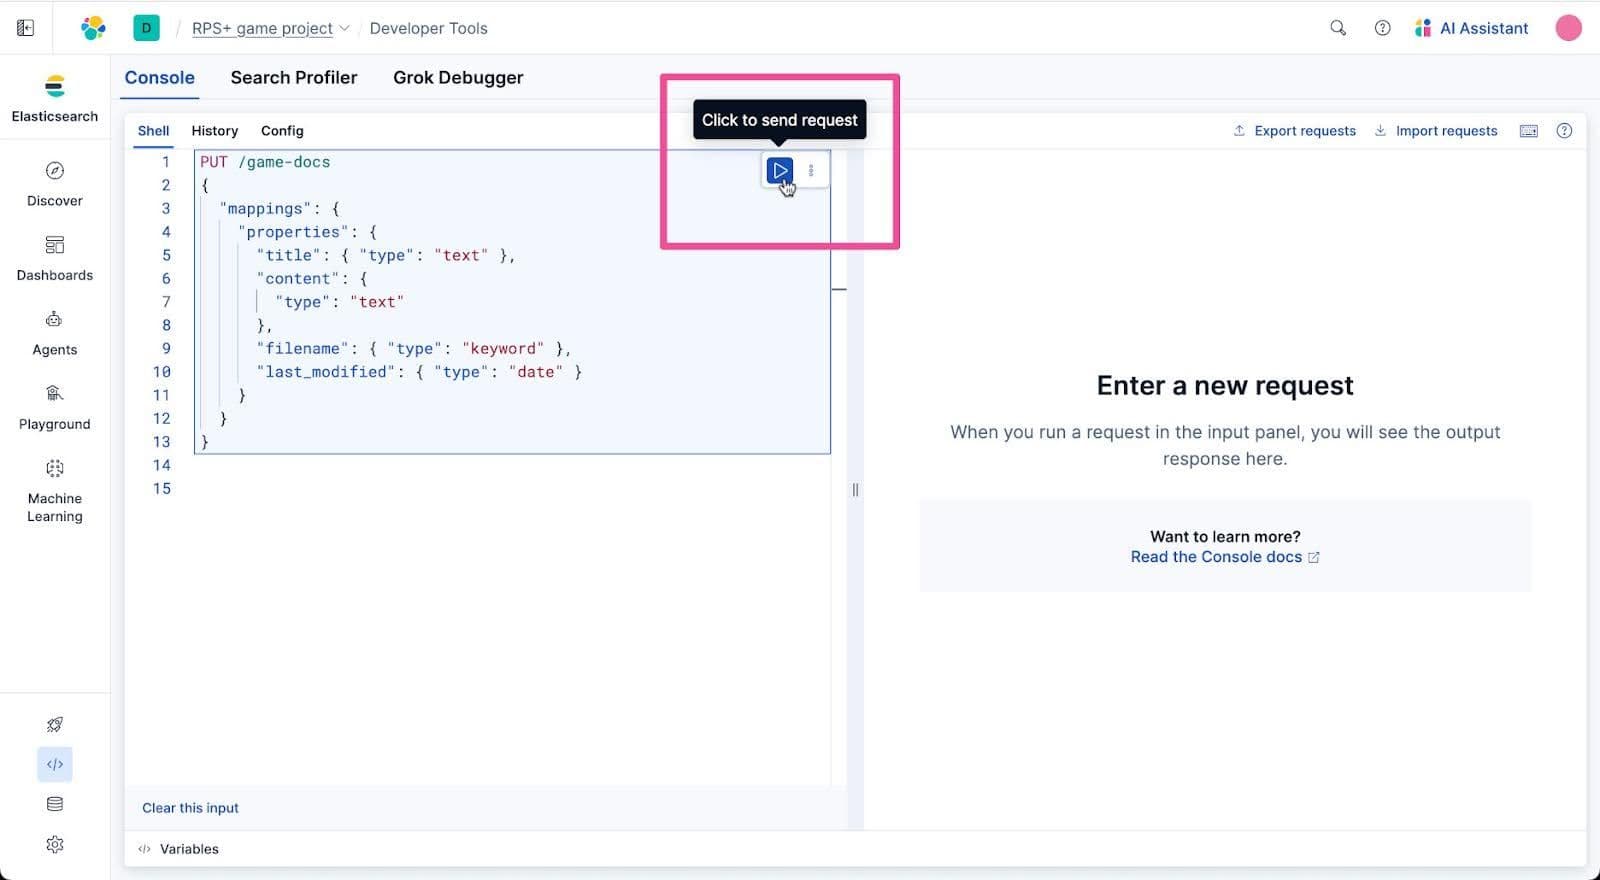
Copy and paste the following PUT command into the request input area of the Developer Tools console. This statement creates an Elasticsearch index named “game-docs”.
Click the Send request button that appears on the right-hand side of the statement in Developer Tools. You should see a notification confirming that the game-docs index was created in the response area of Developer Tools.
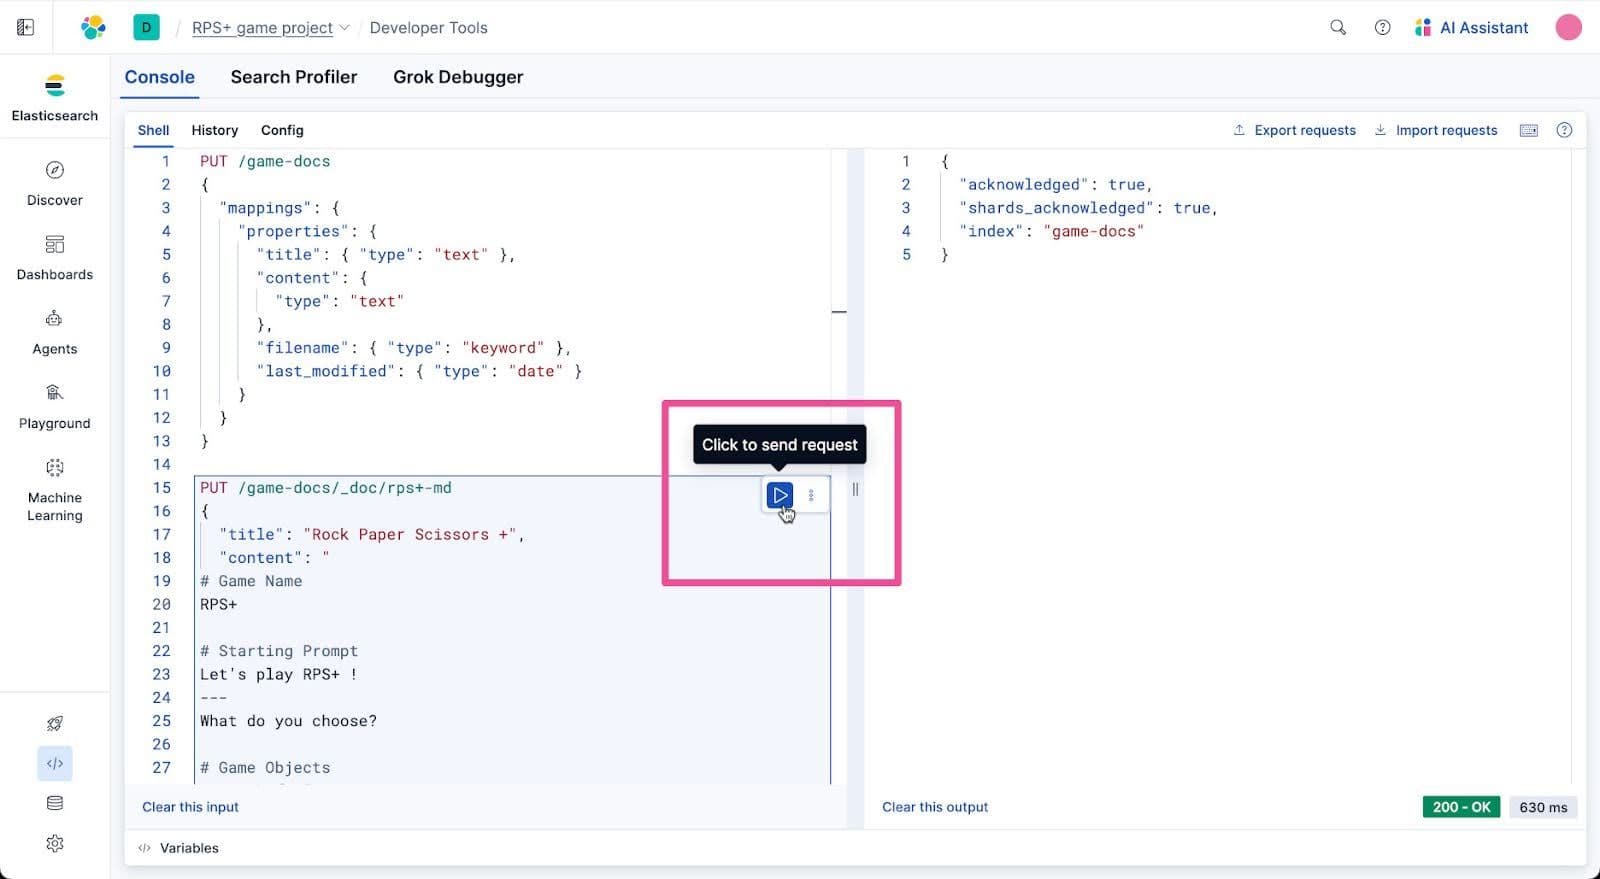
An index named game-docs is a great place to store the data for the game we’re making. Let’s put a document named rps+-md into this index that contains all the data our game requires. Copy and paste the following PUT command into the Developer Tools console.
Click the Send request button next to the statement to run it and add the rps+-md document to the game-docs index.
We should now have some data to query, and with Agent Builder, that’s simpler than ever.
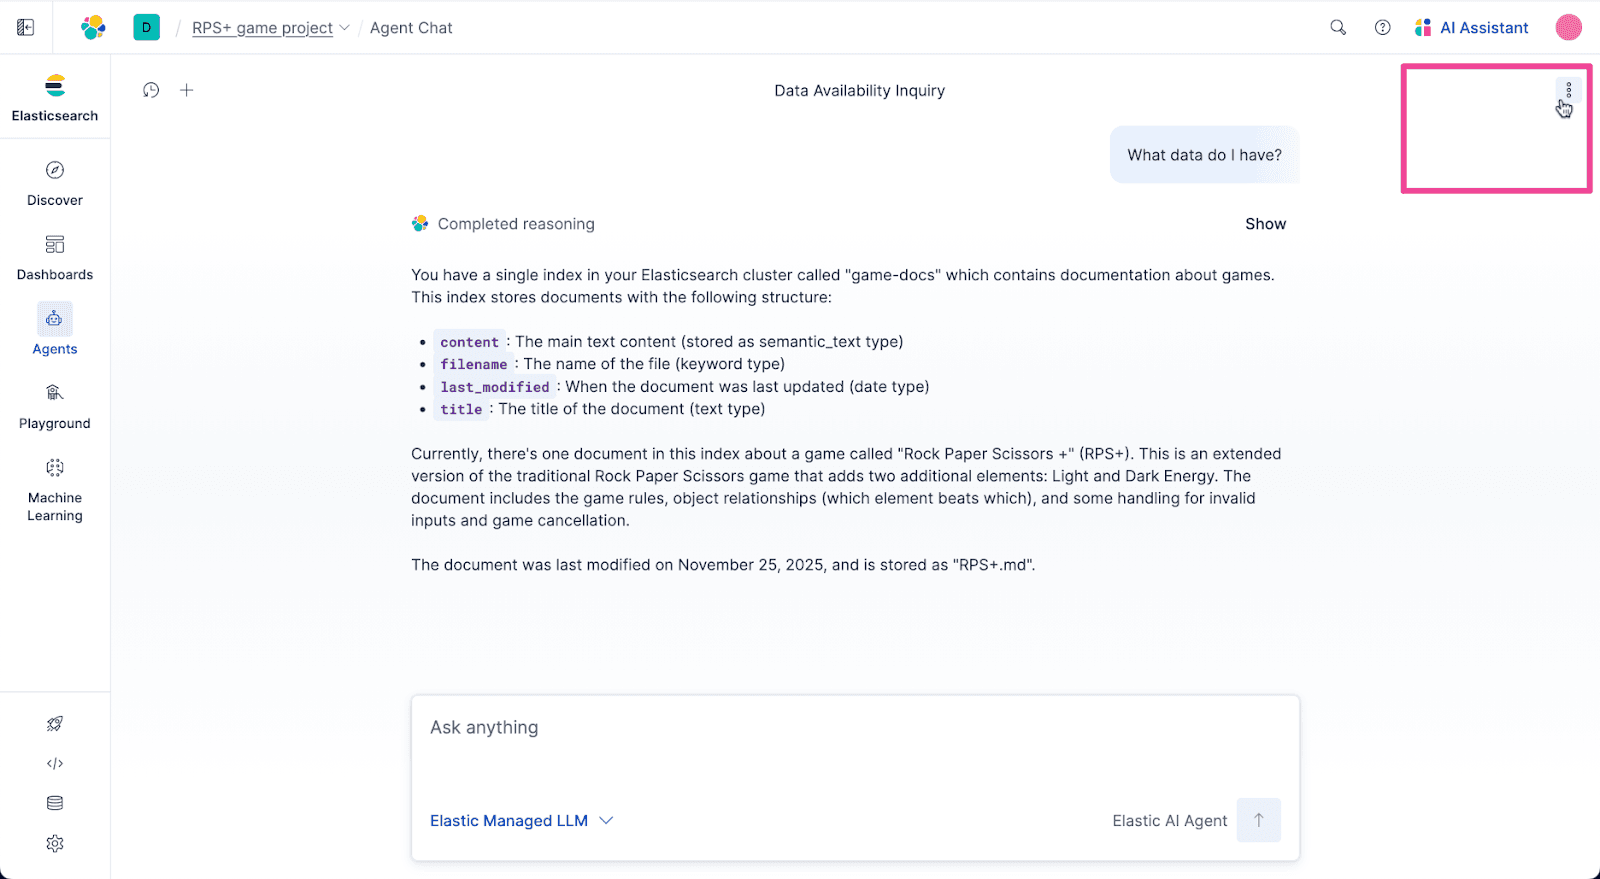
Select Agents from the top-level navigation menu.
Then all you have to do is ask the default Elastic AI Agent, “What data do I have?”
The Elastic AI Agent evaluates the data and returns a concise explanation of the data we have.
Create a tool
Okay we’ve now got some data in Elastic, let’s put it to use. Agent Builder includes built-in support for creating MCP tools that help agents access the data they need to have the right context for their task. Let’s create a simple tool that will retrieve our game data.
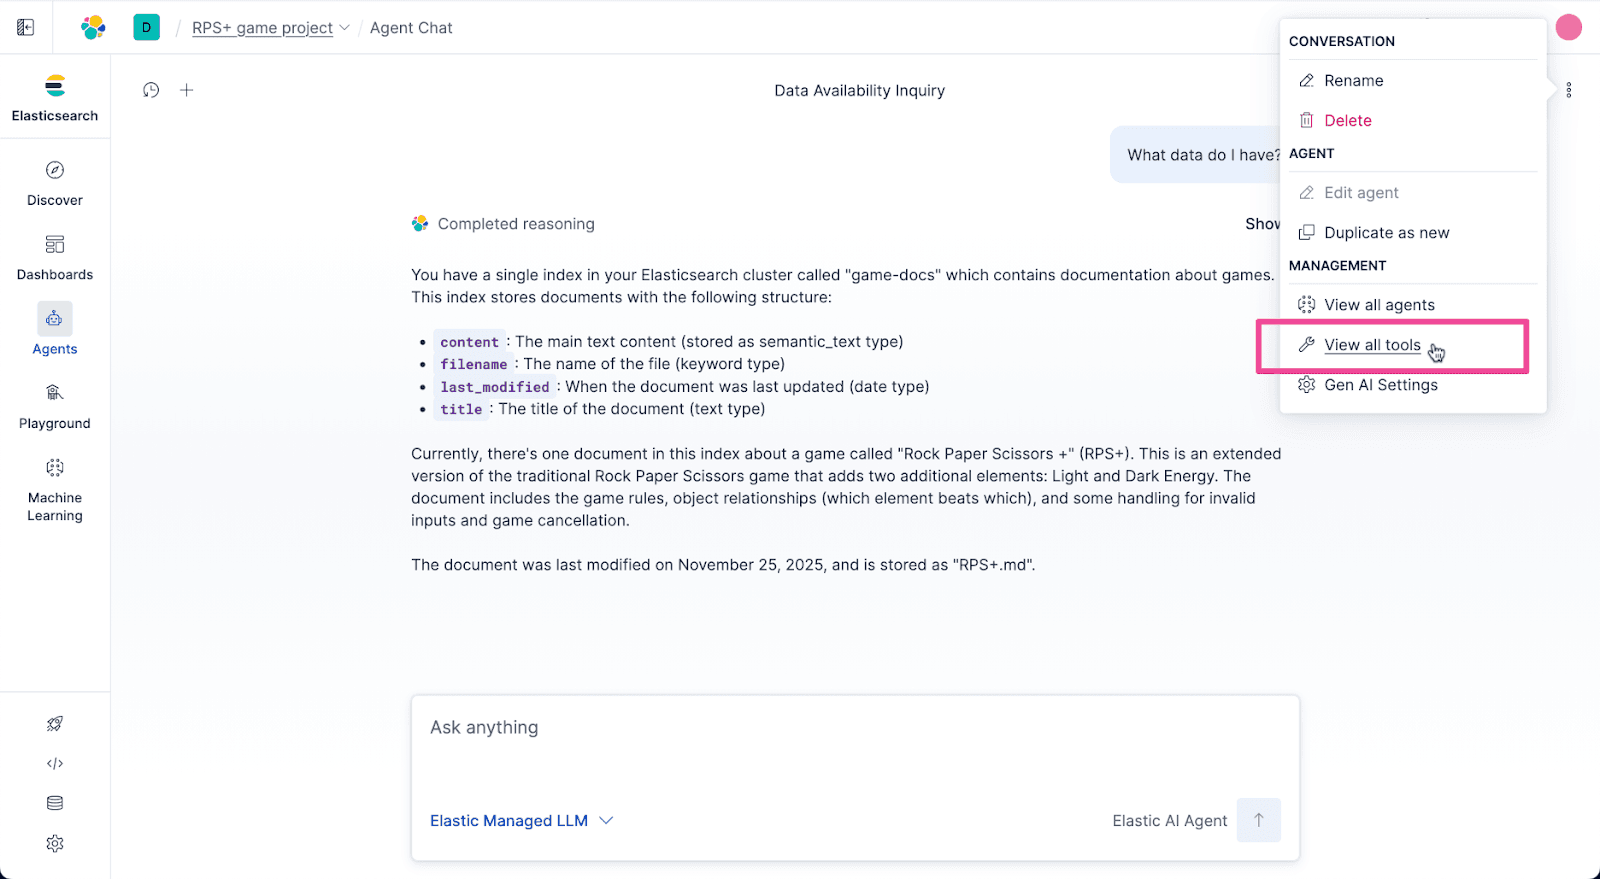
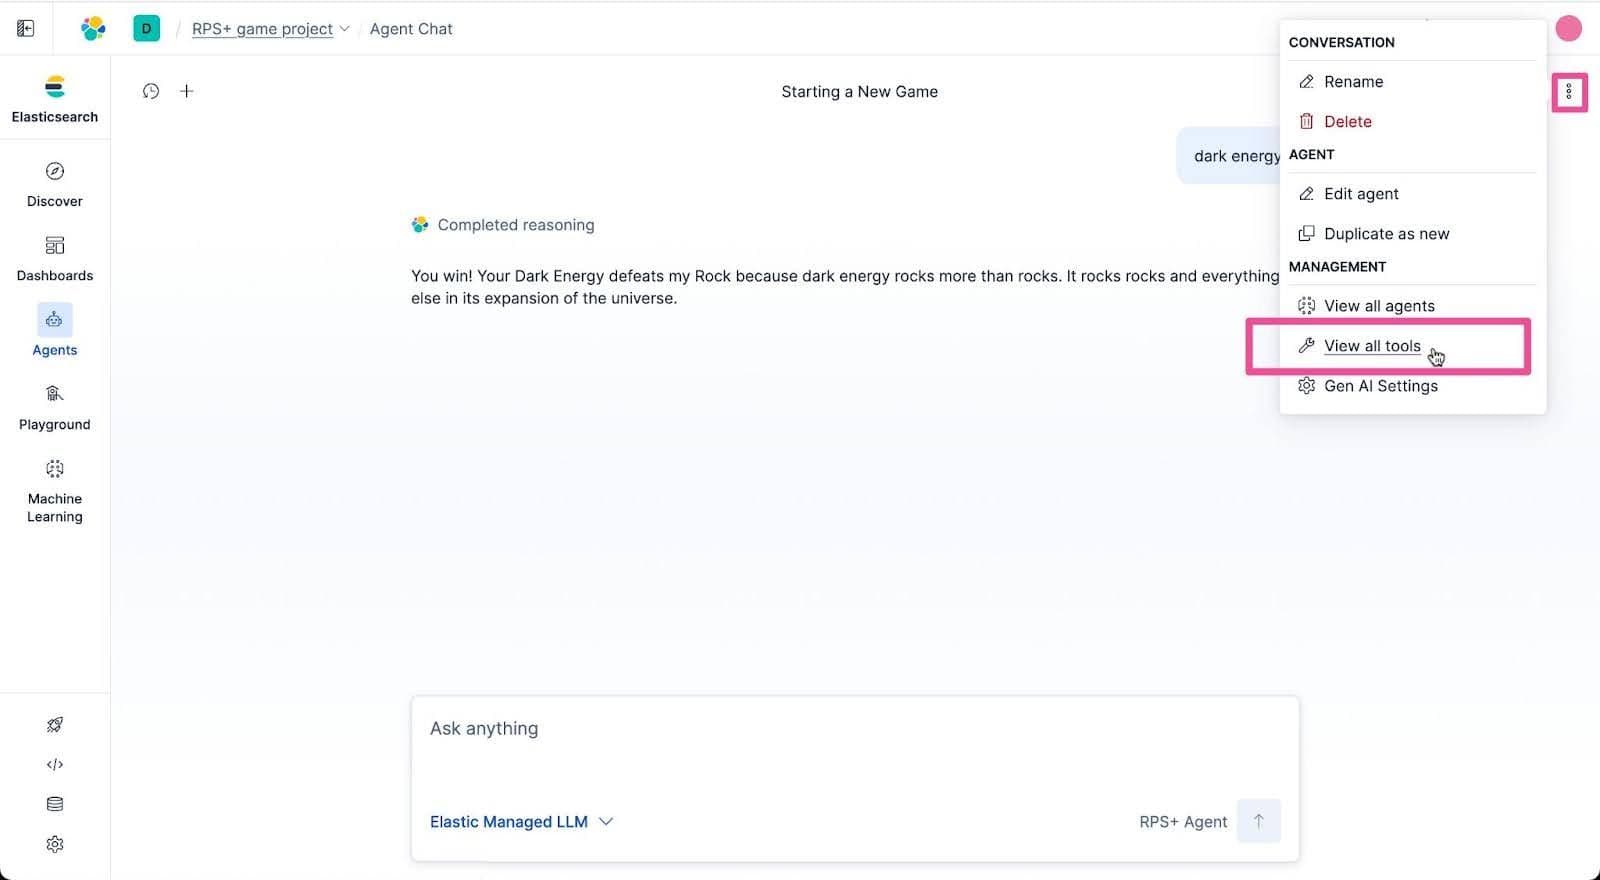
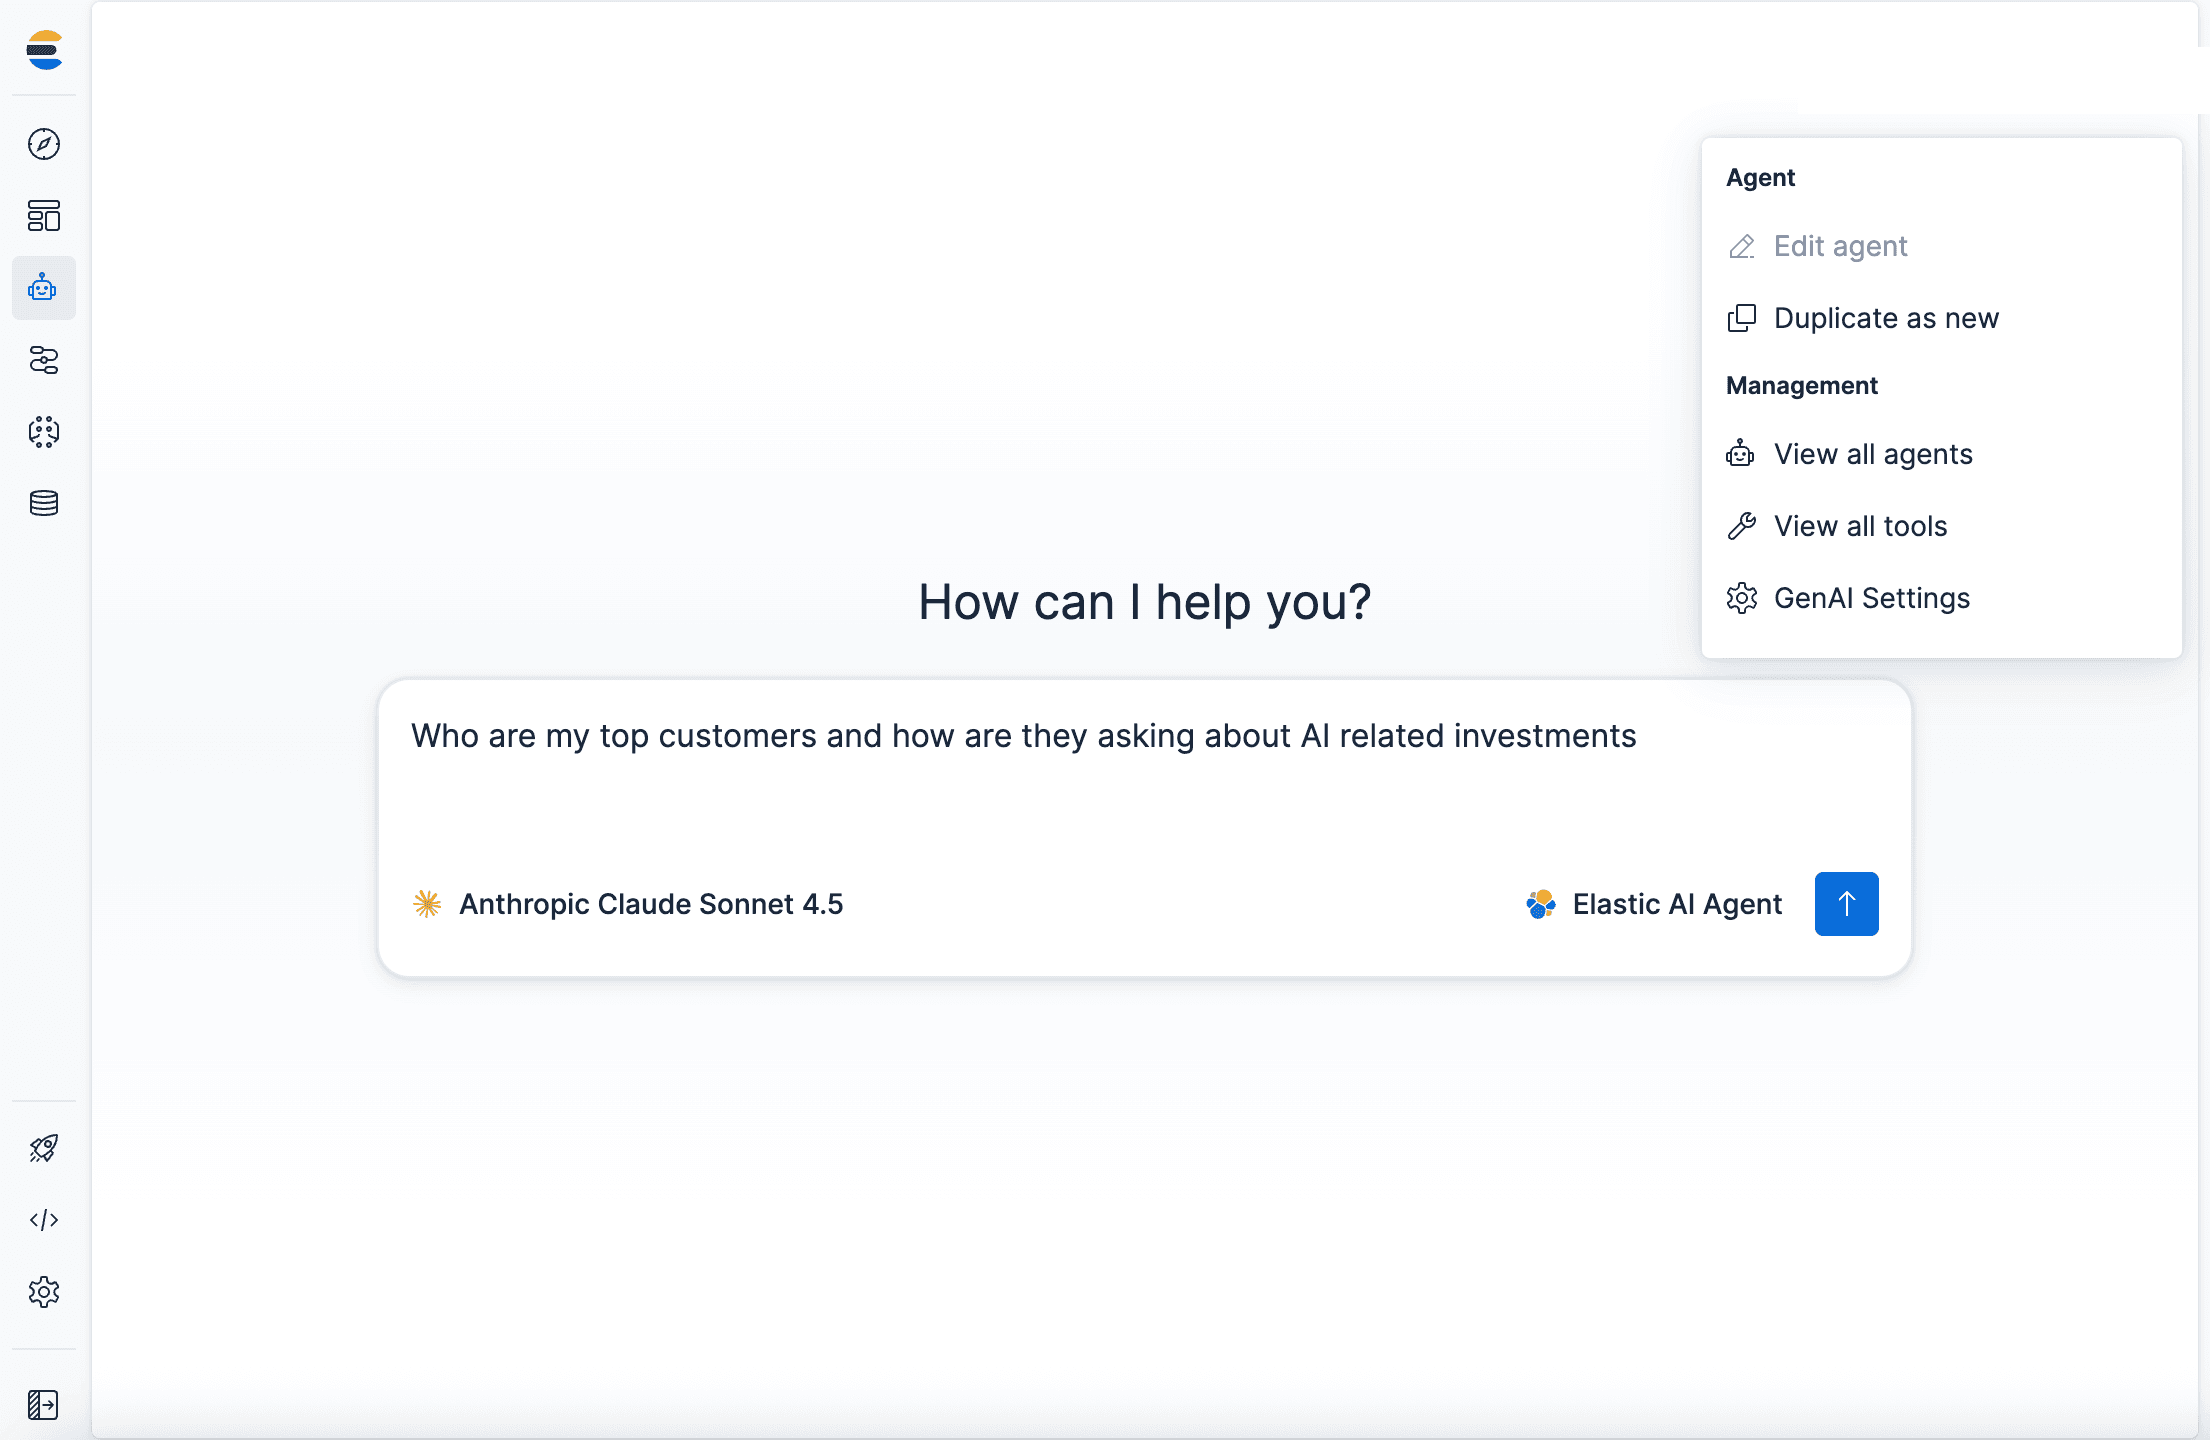
Click the Agent Builder actions menu.
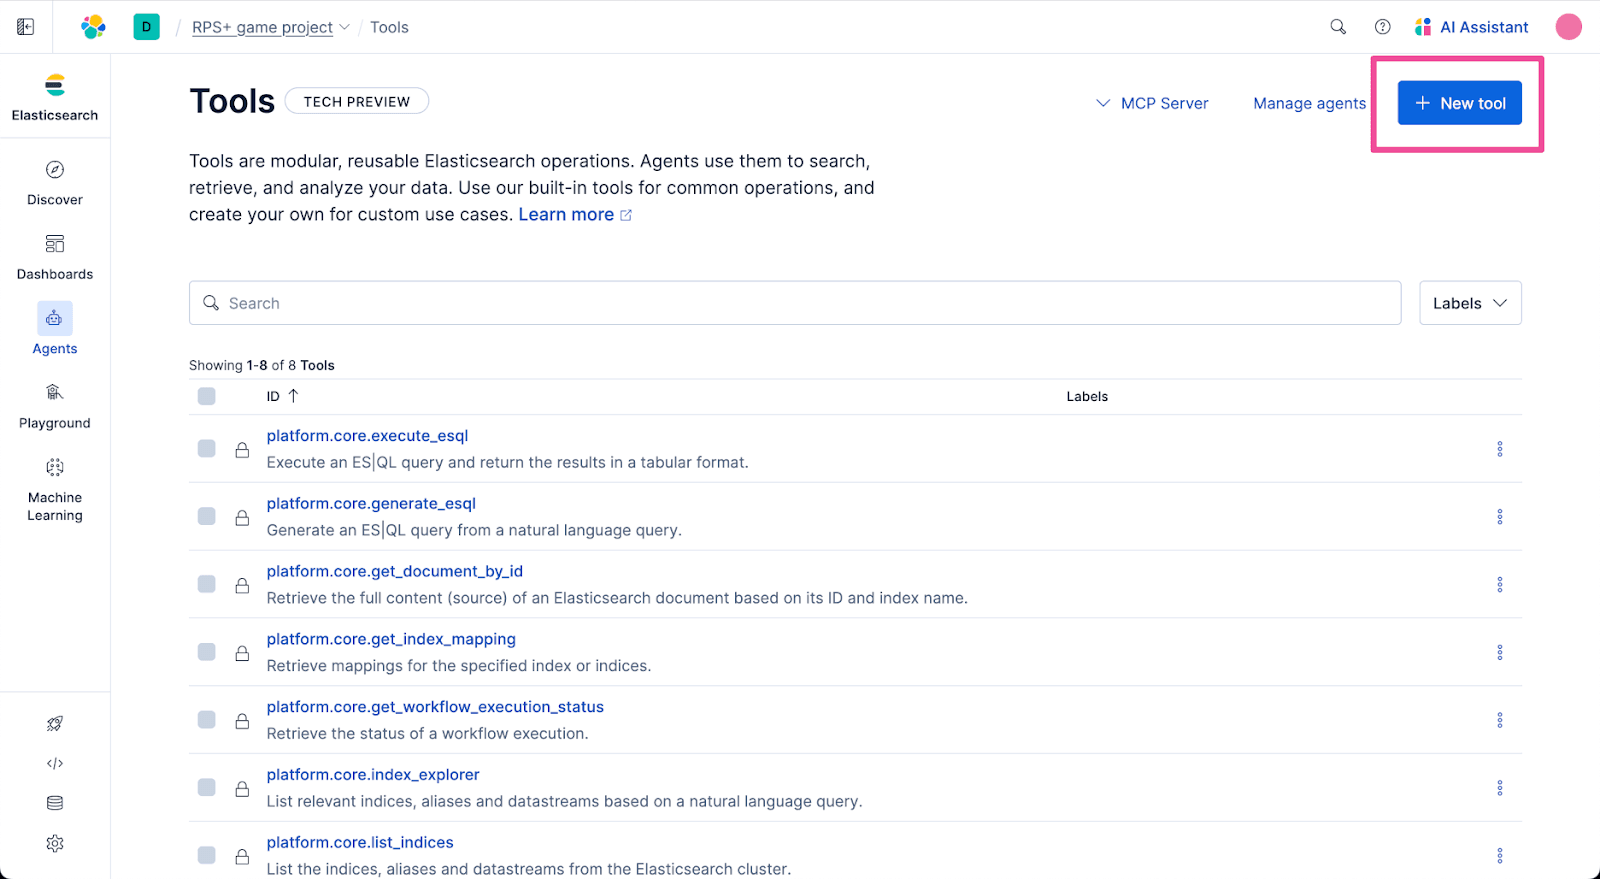
Select View all tools from the menu options.
Click + New Tool.
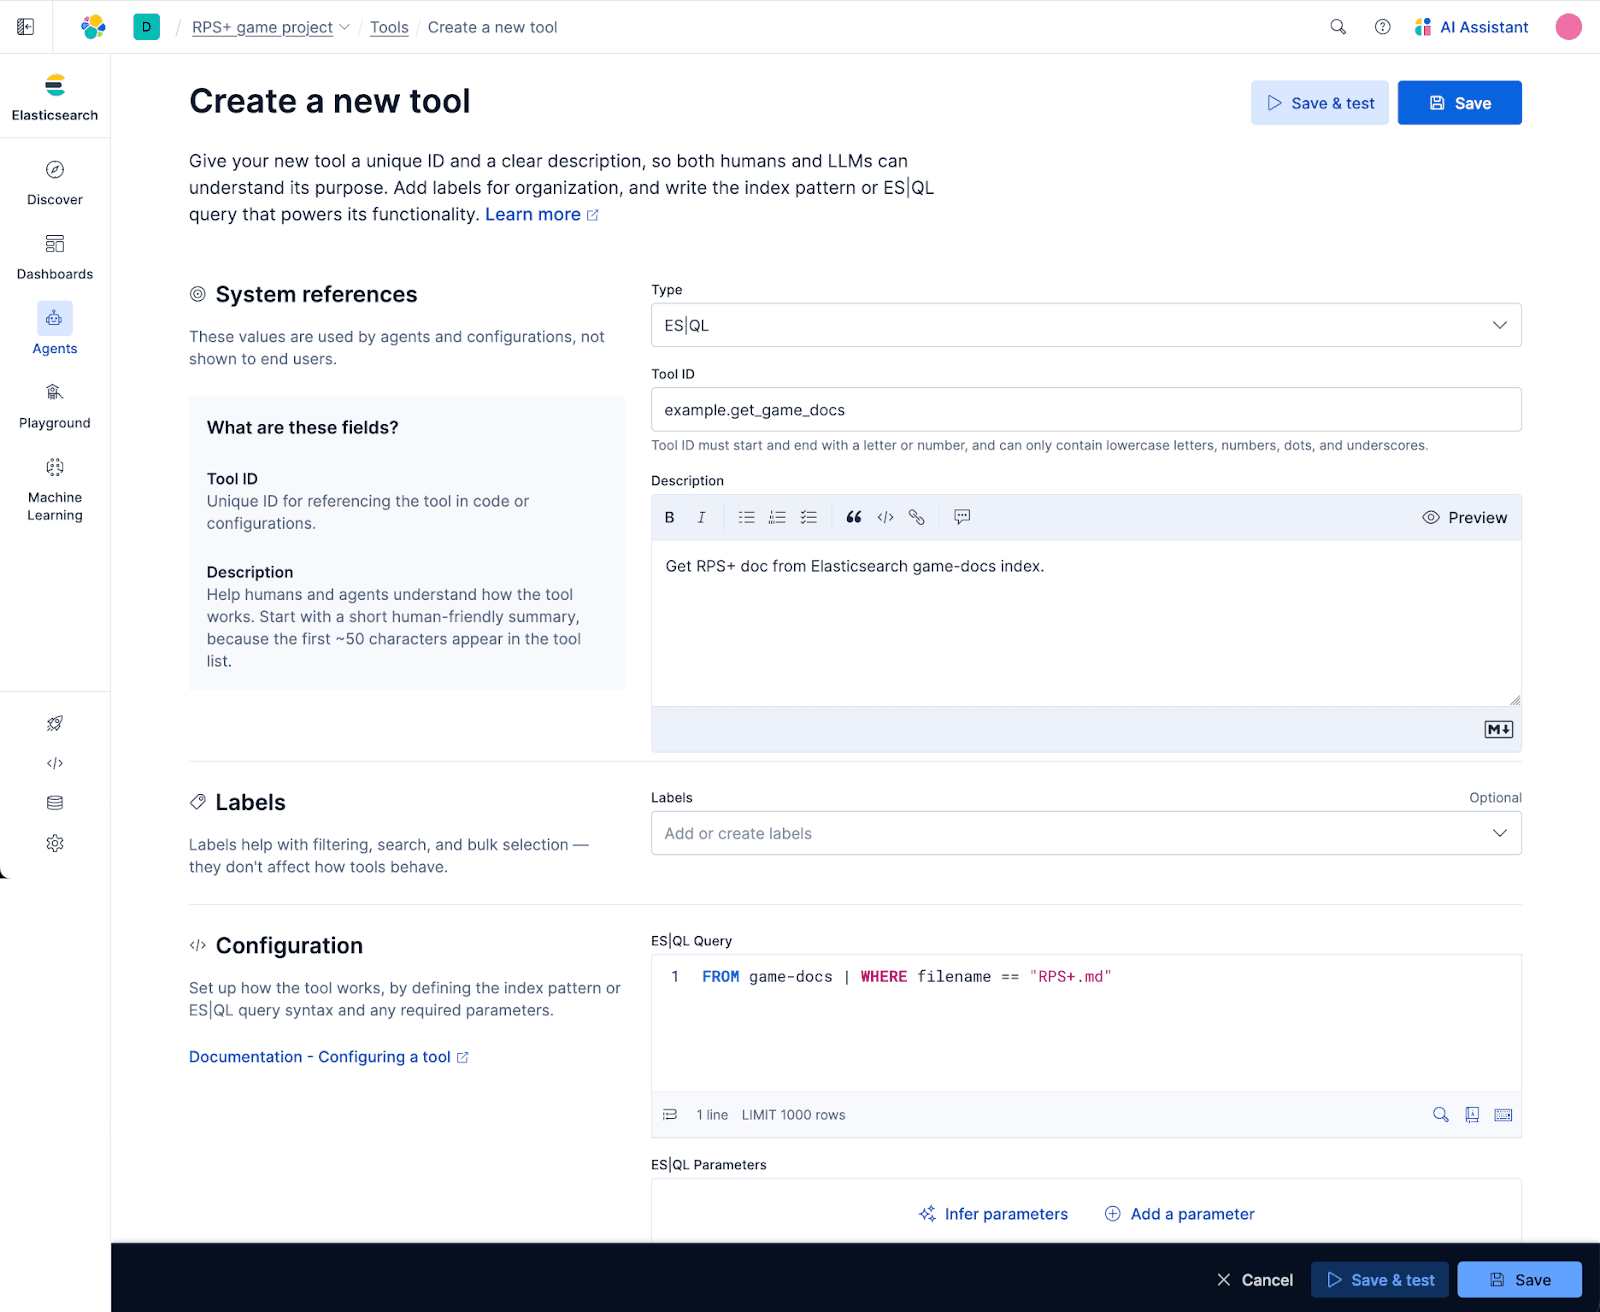
In the Create Tool form, select the ES|QL as the tool Type and enter the following values.
For Tool ID:
For Description:
For Configuration, enter the following query into the ES|QL Query text area:
Your completed Create tool form should look like this. Click Save to create the tool.
We’ve got a new tool hanging on the tool rack. Tools shouldn’t just be perpetually hanging on a rack; they should be put to a worthy use. Let’s create an agent that can use our new custom tool.
Create an Agent and assign it a tool
Creating an agent is refreshingly simple with Agent Builder. You just have to enter the agent instructions with a few details, and that’s all you need. Let’s create an agent now.
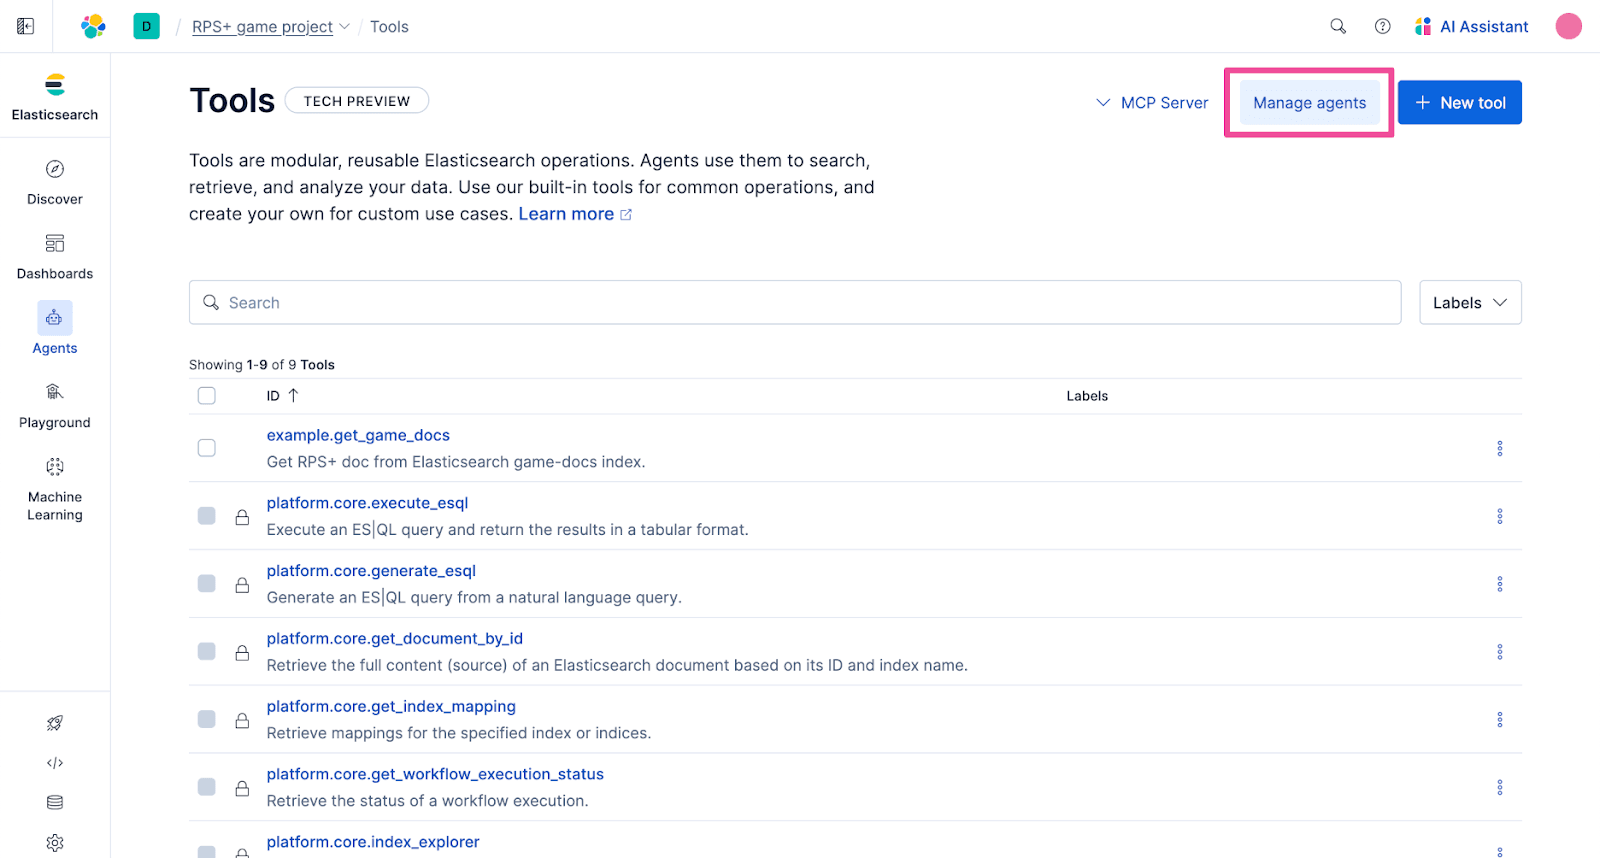
Click Manage agents.
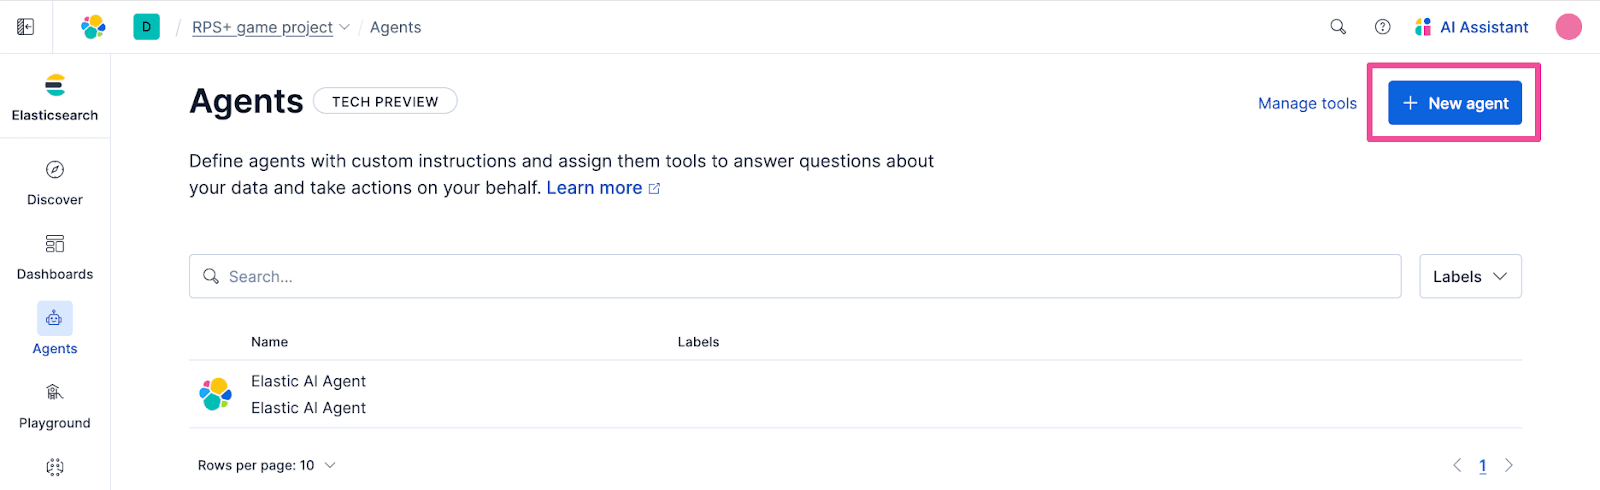
Click + New agent.
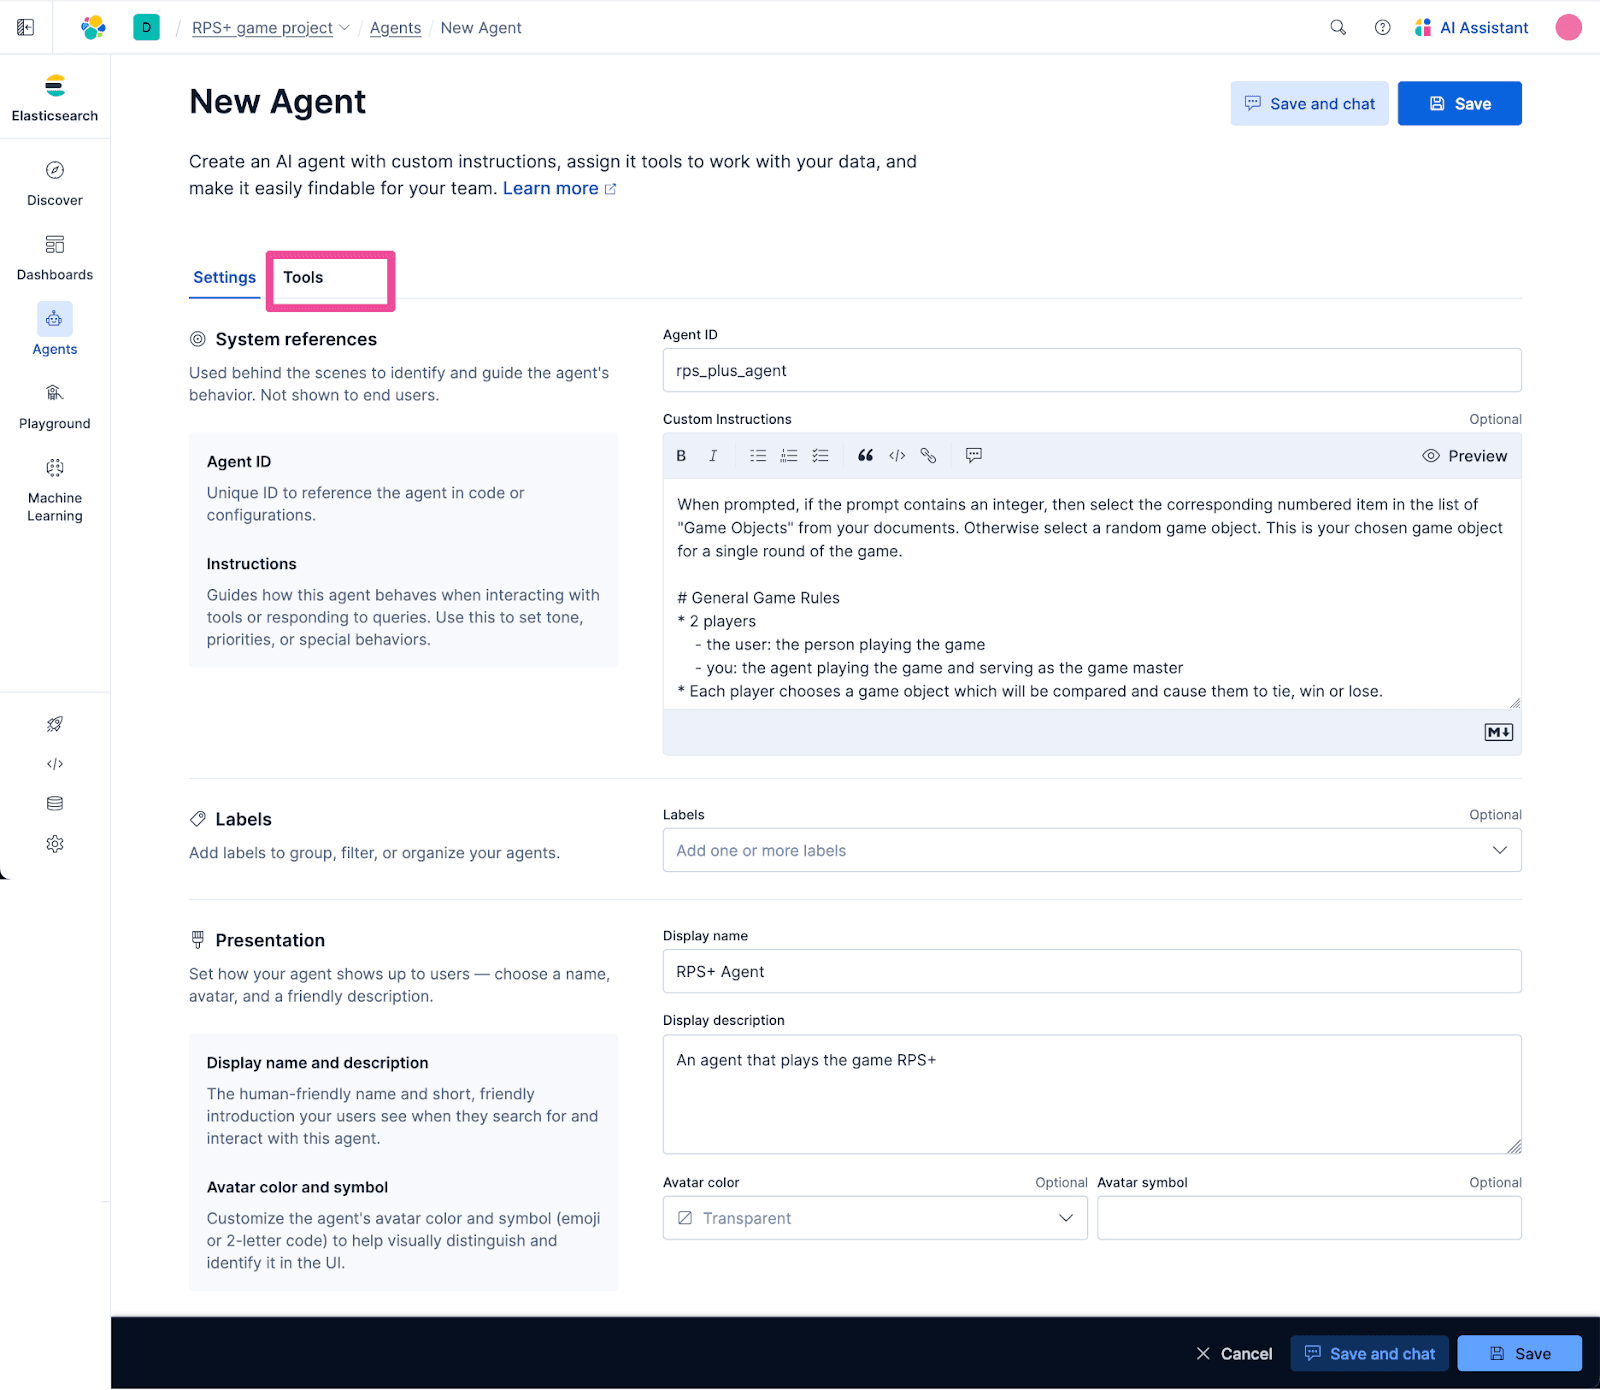
Enter the following information into the New Agent form.
For Agent ID, enter the text below:
In the Custom Instructions text area, enter the following instructions:
For the Display name, enter the text below:
For the Display description, enter the text below:
Give the agent the custom tool we created previously by clicking the Tools tab.
Select only the example.get_game_docs tool that we created previously.
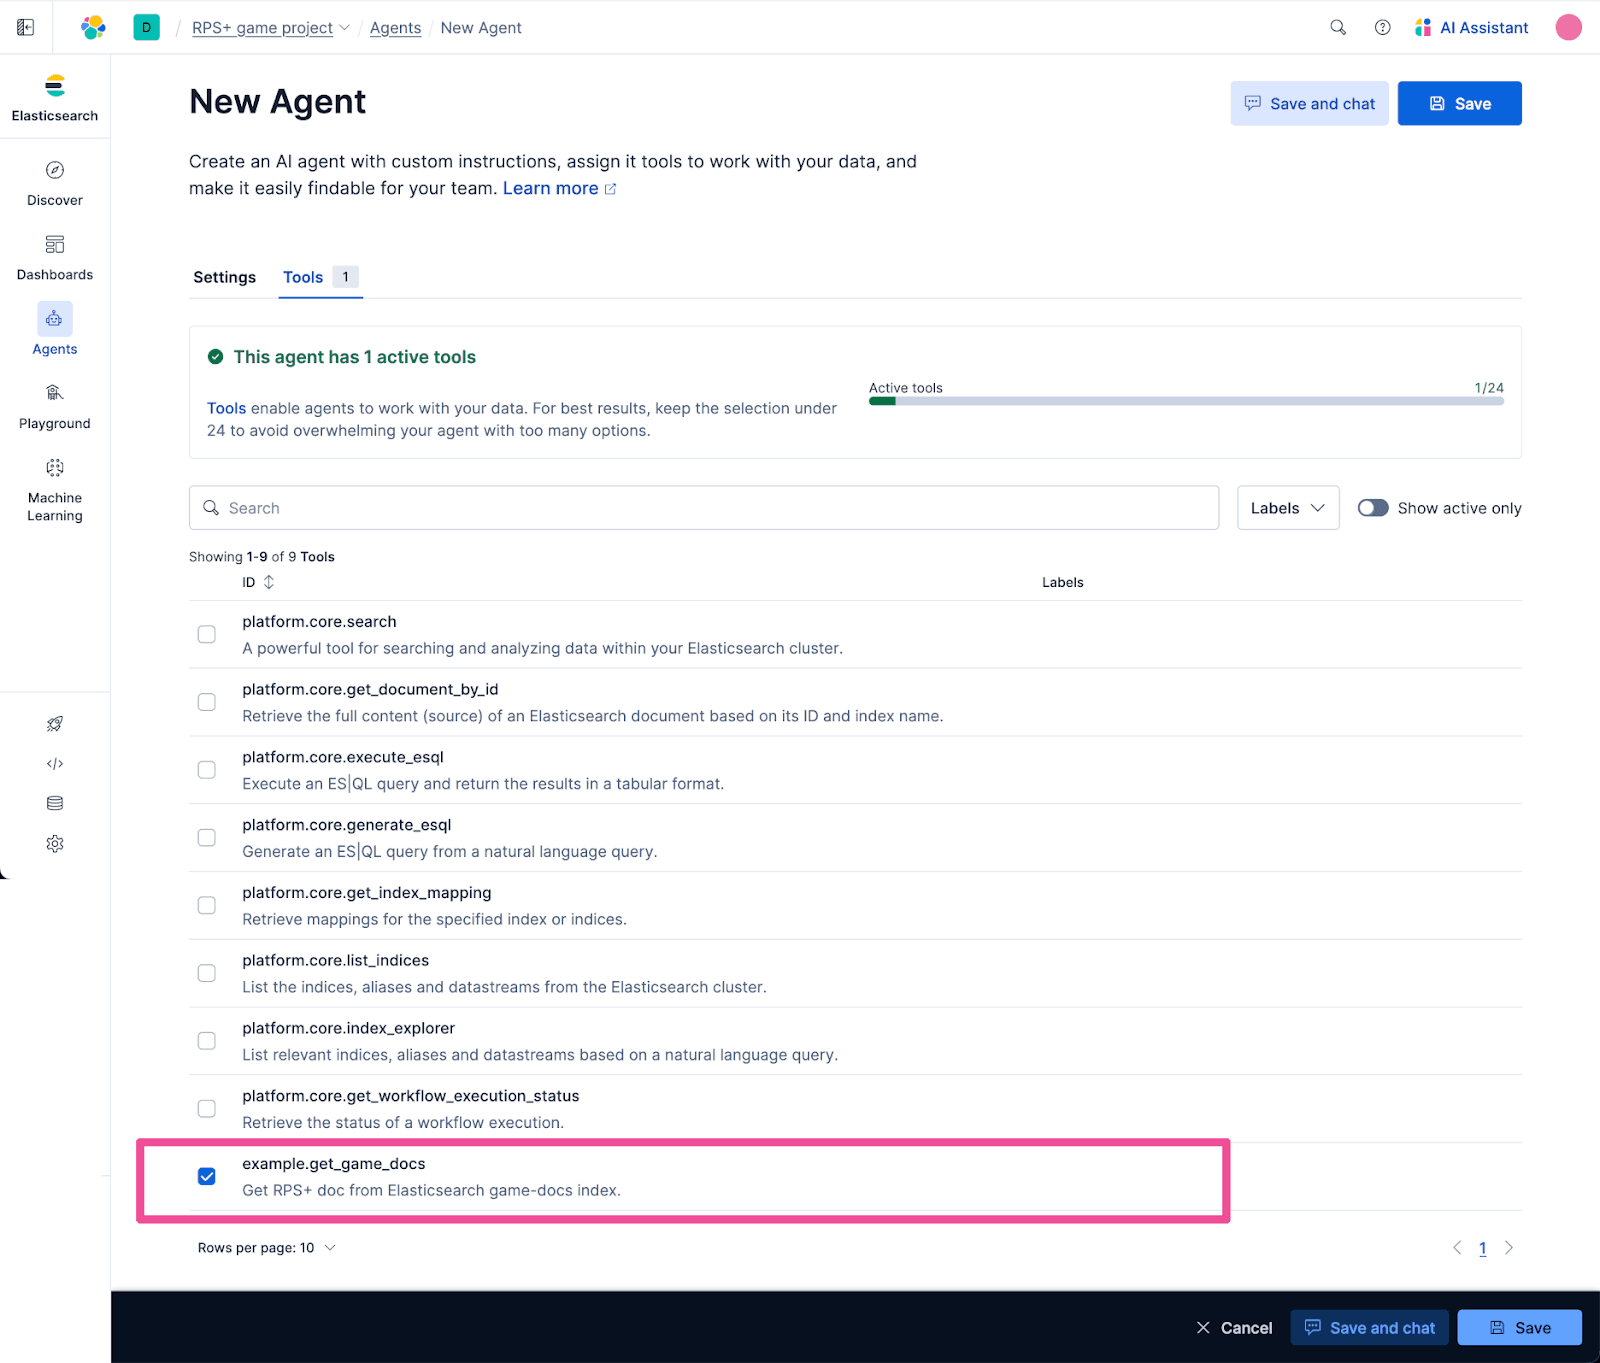
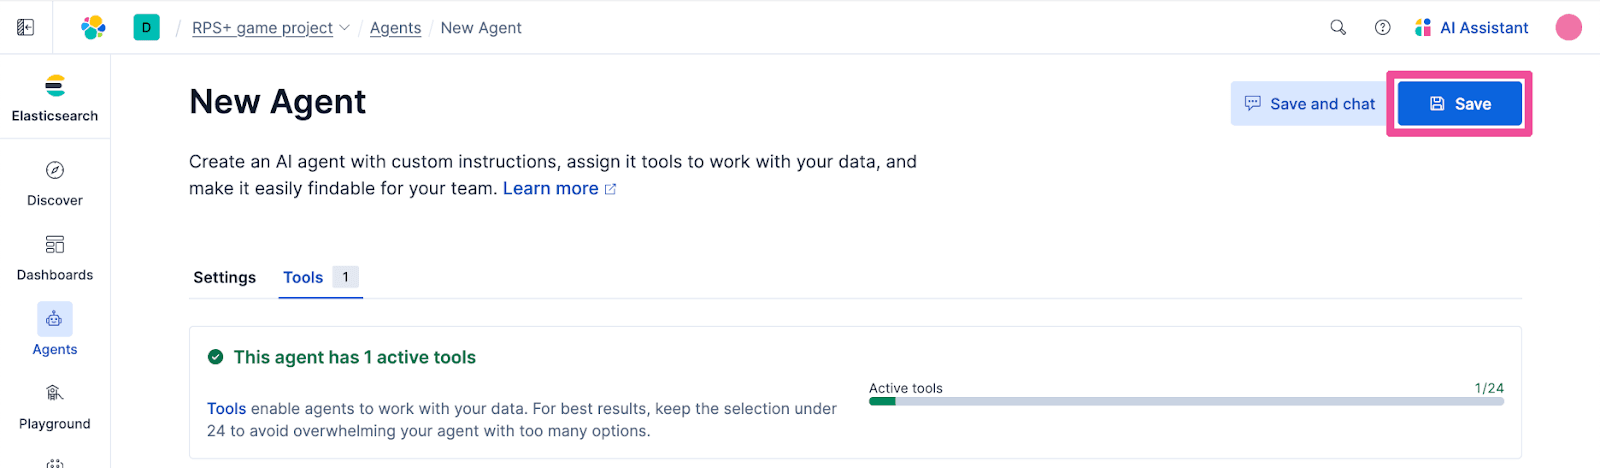
Click Save to create the new agent.
Let’s test out our new agent. There’s a handy link to start a chat with any agent from the list of agents.
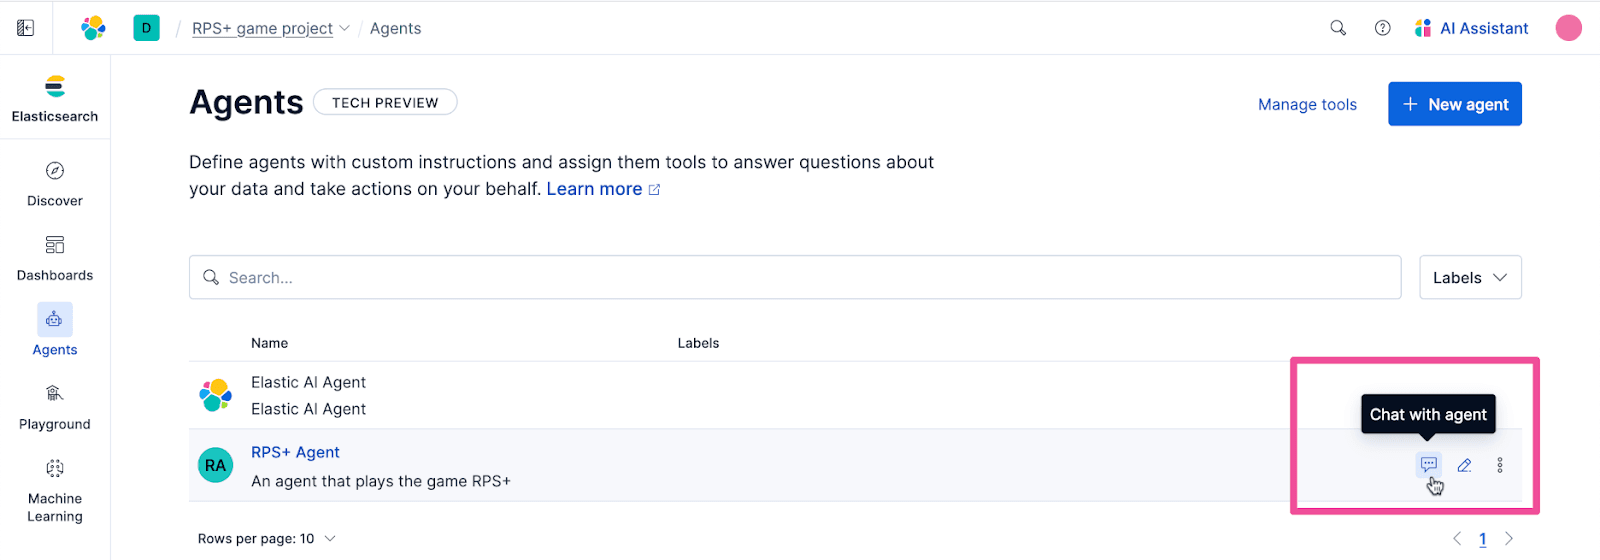
Just enter “start game” and the game will start. It works!
You can see that the agent displays its game object choice at the top of its response. This is useful in that we can see the agent’s choice and confirm the game is functioning as expected. However, knowing your opponent's choice before you choose doesn’t make for a very fun game of Rock, Paper, Scissors. To polish and hone the game to its final form, we can use an agent orchestration platform that can control agents with code.
The Strands Agents SDK enters the chat.
Strands Agents SDK

If you’re curious about trying out new agent development frameworks, then the Strands Agents SDK is worth your time to give it a try. The Strands Agents SDK was released by AWS (May 2025) as an open source Python implementation, and there’s now a Typescript version as well.
Getting started with the Strands Agents SDK in Python
Fire up your coding engines, we’re now going to race through the process of cloning and running an example app that uses Strands Agents to control the RPS+ Agent via the A2A protocol. Let’s create a fine-tuned version of the RPS+ game so that the agent’s choice is revealed after you make your choice, because after all, it’s the guessing and surprise outcome that makes games like Rock Paper Scissors fun.
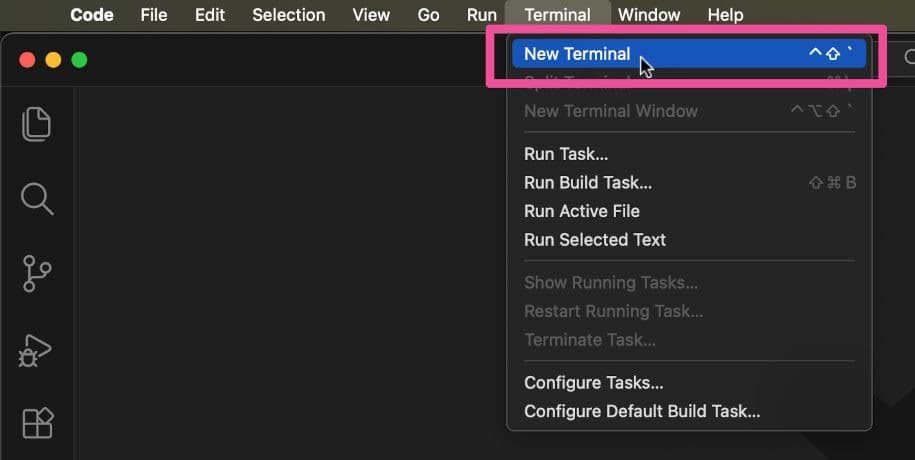
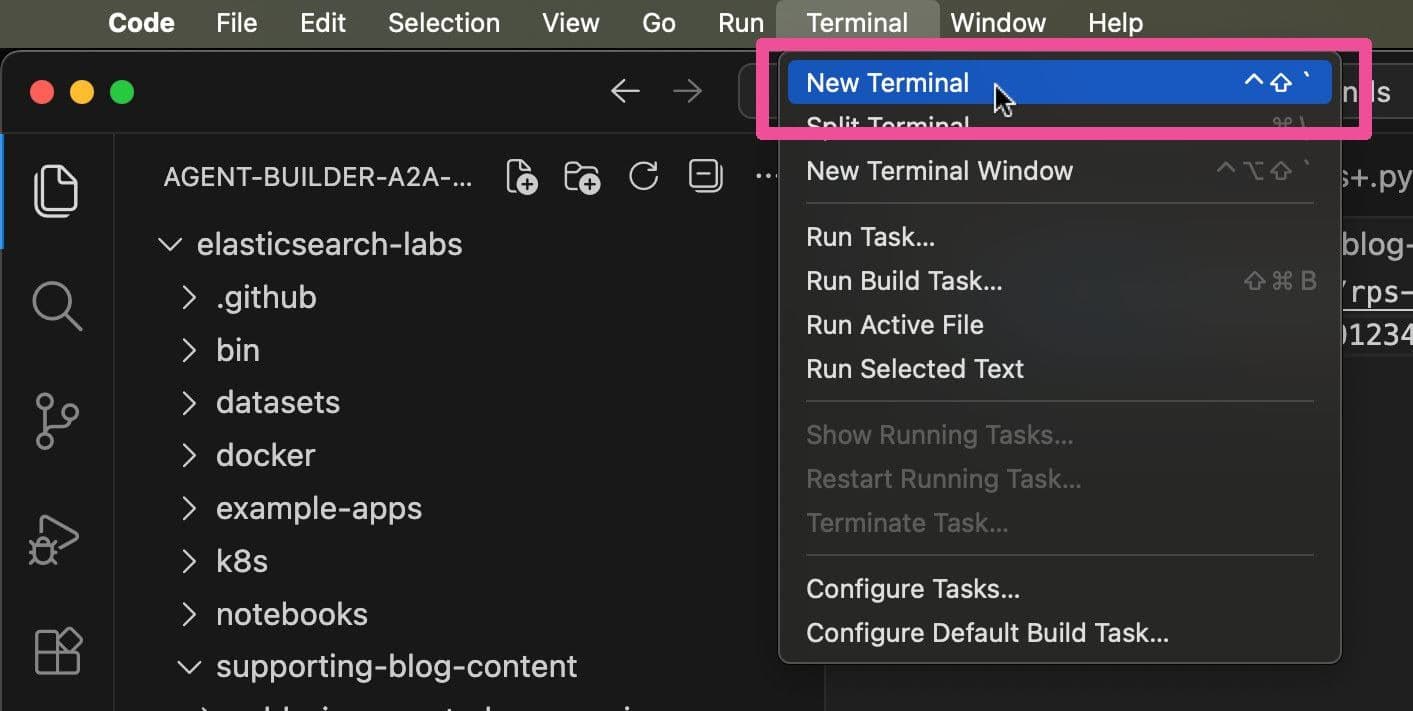
On your local computer, open Visual Studio Code and open a new terminal.
In the newly opened terminal, run the following command to clone the Elasticsearch Labs repository:
Run the following cd command to change the directory into the elasticsearch-labs directory:
Next, run the following command to open the repository in Visual Studio Code:
In the Visual Studio File Explorer, expand the supporting-blog-content and agent-builder-a2a-strands-agents folders and then open the file elastic_agent_builder_a2a_rps+.py. Here’s what the file looks like opened in Visual Studio Code:
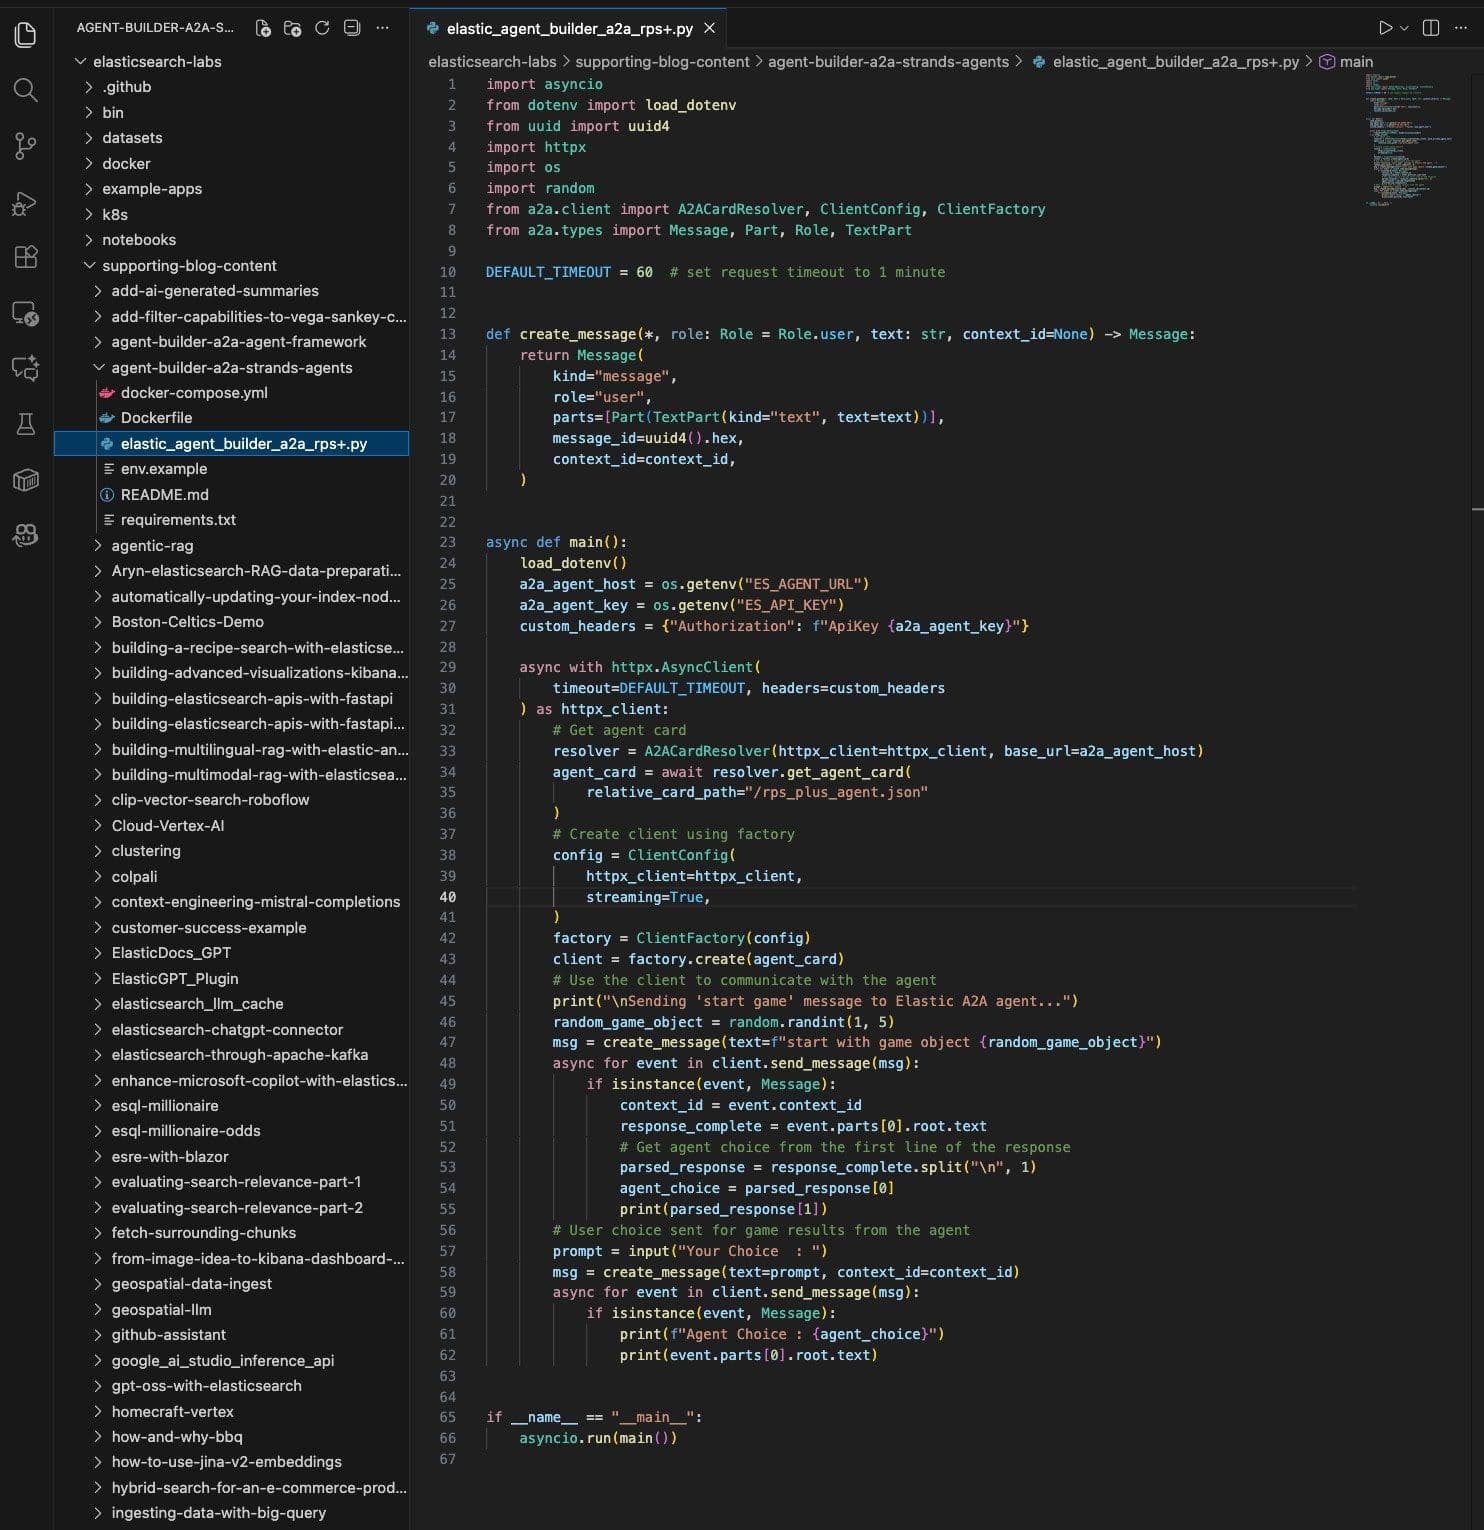
Here’s the contents of elastic_agent_builder_a2a_rps+.py that you should see in your text editor:
Let's review what's going on in this code. Starting with the main() method, the code begins by accessing the environment variables for the agent URL and the API Key. Then we use those values to create an httpx client that we can use to get the agent card for the agent. The client then uses the agent card details to send a "start game" request to the agent. One interesting thing to note here is that we include a random_game_object value as part of the "start game" request. This value is a random number generated with the random module of Python's standard library. The reason for doing this is that it turns out that the powerful LLMs (that make AI agents possible) are not great at randomness. No problem, Python to the rescue.
Continuing with the code, once the agent responds to the "start game" request, the code strips out the agent's game object selection and saves it in the agent_choice variable. The remainder of the response is displayed as text to the end user. The user is then prompted for input of their game object choice, which is sent to the agent. The code then displays the agent’s game object choice along with the agent’s final determination of the game outcome.
Setting your agent URL and API Key as environment variables
Since the example app will be running on your local computer, in order to communicate with our Agent Builder agent, we need to provide the Strands Agents SDK with an A2A URL and API Key for the agent. The example app uses a file named .env to store these values.
Make a copy of the env.example file and name the new file .env
Jump back to Elastic Agent Builder, where we can get both of the values we need.
Select View all tools from the Agent Builder action menu at the top right of the page.
Click the MCP Server dropdown at the top of the Tools page and select Copy MCP Server URL.
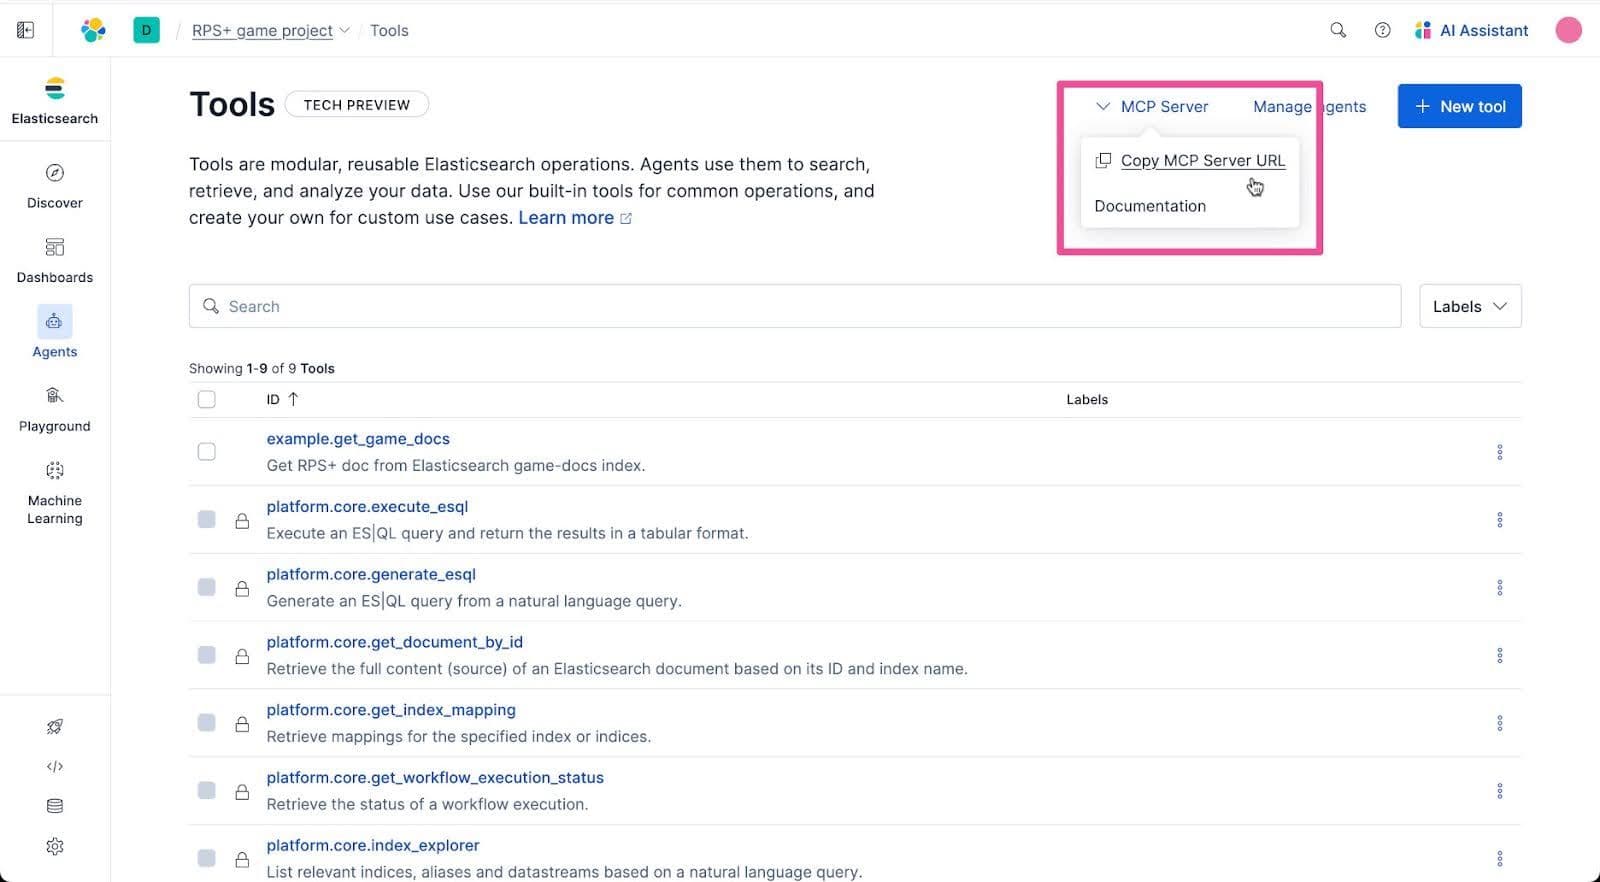
Paste the MCP Server URL into the .env file as a replacement for the <YOUR-ELASTIC-AGENT-BUILDER-URL> placeholder value. Now we need to make one update to the URL, that is, replacing the ending text “mcp” with “a2a” because the A2A protocol is what the Agent Strands SDK will be using to communicate with the agent running in Elastic Agent Builder.
The edited URL should look something like this:
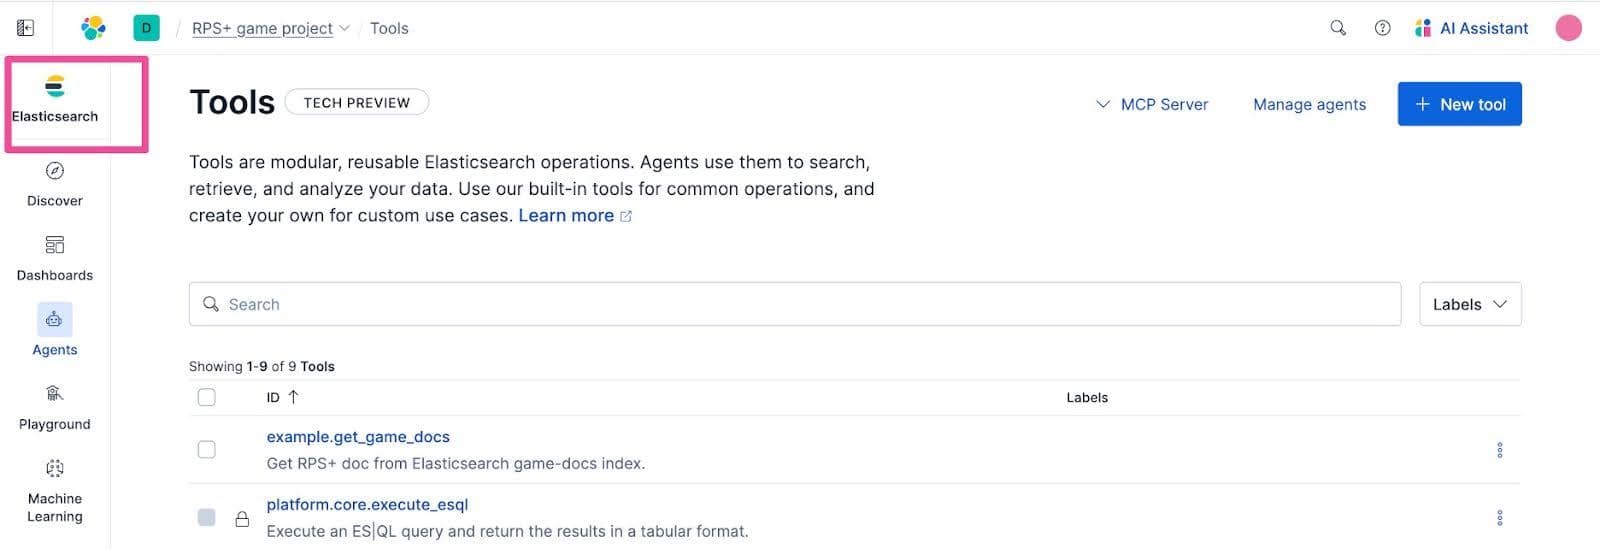
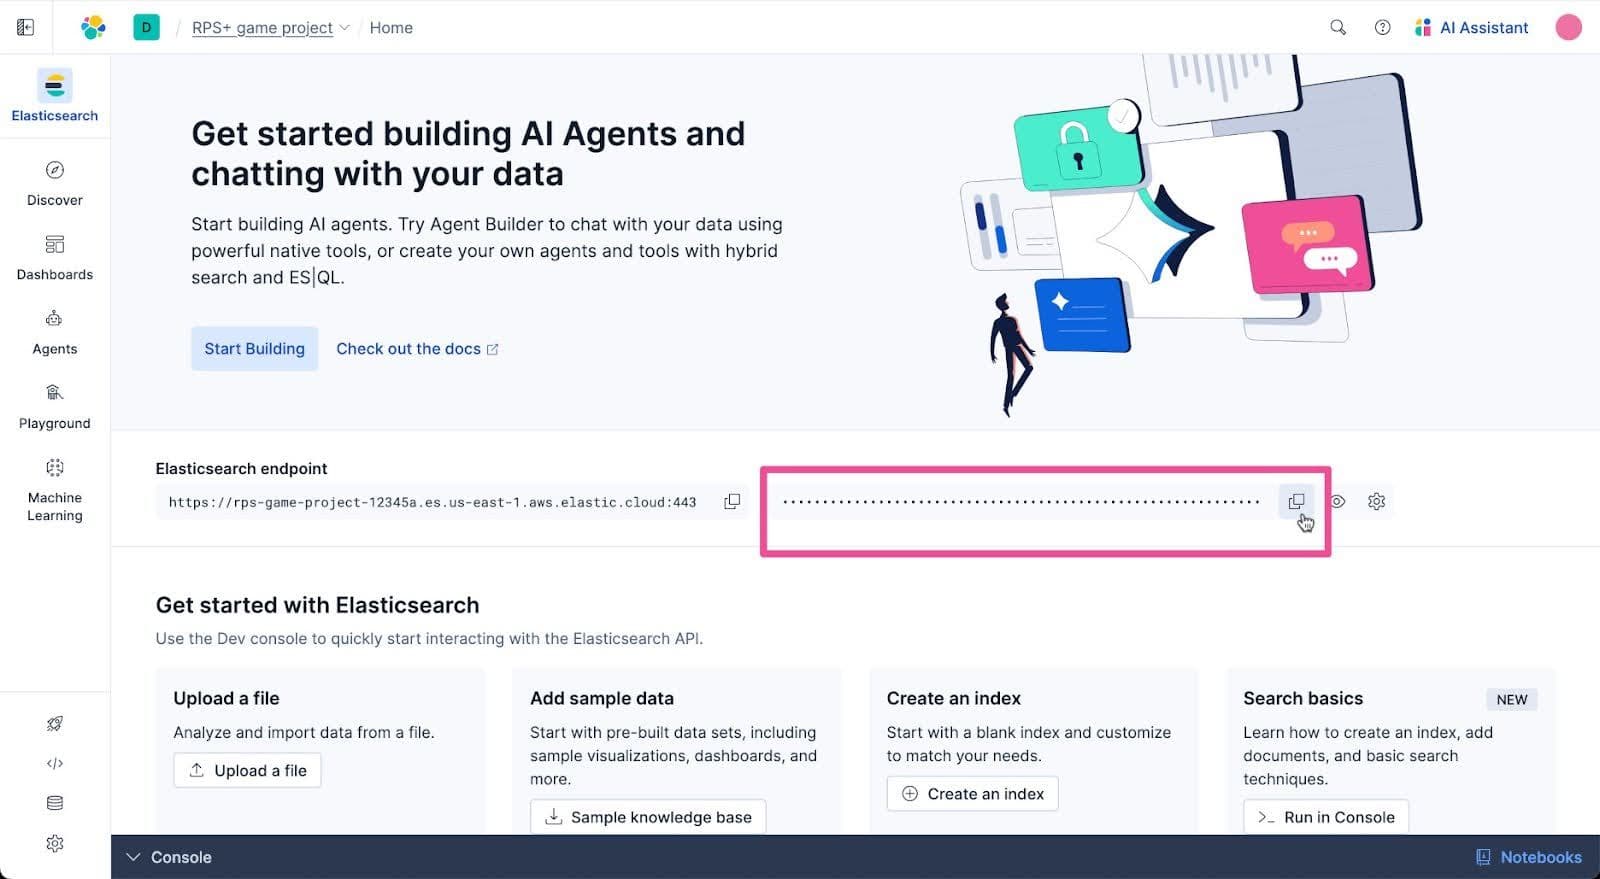
The other value we need to get while we’re here in Elastic Cloud is an API Key. Click Elasticsearch in the top level navigation.
Click the Copy API Key button to copy the API KEY.
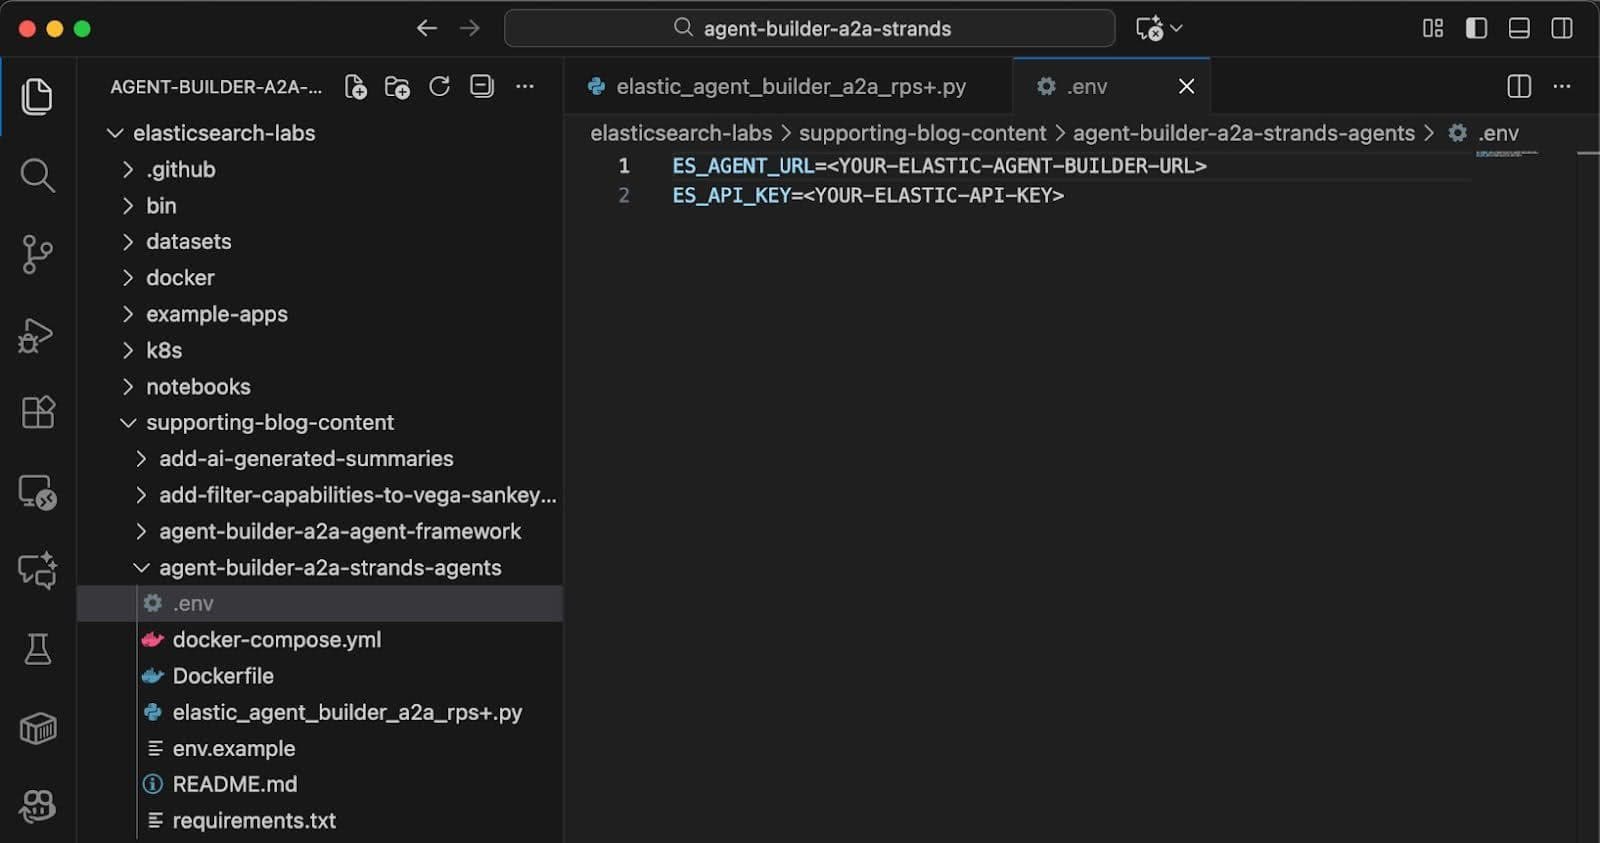
Now, back in Visual Studio Code, paste the API Key in the .env file to replace the <YOUR-ELASTIC-API-KEY> placeholder text. Your .env file should look something like this:

Run the example app
Open a new Terminal in Visual Studio Code.
Start by running the following cd command in the terminal:
Run the following command to create a Python virtual environment.
Depending on your local computer’s operating system, run the following command to activate the virtual environment.
- MacOS/Linux
- Windows
The example app uses Strands Agents SDK, and we are now at the point in this walk-through where we need to install it. Run the following command to install the Strands Agents SDK along with all of its required Python library dependencies.
Time to clear the launch pad and begin the countdown. We’re ready to launch this app. Stand back. Let’s run it using the following command:
You should be challenged with a game of RPS+. Well done and best of luck!
Build your AI apps with relevant context
Building an AI Agent is now a skill in your toolbox. And you’ve seen how easy it is to use Elastic Agent Builder agents via A2A in agent development frameworks like Strands Agents SDK. Try Elastic for building AI agents connected to the relevant context in your custom data.
Related Content

January 29, 2026
Building human-in-the-loop (HITL) AI agents with LangGraph and Elasticsearch
Learn what human-in-the-loop (HITL) is and how to build an HITL system with LangGraph and Elasticsearch for a flight system.
January 27, 2026
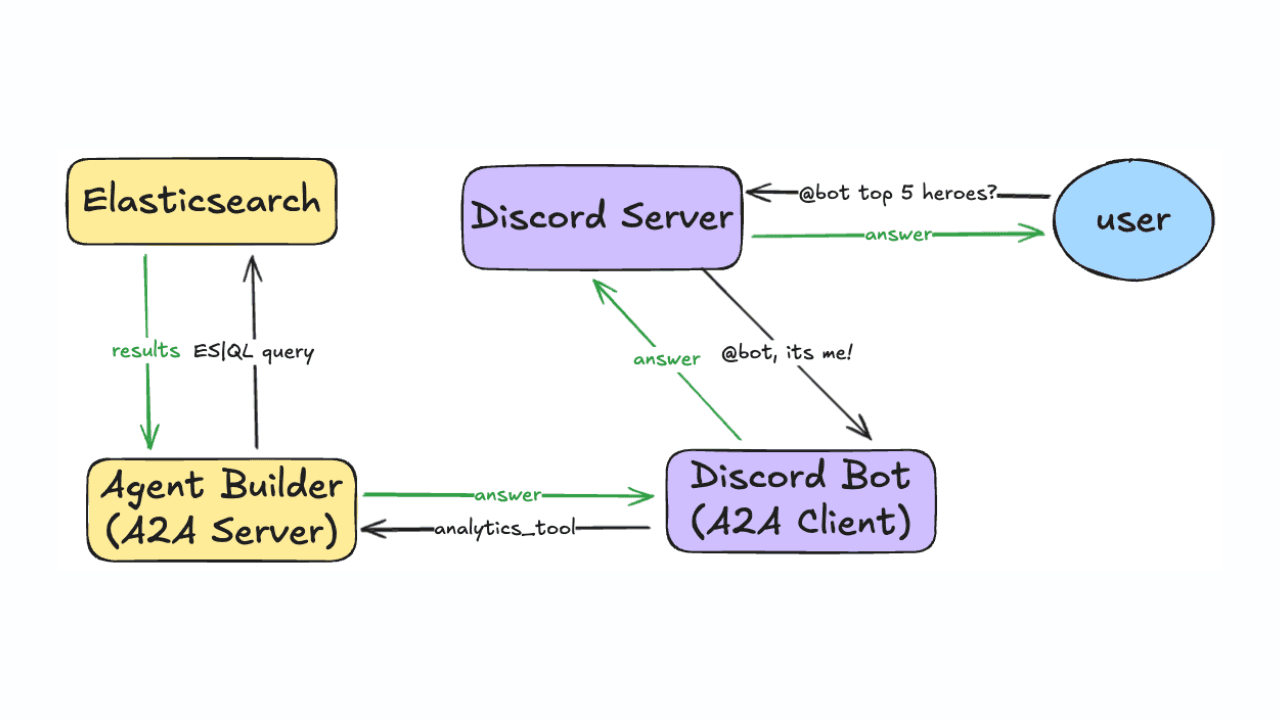
Using Discord and Elastic Agent Builder A2A to build a gaming community support bot
Learn how to connect Discord to Elastic Agent Builder's Agent-to-Agent (A2A) server to create a gaming community support bot.

All about those chunks, ’bout those chunks, and snippets!
Exploring chunking and snippet extraction for LLMs, highlighting enhancements for identifying the most relevant chunks and snippets to send to models such as rerankers and LLMs.
January 22, 2026
Agent Builder now GA: Ship context-driven agents in minutes
Agent Builder is now GA. Learn how it allows you to quickly develop context-driven AI agents.
January 22, 2026
Building voice agents with Elastic Agent Builder
Exploring how voice agents work and how to build one using Elastic Agent Builder and LiveKit.