Connecting OneDrive
editConnecting OneDrive
editOneDrive is a cloud-based storage service for organizations of all sizes, with a focus on Microsoft 365 (formerly known as Office 365) document storage and collaboration. Create, store, share and automatically synchonize documents across your organization. The OneDrive connector provided with Workplace Search automatically captures, syncs and indexes the following items:
Stored Files |
Including ID, File Metadata, File Content, Updated by, and timestamps |
Known issues
edit-
When configured after November 8, 2020, the OneDrive connector must be connected by an Azure AD admin user. Therefore, private sources are not supported. Organization sources are supported when connected by an Azure AD admin user.
During configuration, you register an OAuth app in Azure AD that does not have a verified publisher. After November 8, 2020, these apps can be connected by Azure AD admin users only.
Configuring the OneDrive Connector
editConfiguring the OneDrive connector is the first step prior to connecting the OneDrive service to Workplace Search, and requires that you create an OAuth App from the OneDrive platform. To get started, first log in to OneDrive and access your administrative dashboard:
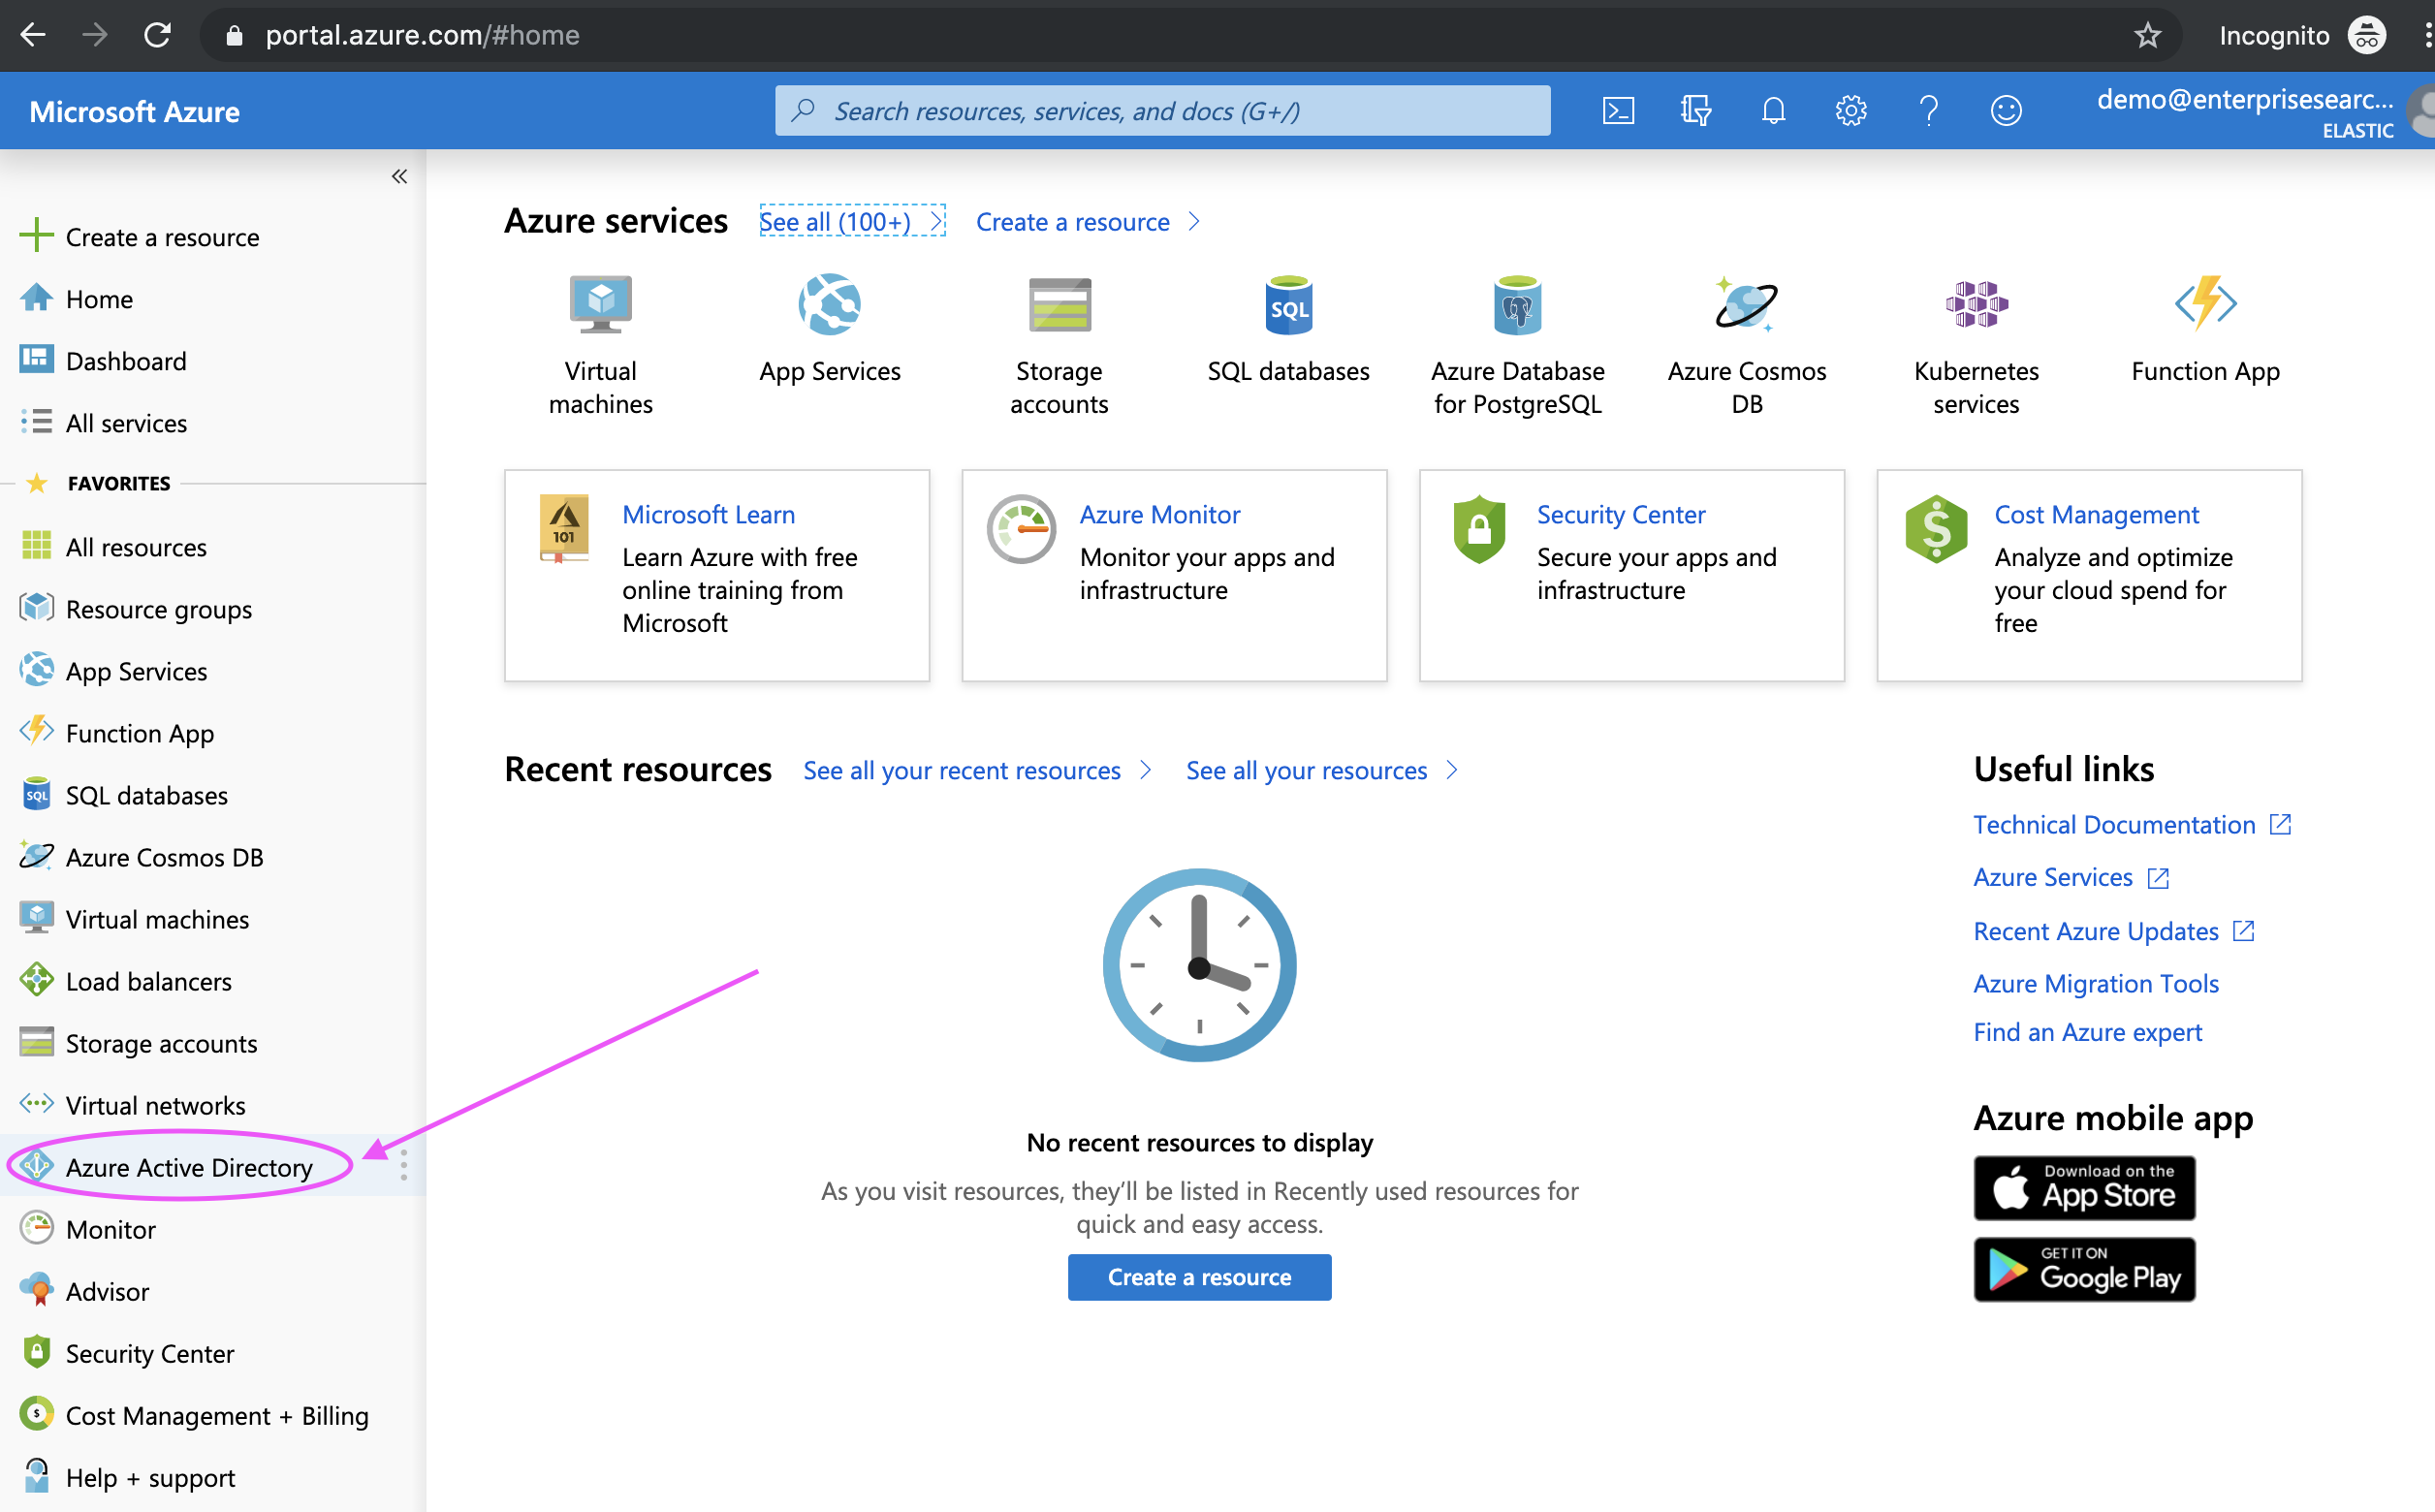
Step 1. Sign in to https://portal.azure.com/ and click on Azure Active Directory:
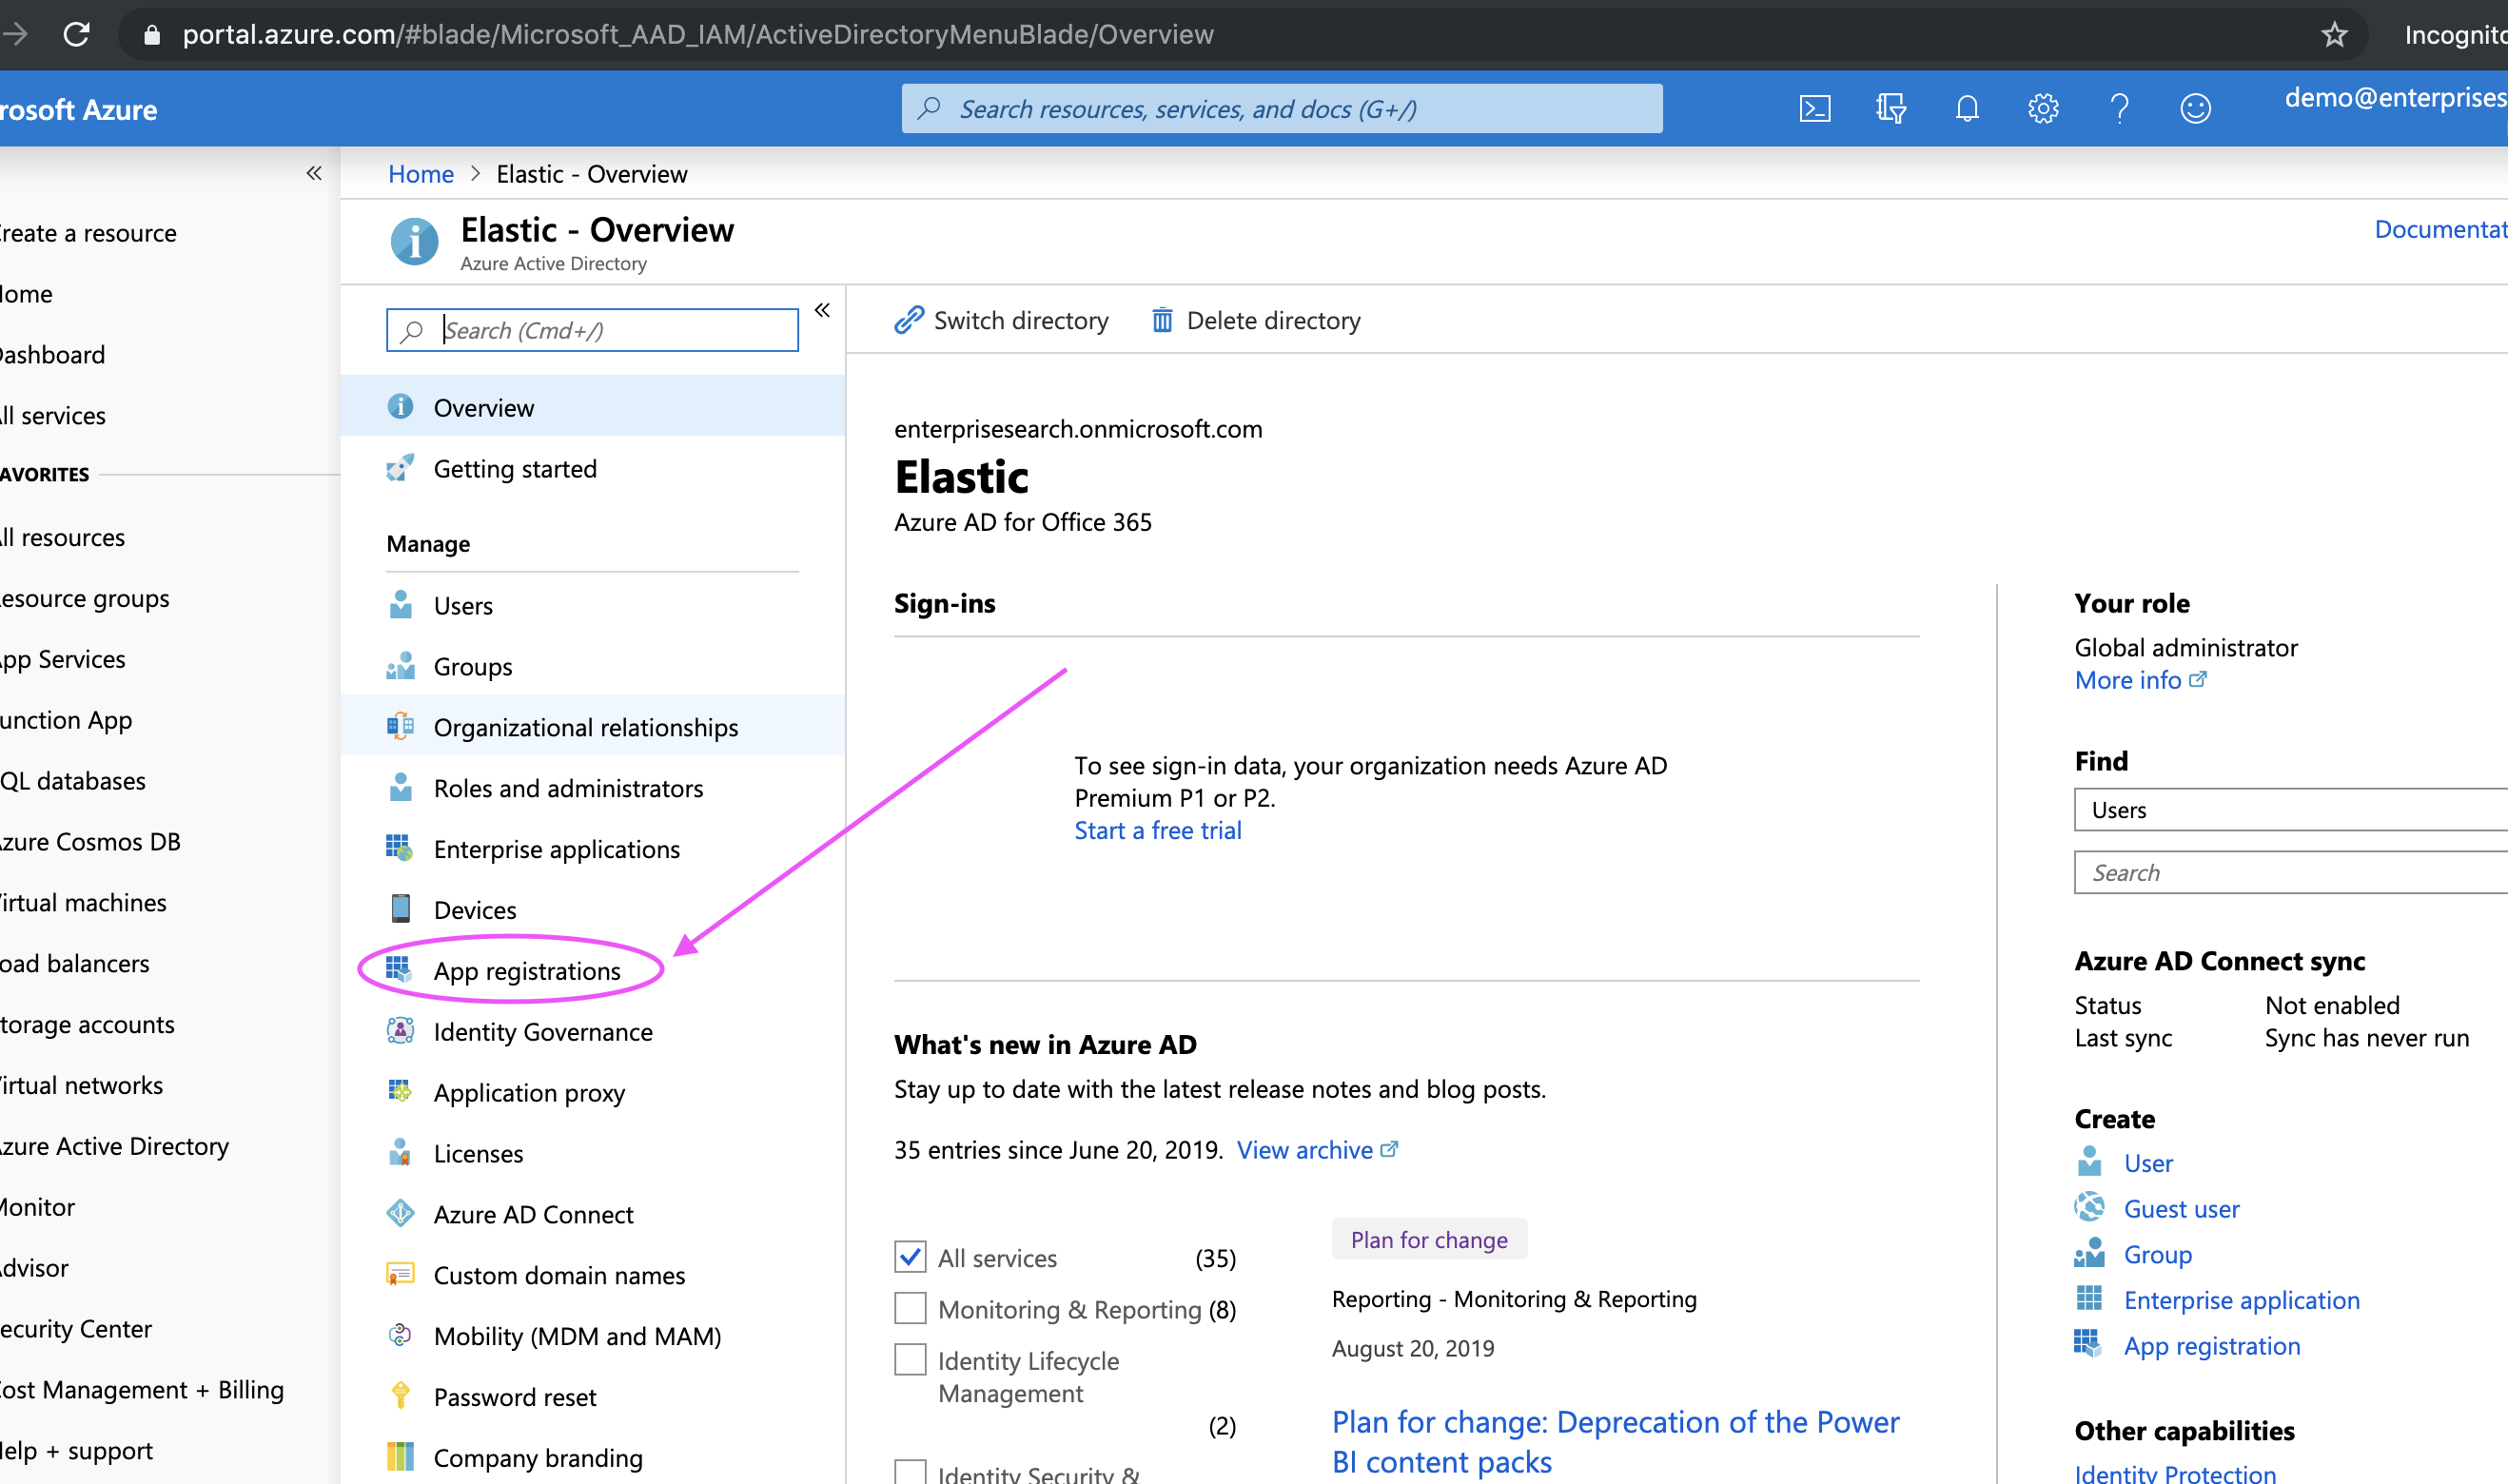
Step 2. Locate App Registrations:
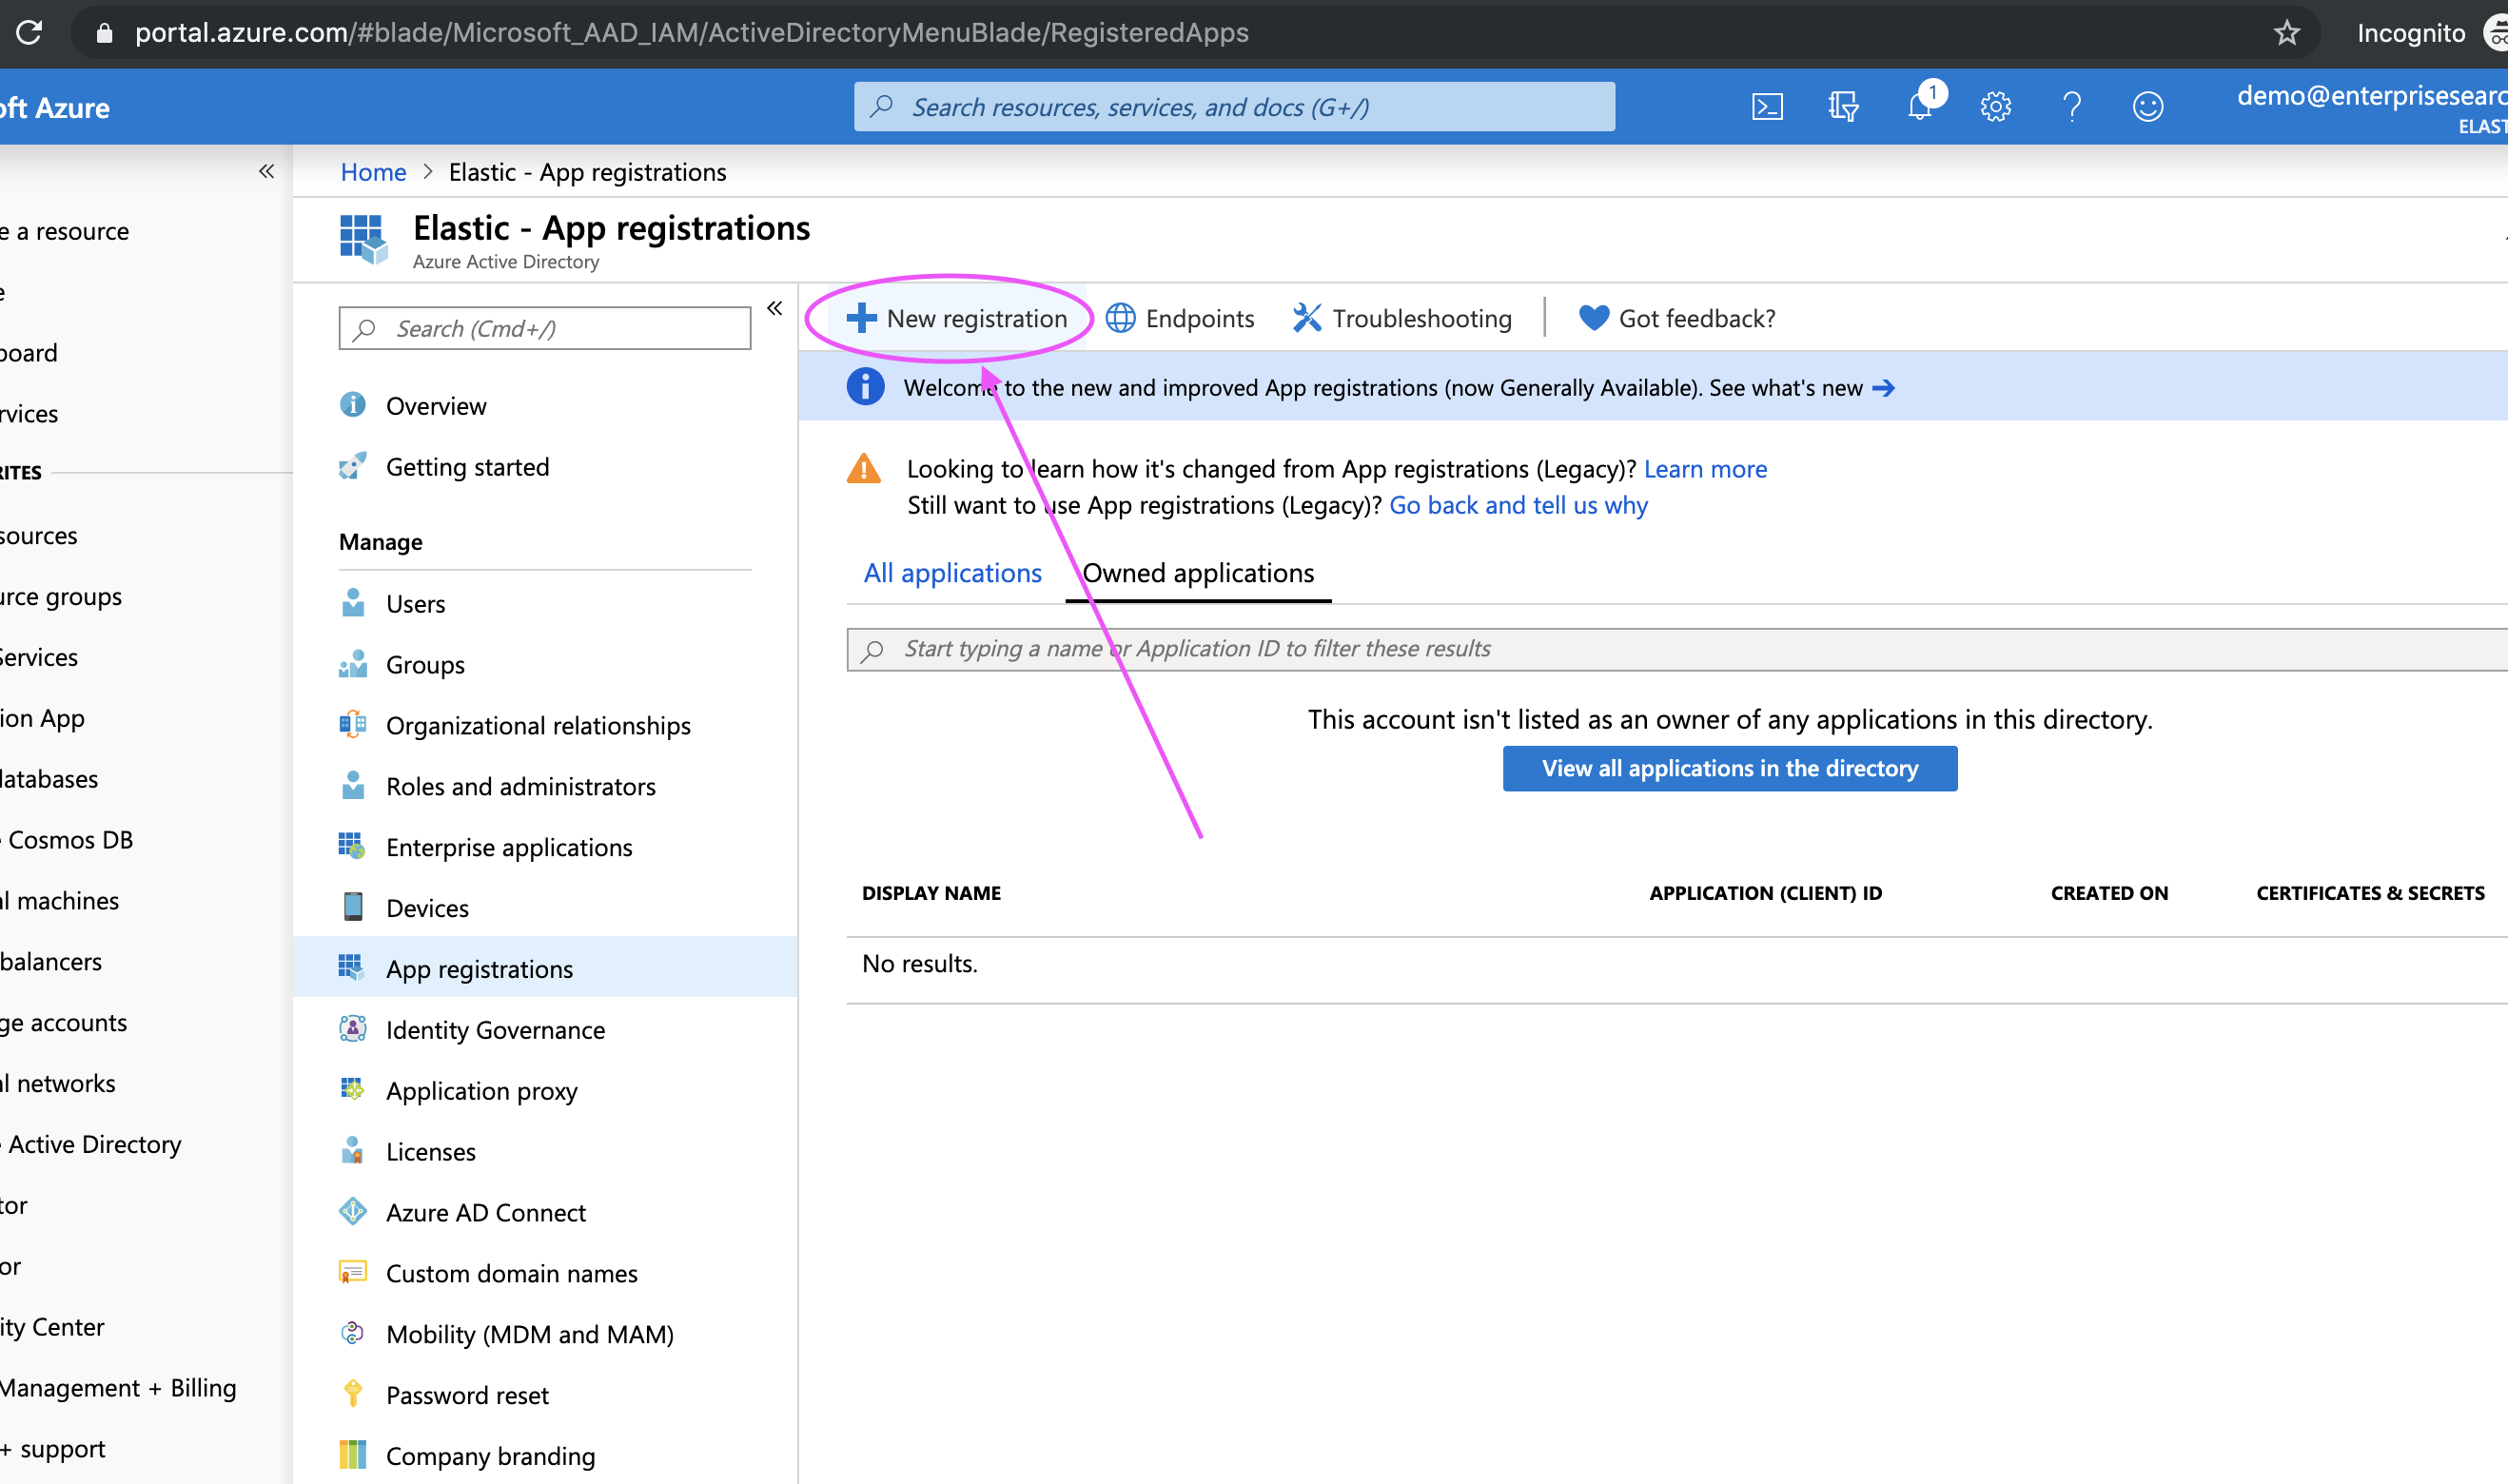
Step 3. Click New Registration:
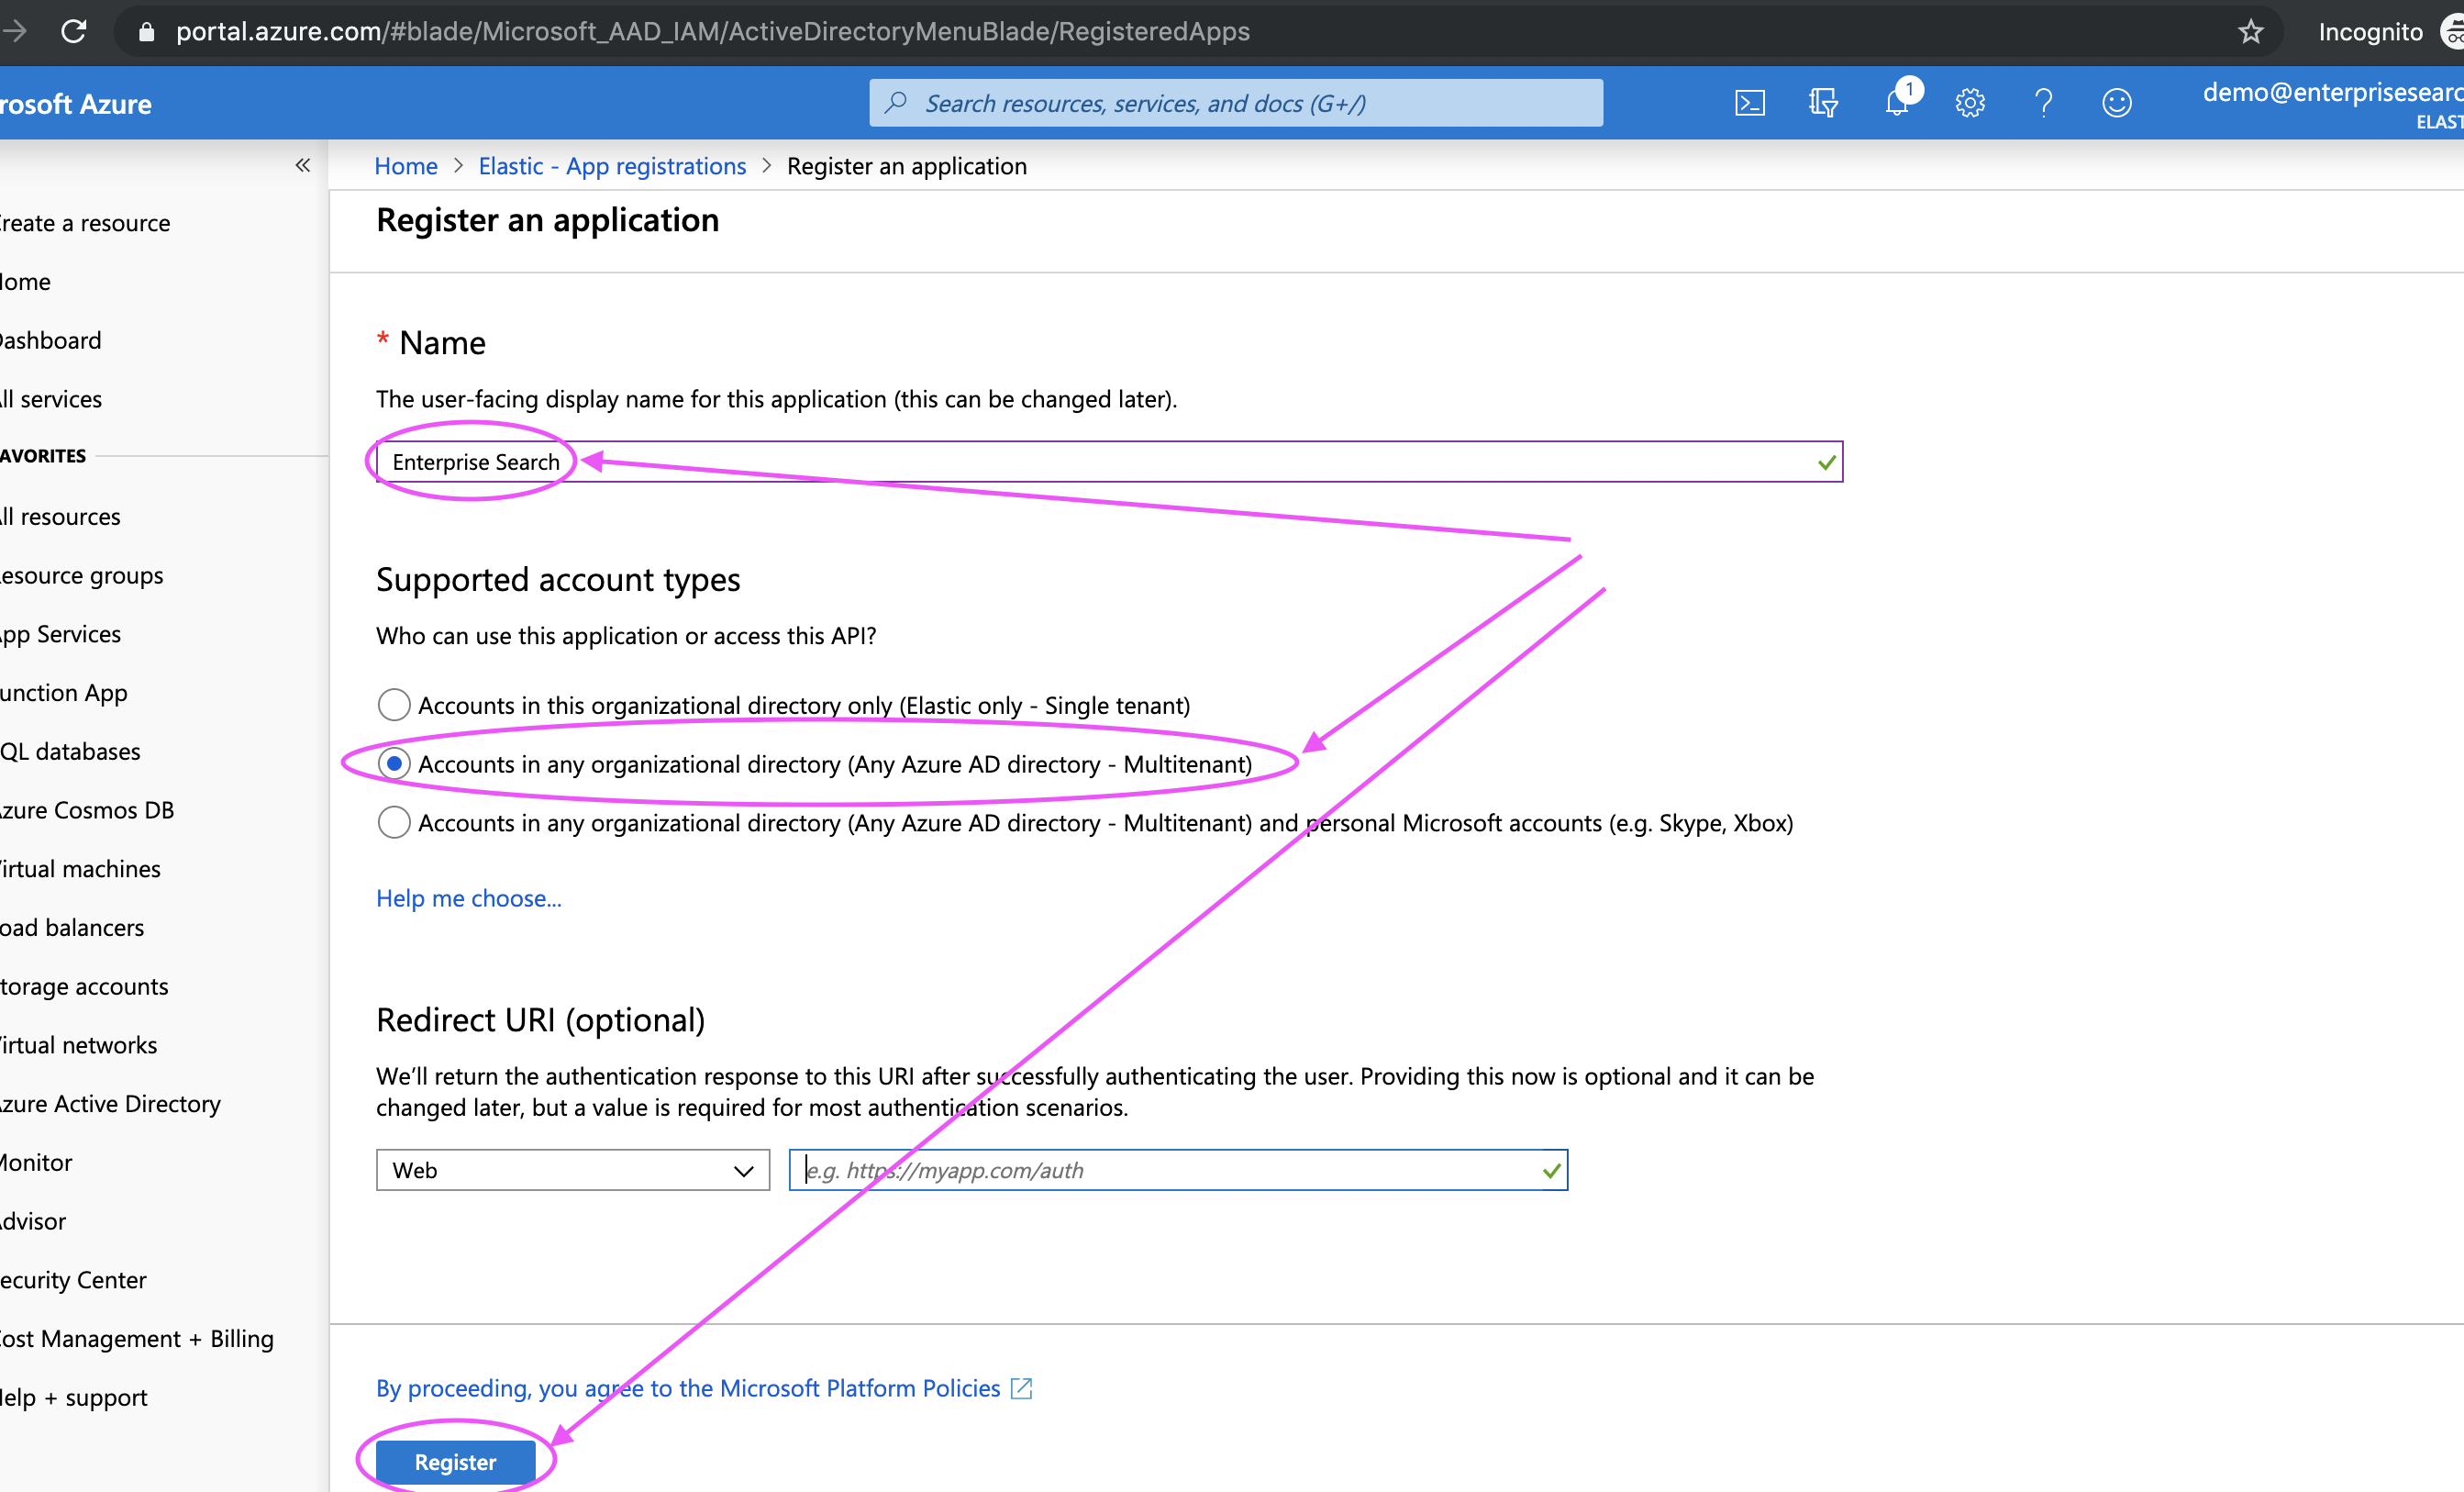
Step 4. Give your app a name - like "Workplace Search" - and make it multitenant.
Setting the app to single tenant will result in a degraded experience, and the connector will not sync content.
Leave the Redirect URIs blank for now. We will need two: one for Organizational Sources and the other for Personal Sources. We’ll add this later in the process.
Step 5. Register the application:
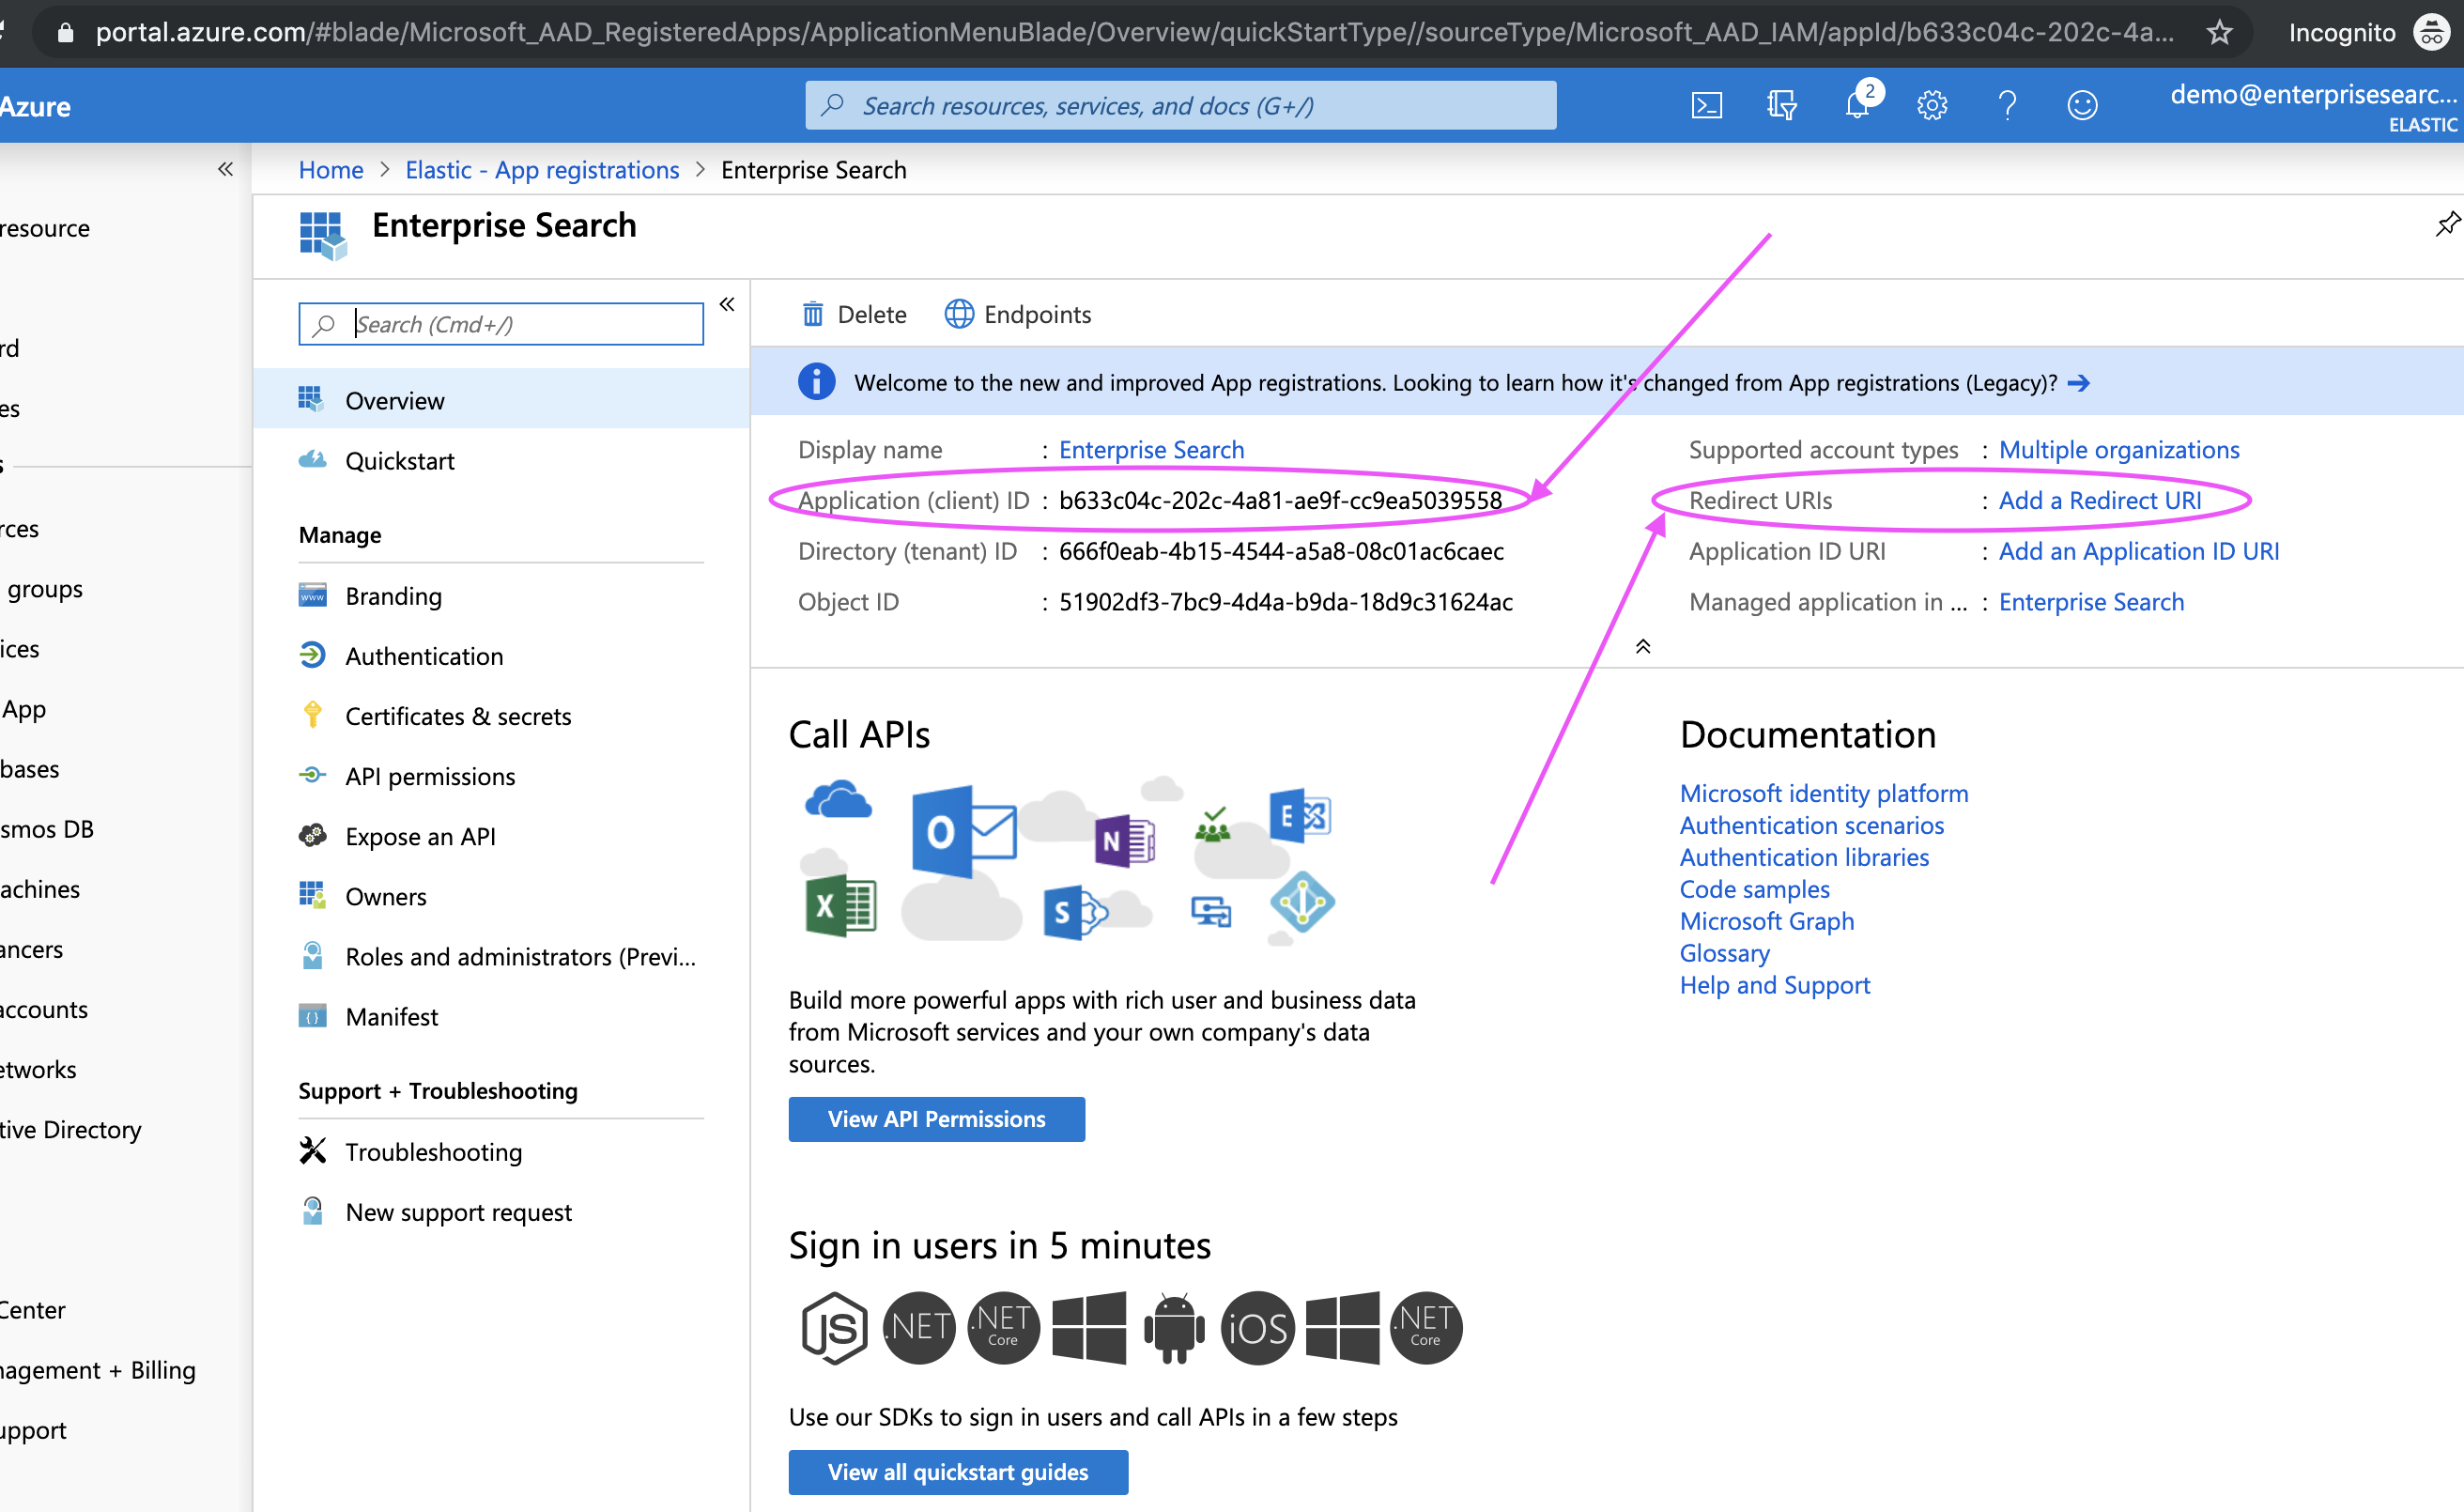
Step 6. Retrieve and keep the Client ID handy - we’ll need it within Workplace Search.
Step 7. Next, add two redirect URIs. Click the Add Redirect URIs link in the header:
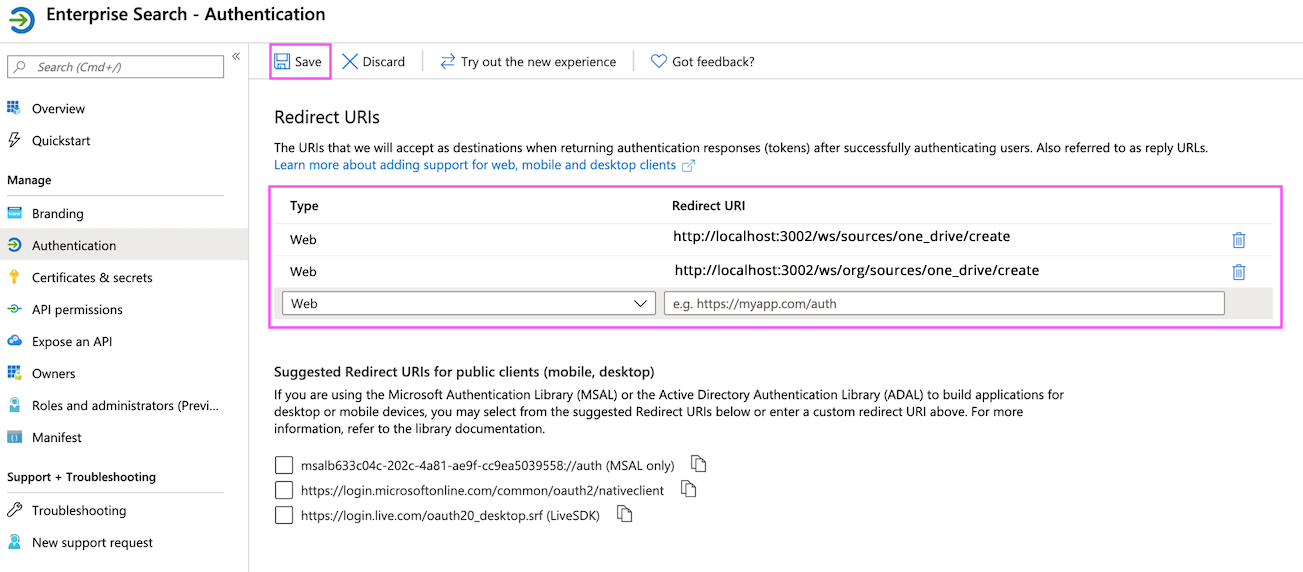
The two redirect URIs are:
# Important note: the hostname should be relative to the one you have configured.
http://localhost:3002/ws/sources/one_drive/create
http://localhost:3002/ws/org/sources/one_drive/create
Step 7. Save the cofiguration:
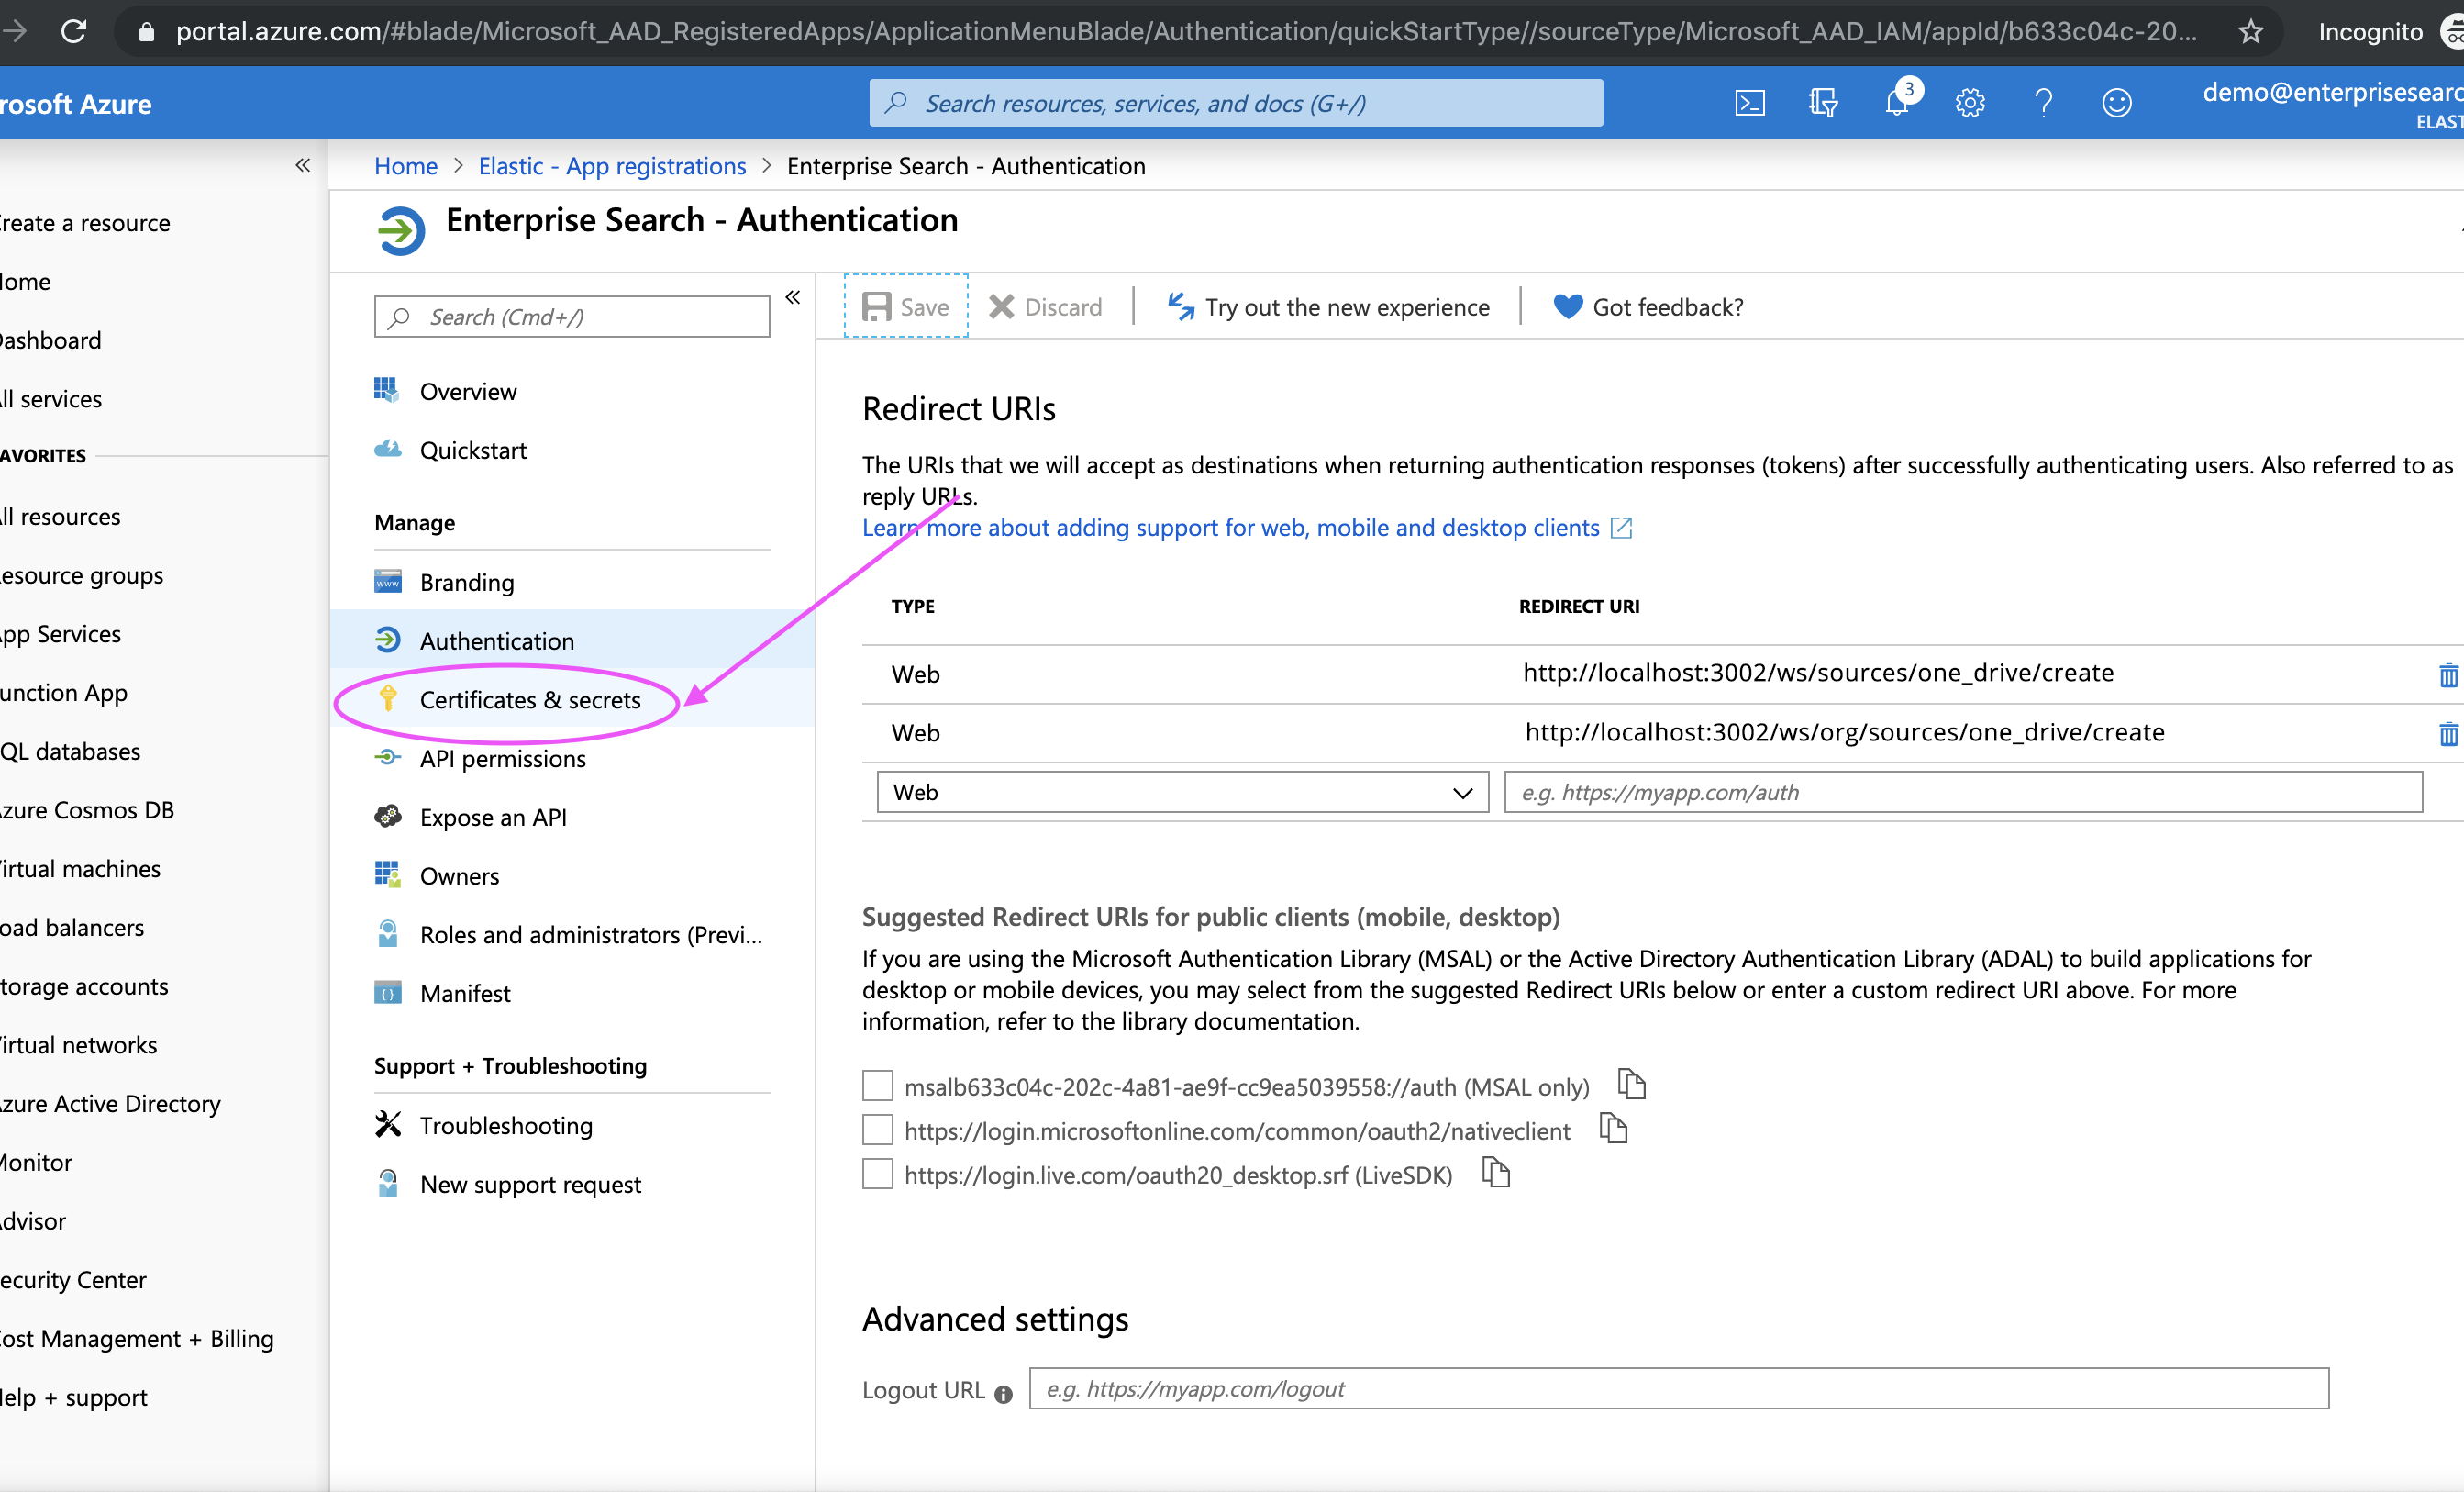
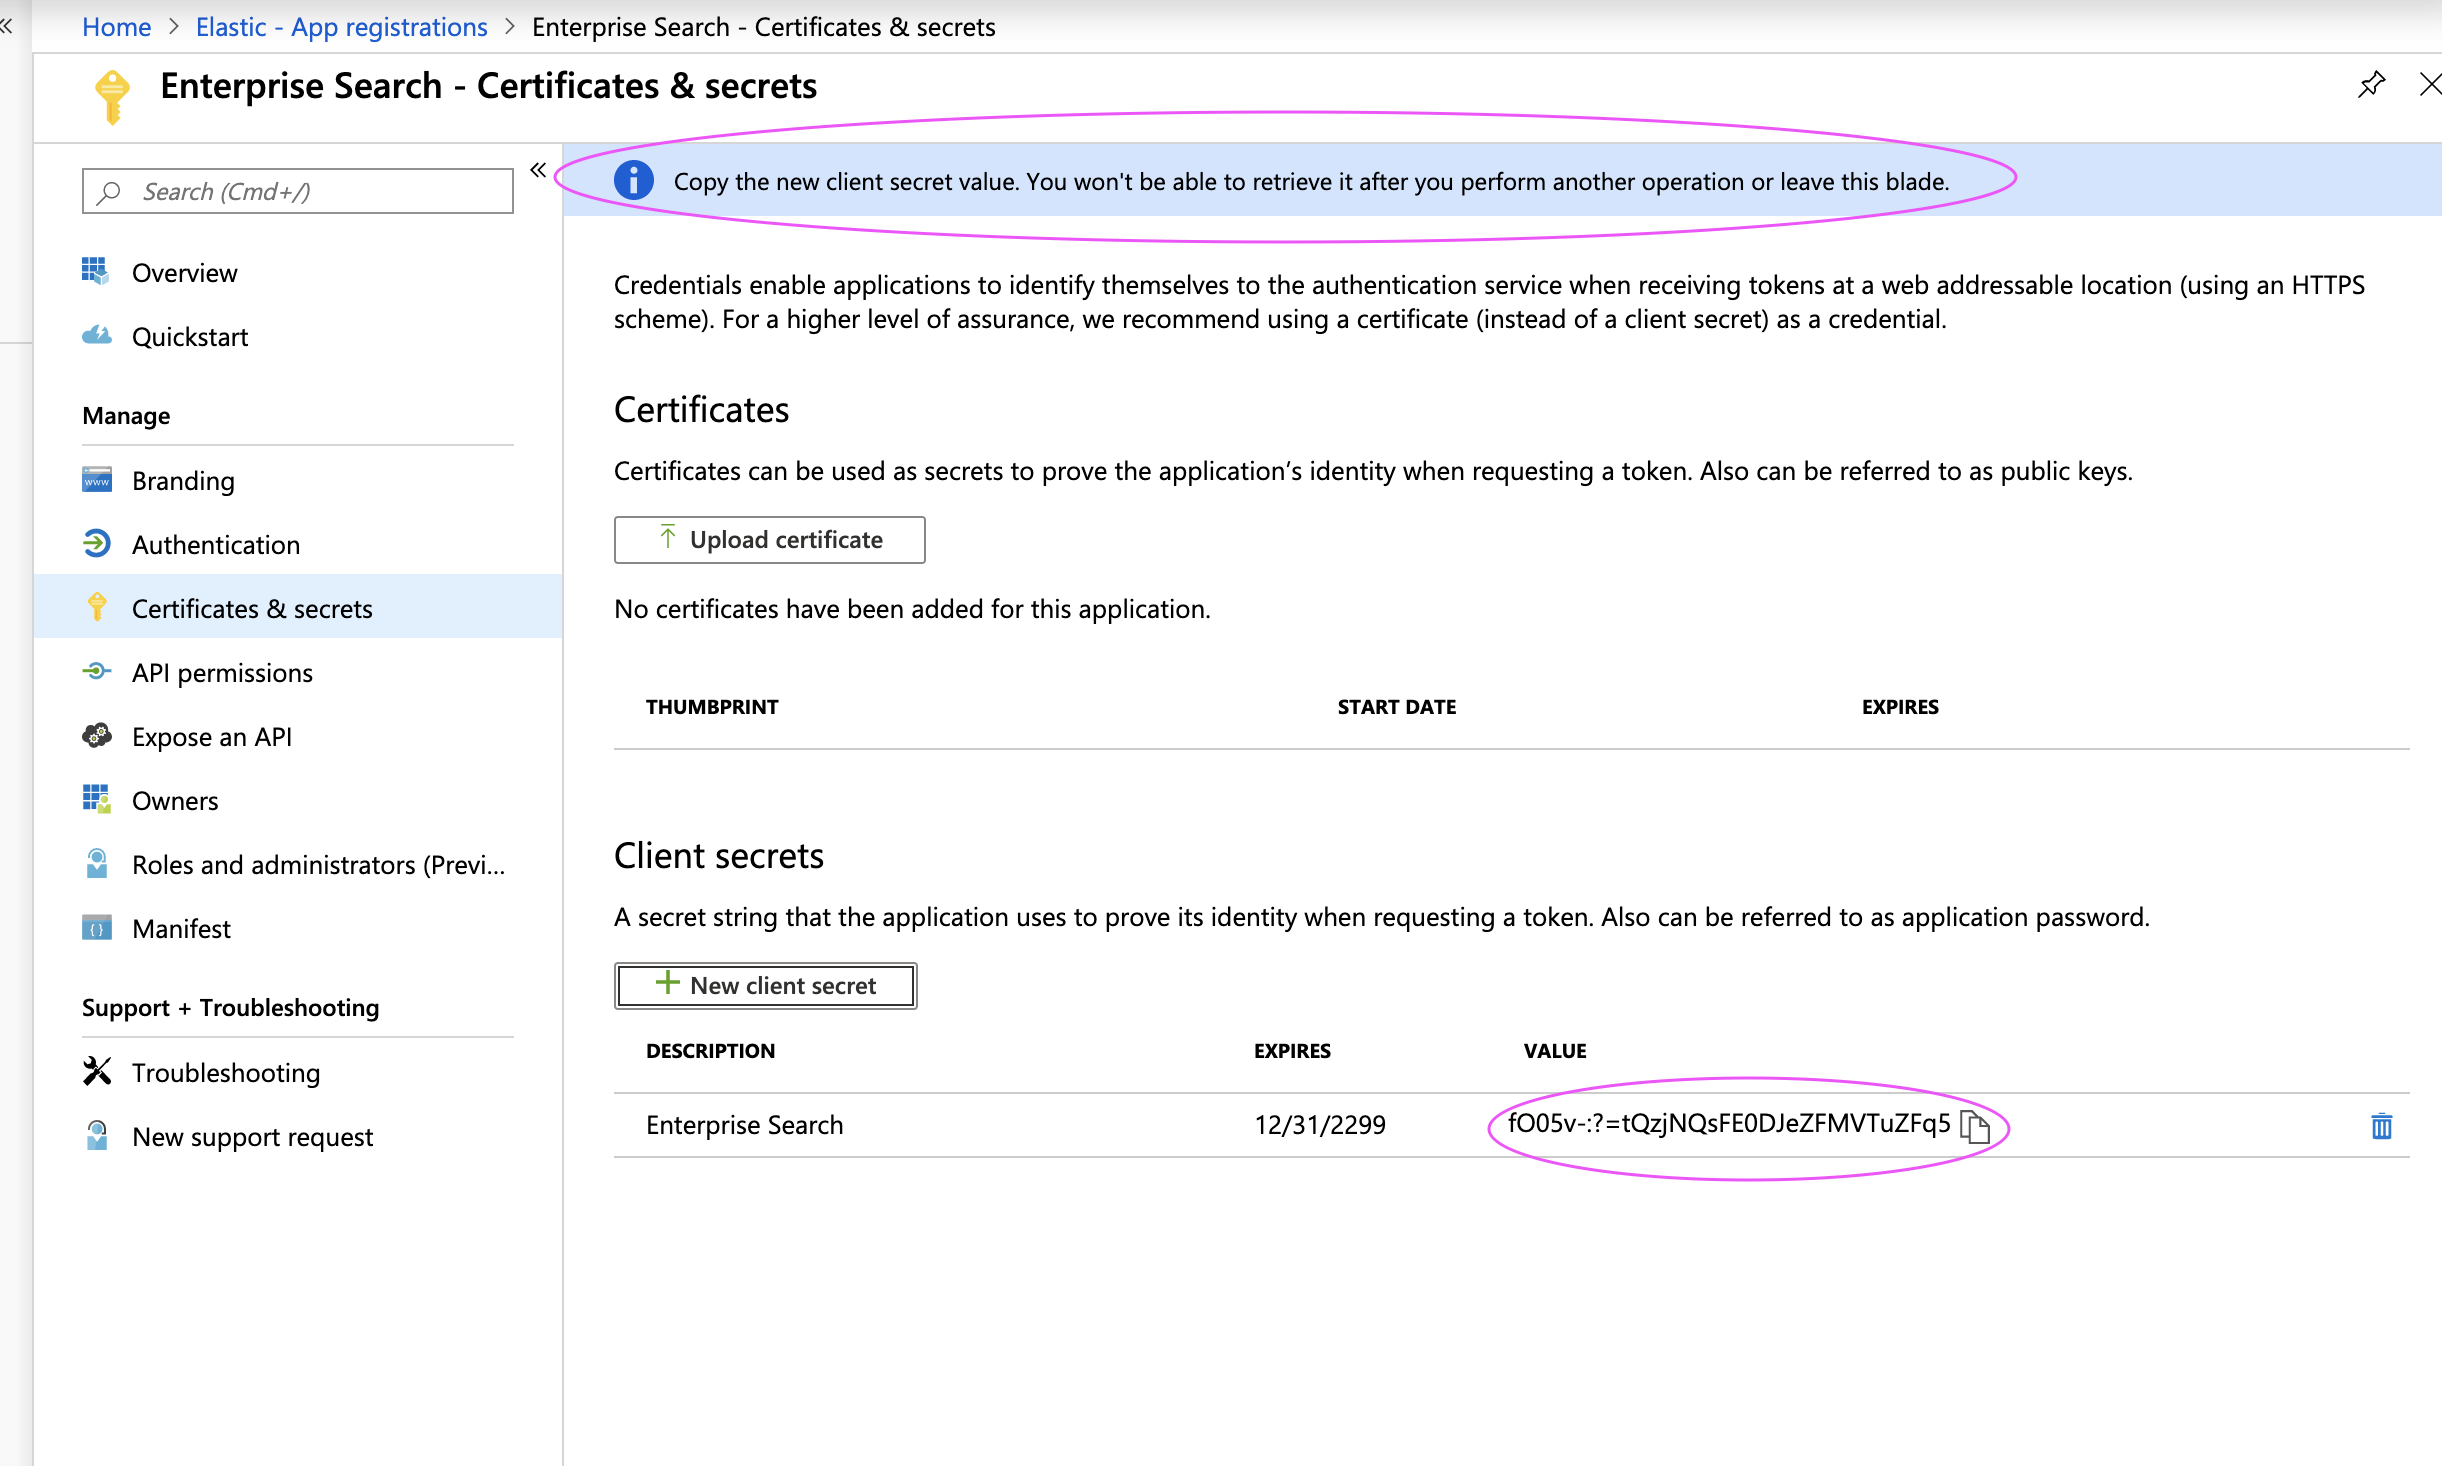
Step 8. Locate the Client Secret by navigating to Certificates & Secrets:
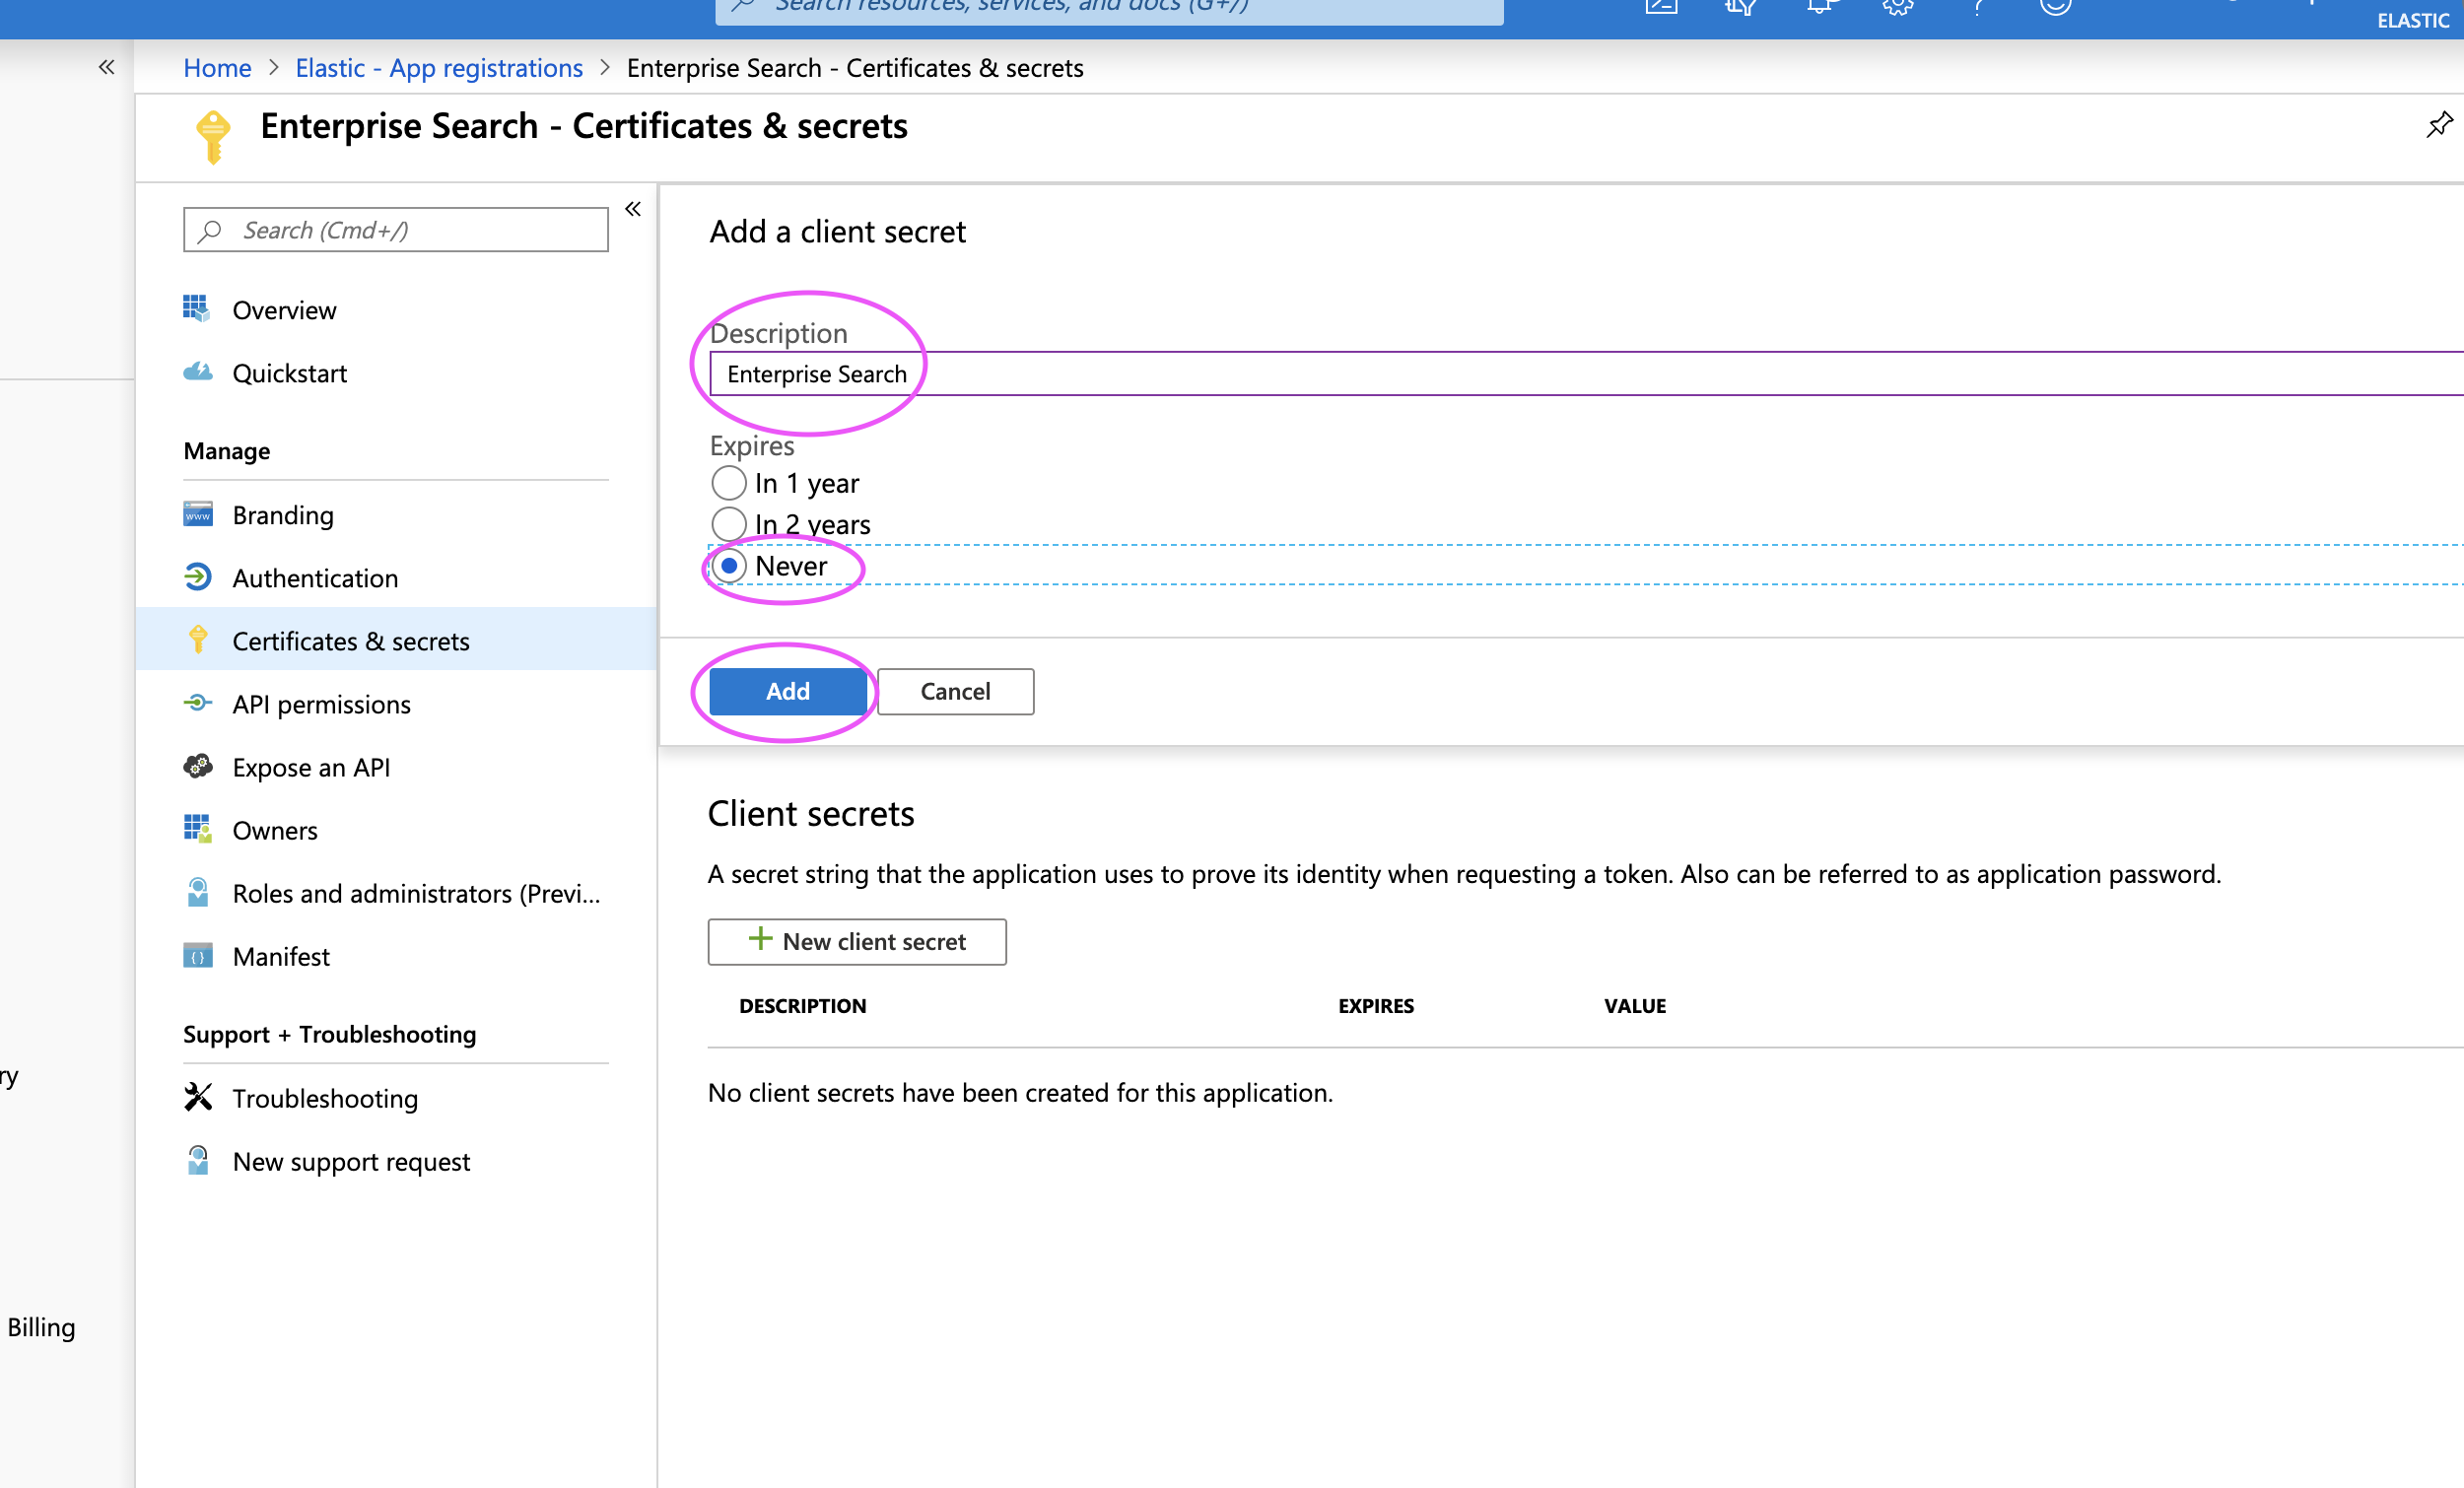
Step 9. Pick a name for your client secret (for example, Workplace Search). Select Never as the expiration date:
Step 10. Save the Client Secret value before leaving this screen.
Step 11. We must now set up the permissions the Application will request from the Admin. Navigate to API Permissions and click Add Permission. Add delegated permissions until the list resembles the following:
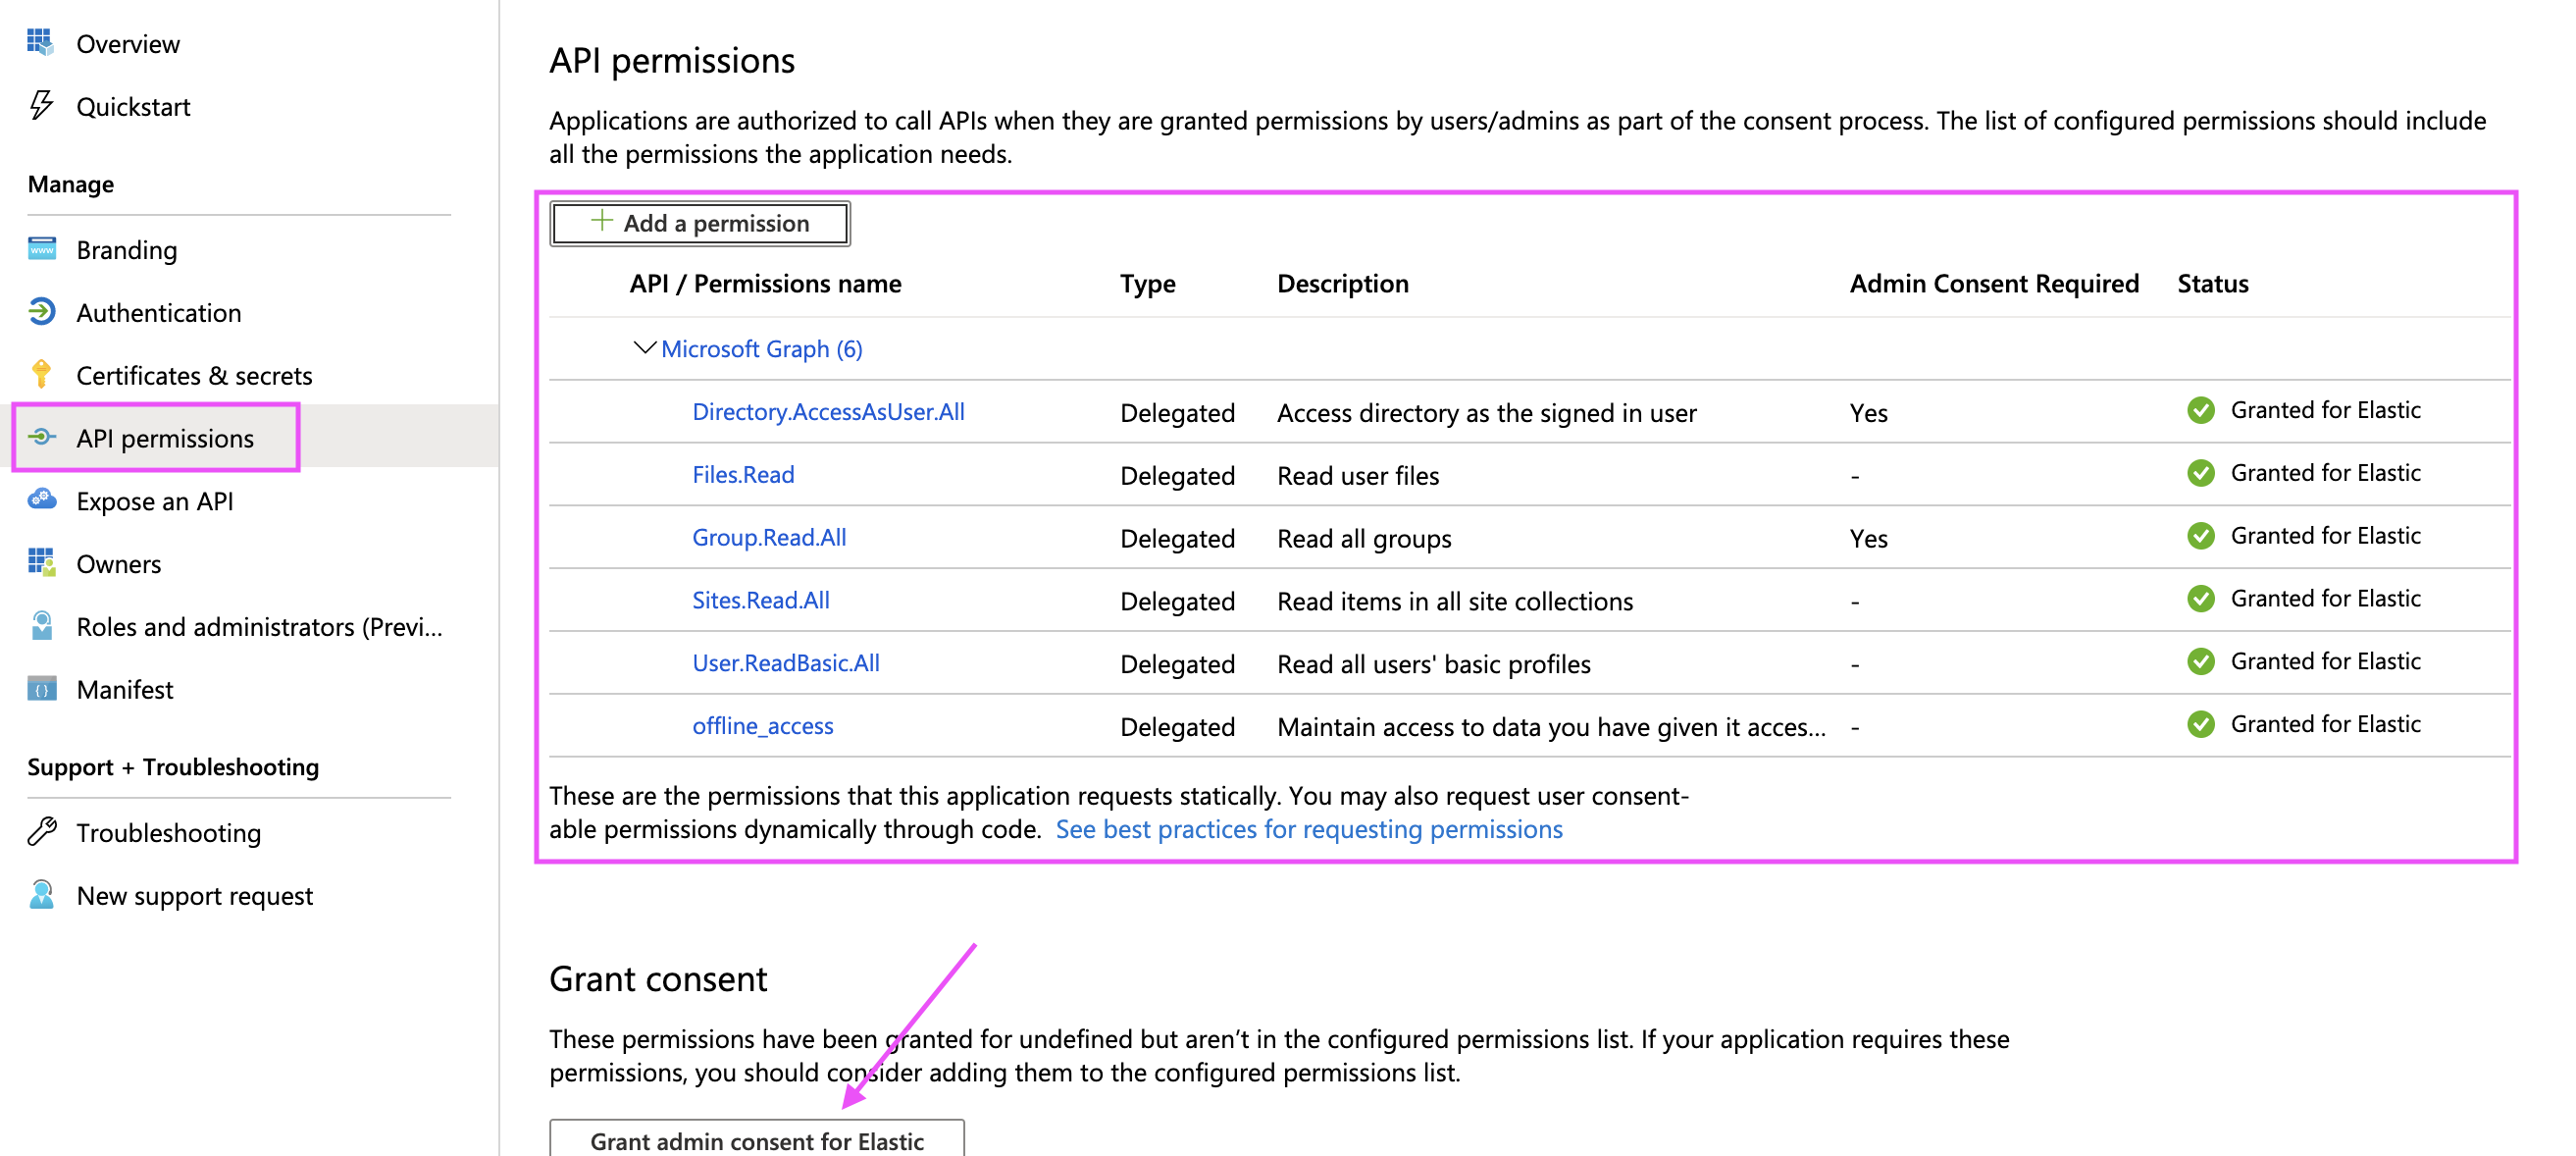
Step 12. Finally, Grant admin consent.
Step 13. From the Workplace Search administrative dashboard’s Sources area, locate OneDrive, click Configure and provide both the Client ID and Client Secret.
Voilà! The OneDrive connector is now configured, and ready to be used to synchronize content. In order to capture data, you must now connect a OneDrive instance with the adequate authentication credentials.
Connecting OneDrive to Workplace Search
editOnce the OneDrive connector has been configured, you may connect a OneDrive instance to your organization.
Step 1. Head to your organization’s Workplace Search administrative dashboard, and locate the Sources tab.
Step 2. Click Add a new source.
Step 3. Select OneDrive in the Configured Sources list, and follow the OneDrive authentication flow as presented.
Step 4. Upon the successful authentication flow, you will be redirected to Workplace Search.
OneDrive content will now be captured and will be ready for search gradually as it is synced. Once successfully configured and connected, the OneDrive synchronization automatically occurs every 2 hours.