IMPORTANT: No additional bug fixes or documentation updates
will be released for this version. For the latest information, see the
current release documentation.
Deploy using AWS Console
edit
IMPORTANT: This documentation is no longer updated. Refer to Elastic's version policy and the latest documentation.
Deploy using AWS Console
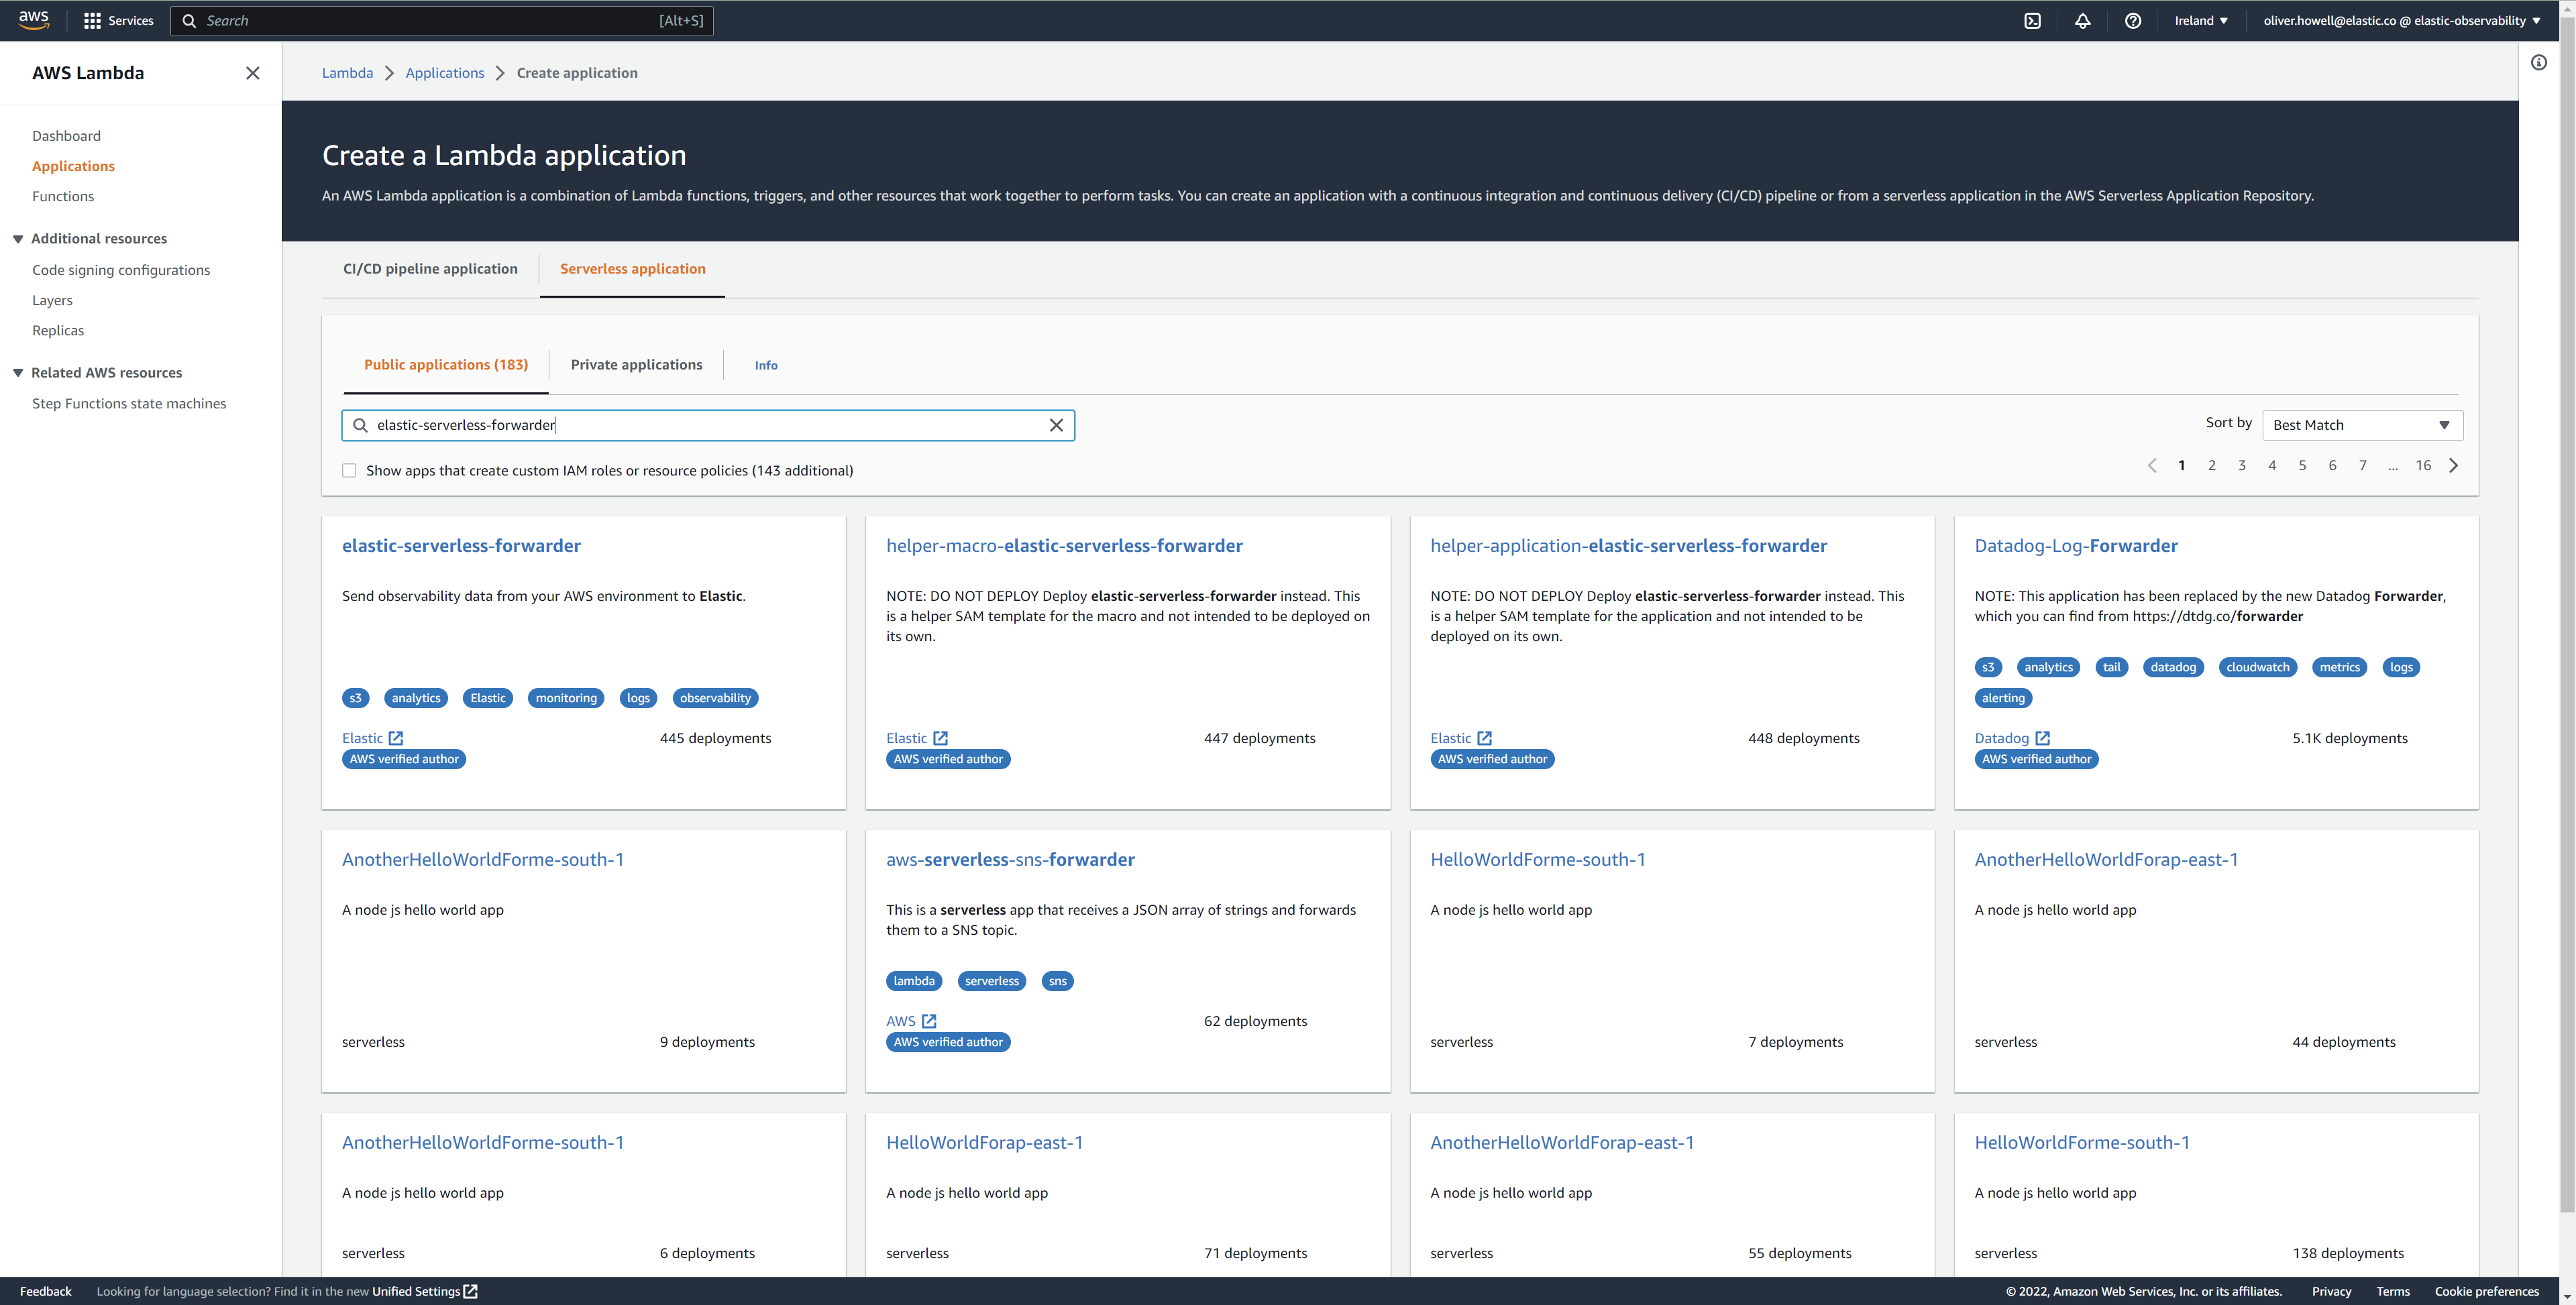
edit- Log in to AWS console and open Lambda.
- Click Applications and then Create application.
- Click Serverless application and search for elastic-serverless-forwarder.
-
Select elastic-serverless-forwarder from the search results (ignoring any application beginning helper-).
- Complete the Application settings according to Define deployment parameters
- After your settings have been added, click Deploy.
- On the Applications page for serverlessrepo-elastic-serverless-forwarder, click Deployments.
-
Refresh the Deployment history until you see the
Create completestatus update. It should take around 5 minutes to deploy — if the deployment fails for any reason, the create events will be rolled back and you will be able to see an explanation for which event failed. -
(Optional) To enable Elastic APM instrumentation for your new deployment:
- Go to Lambda > Functions within AWS console, and find and select the function with serverlessrepo-.
- Go to Configuration tab and select Environment Variables
-
Add the following environment variables:
| Key                       | Value  |
|---------------------------|--------|
|`ELASTIC_APM_ACTIVE`       | `true` |
|`ELASTIC_APM_SECRET_TOKEN` | token  |
|`ELASTIC_APM_SERVER_URL`	  | url    |
If you have already successfully deployed the forwarder but want to update the application (for example, if a new version of the Lambda function is released), you should go through this deploy step again and use the same Application name. This will ensure the function is updated rather than duplicated or created anew.