Step 1: Set up Fleet
editStep 1: Set up Fleet
editUse Fleet in Kibana to get APM data into the Elastic Stack. The first time you use Fleet, you’ll need to set it up and add a Fleet Server:
To deploy a self-managed Fleet Server, you install an Elastic Agent and enroll it in an agent policy containing the Fleet Server integration.
You can install only a single Elastic Agent per host, which means you cannot run Fleet Server and another Elastic Agent on the same host unless you deploy a containerized Fleet Server.
- In Fleet, open the Settings tab. For more information about these settings, see Fleet settings.
-
Under Fleet Server hosts, click Edit hosts and specify one or more host URLs your Elastic Agents will use to connect to Fleet Server. For example,
https://192.0.2.1:8220, where192.0.2.1is the host IP where you will install Fleet Server. Save and apply your settings.If the Edit hosts option is grayed out, Fleet Server hosts are configured outside of Fleet. For more information, refer to Fleet settings in Kibana.
-
In the Elasticsearch hosts field, specify the Elasticsearch URLs where Elastic Agents will send data.
For example,
https://192.0.2.0:9200. Skip this step if you’ve started the Elastic Stack with security enabled (you cannot change this setting because it’s managed outside of Fleet). - Save and apply the settings.
-
Click the Agents tab and follow the in-product instructions to add a Fleet server:
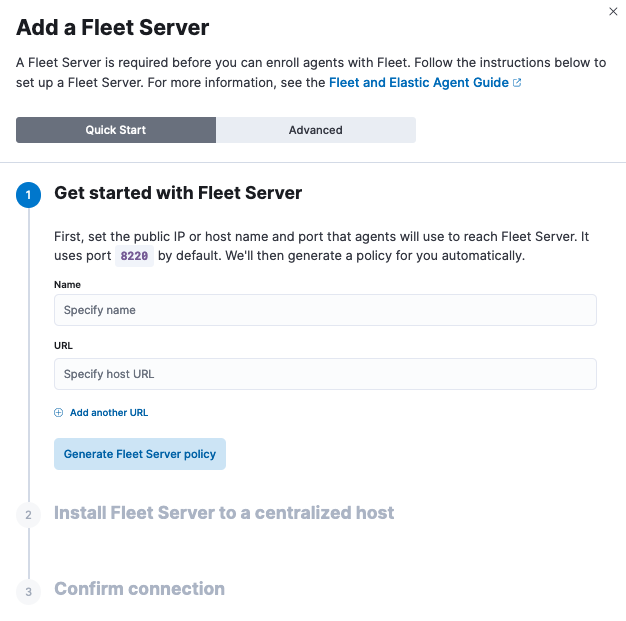
Notes:
- Choose Quick Start if you want Fleet to generate a Fleet Server policy and enrollment token for you. The Fleet Server policy will include a Fleet Server integration plus a system integration for monitoring Elastic Agent. This option generates self-signed certificates and is not recommended for production use cases.
-
Choose Advanced if you want to either:
- Use your own Fleet Server policy. You can create a new Fleet Server policy or select an existing one. Alternatively you can create a Fleet Server policy without using the UI, and select the policy here.
- Use your own TLS certificates to encrypt traffic between Elastic Agents and Fleet Server. To learn how to generate certs, refer to Configure SSL/TLS for self-managed Fleet Servers.
-
It’s recommended you generate a unique service token for each
Fleet Server. For other ways to generate service tokens, see
elasticsearch-service-tokens. -
If you are providing your own certificates:
-
Before running the
installcommand, make sure you replace the values in angle brackets. -
Note that the URL specified by
--urlmust match the DNS name used to generate the certificate specified by--fleet-server-cert.
-
Before running the
-
The
installcommand installs the Elastic Agent as a managed service and enrolls it in a Fleet Server policy. For more Fleet Server commands, see Elastic Agent command reference.
If installation is successful, you’ll see confirmation that Fleet Server connected. Click Continue enrolling Elastic Agent to begin enrolling your agents in Fleet Server.
If you’re unable to add a Fleet-managed agent, click the Agents tab and confirm that the agent running Fleet Server is healthy.
For more information, refer to Fleet Server.