How to deploy a text embedding model and use it for semantic search
editHow to deploy a text embedding model and use it for semantic search
editYou can use these instructions to deploy a text embedding model in Elasticsearch, test the model, and add it to an inference ingest pipeline. It enables you to generate vector representations of text and perform vector similarity search on the generated vectors. The model that is used in the example is publicly available on HuggingFace.
The example uses a public data set from the MS MARCO Passage Ranking Task. It consists of real questions from the Microsoft Bing search engine and human generated answers for them. The example works with a sample of this data set, uses a model to produce text embeddings, and then runs vector search on it.
Requirements
editTo follow along the process on this page, you must have:
- an Elasticsearch Cloud cluster that is set up properly to use the machine learning features. Refer to Setup and security.
- The appropriate subscription level or the free trial period activated.
- Docker installed.
Deploy a text embedding model
editYou can use the Eland client to install the natural language processing model. Eland commands can be run in Docker. First, you need to clone the Eland repository then create a Docker image of Eland:
git clone [email protected]:elastic/eland.git
cd eland
docker build -t elastic/eland .
After the script finishes, your Eland Docker client is ready to use.
Select a text embedding model from the third-party model reference list. This example uses the msmarco-MiniLM-L-12-v3 sentence-transformer model.
Install the model by running the eland_import_model_hub command in the Docker
image:
docker run -it --rm elastic/eland \
    eland_import_hub_model \
      --cloud-id $CLOUD_ID \
      -u <username> -p <password> \
      --hub-model-id sentence-transformers/msmarco-MiniLM-L-12-v3 \
      --task-type text_embedding \
      --start
You need to provide an administrator username and password and replace the
$CLOUD_ID with the ID of your Cloud deployment. This Cloud ID can be copied
from the deployments page on your Cloud website.
Since the --start option is used at the end of the Eland import command, Elasticsearch
deploys the model ready to use. If you have multiple models and want to select
which model to deploy, you can use the Machine Learning > Model Management user
interface in Kibana to manage the starting and stopping of models.
Go to the Machine Learning > Trained Models page and synchronize your trained models. A warning message is displayed at the top of the page that says "ML job and trained model synchronization required". Follow the link to "Synchronize your jobs and trained models." Then click Synchronize. You can also wait for the automatic synchronization that occurs in every hour, or use the sync machine learning objects API.
Test the text embedding model
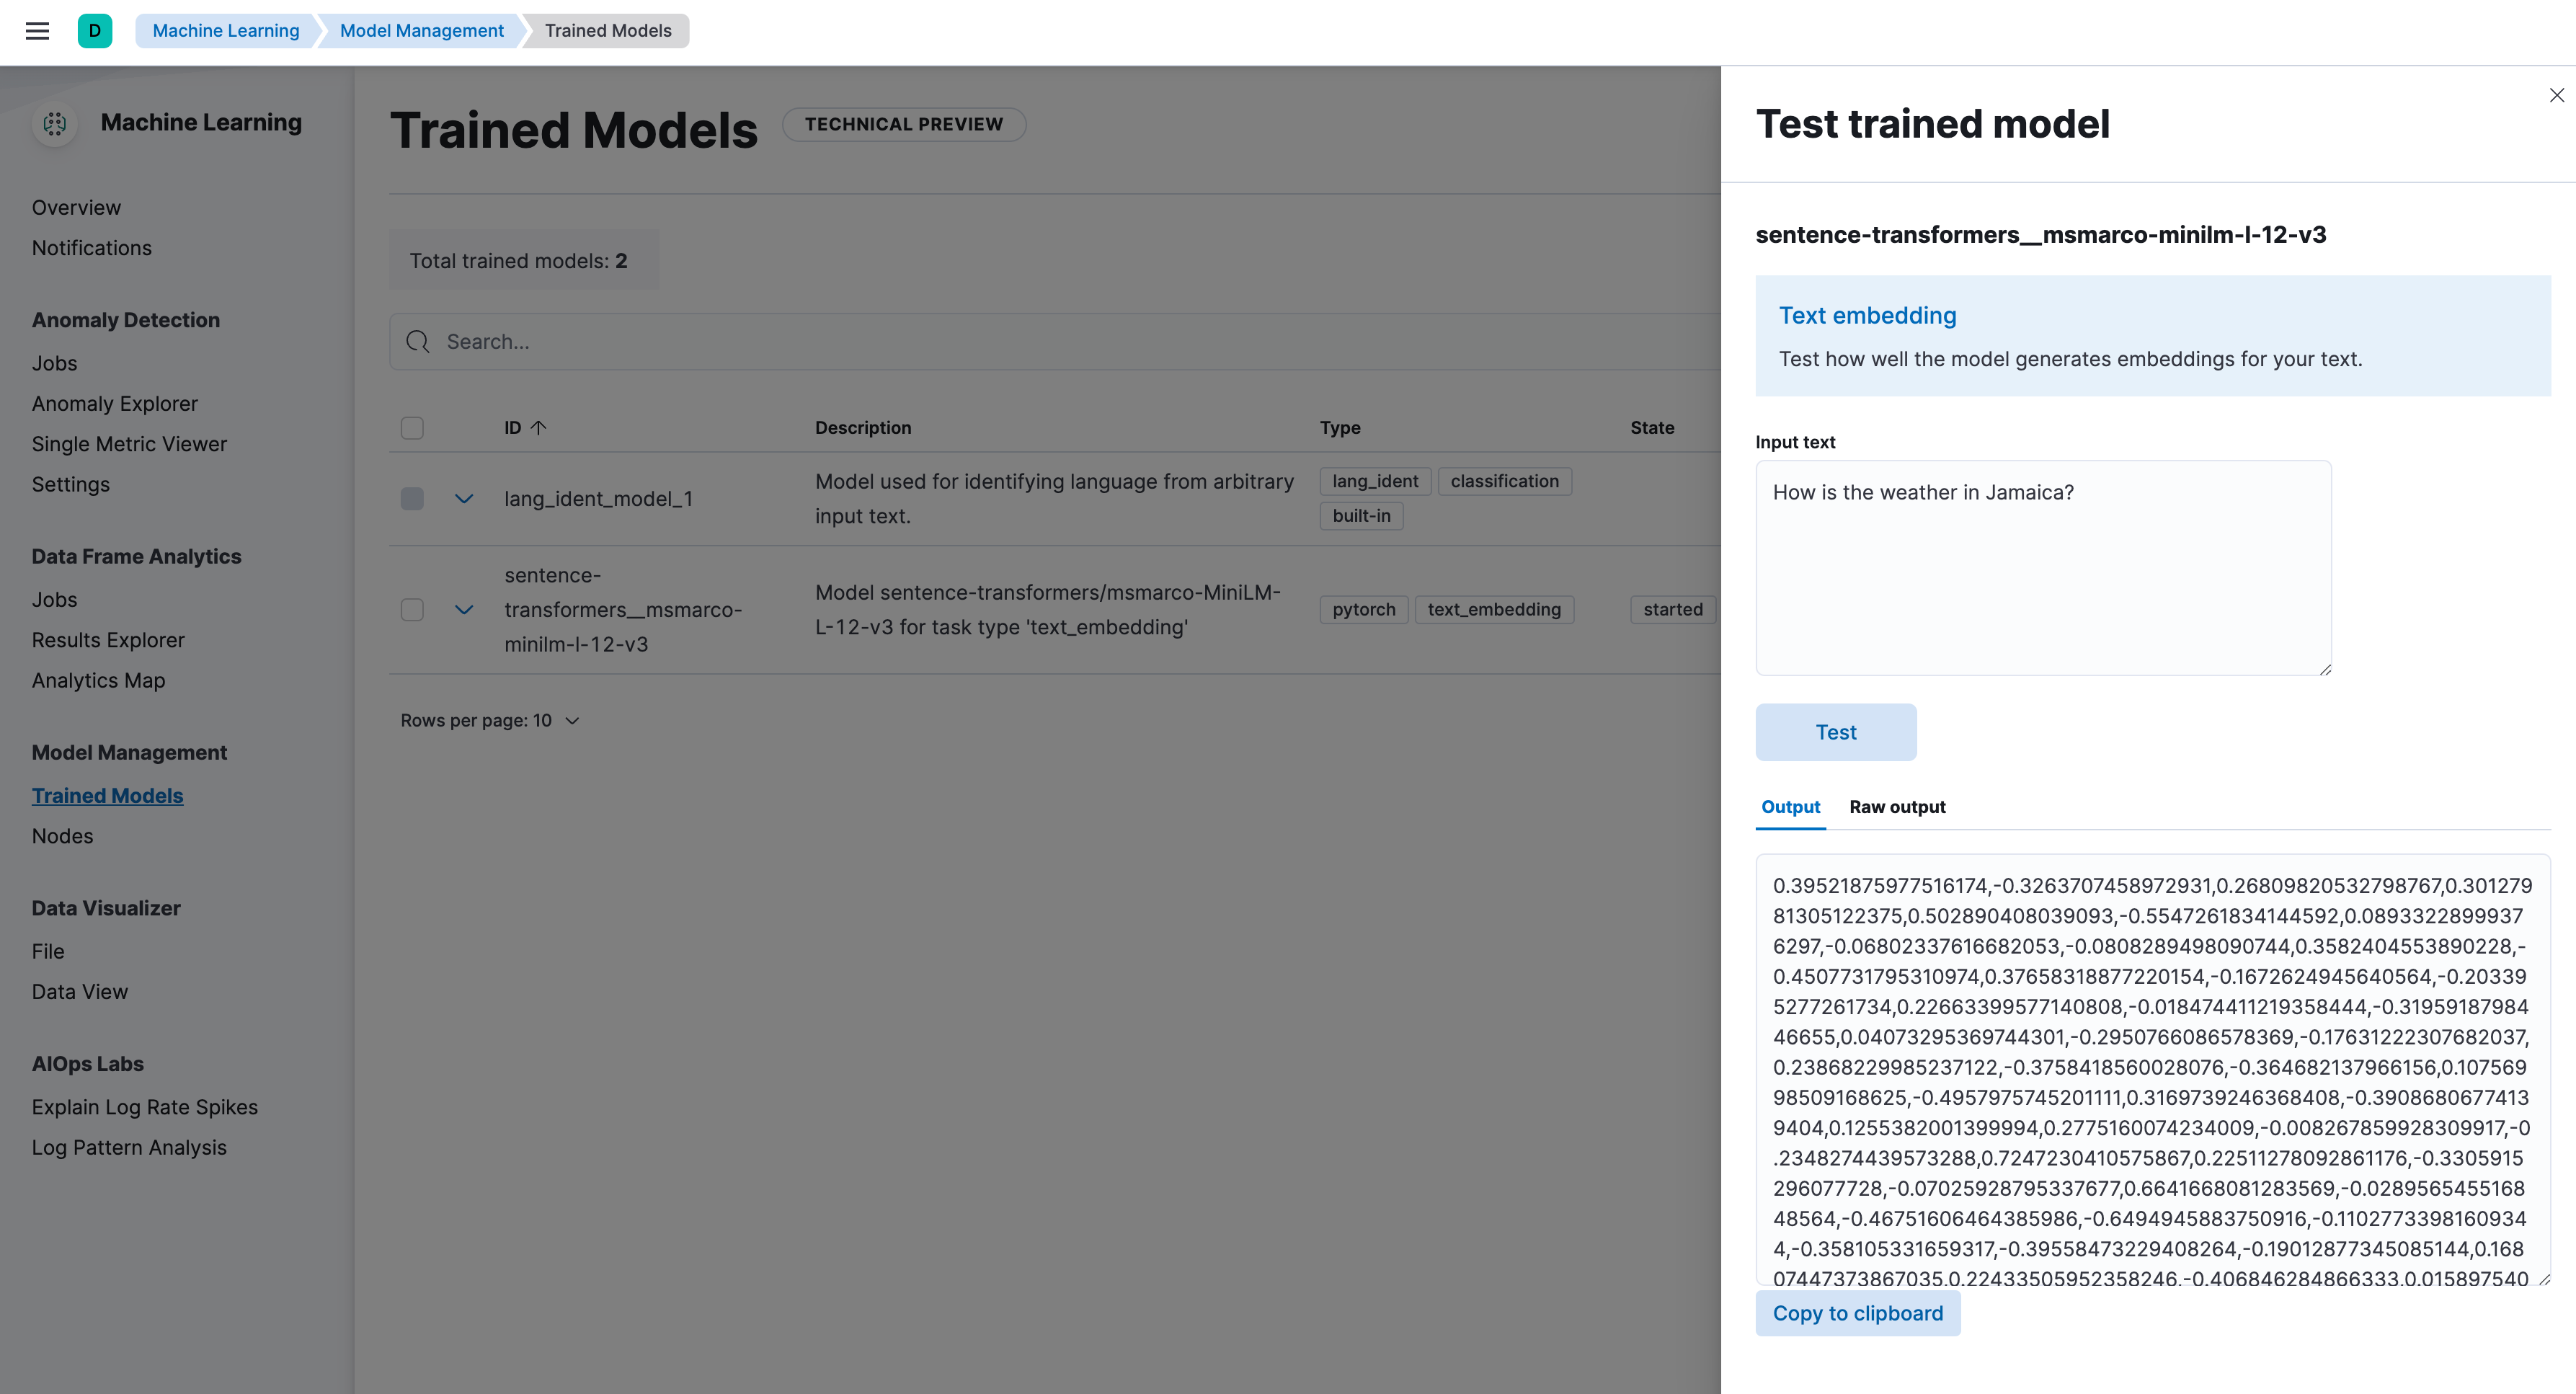
editDeployed models can be evaluated in Kibana under Machine Learning > Trained Models by selecting the Test model action for the respective model.

Test the model by using the _infer API
You can also evaluate your models by using the
_infer API. In the following request,
text_field is the field name where the model expects to find the input, as
defined in the model configuration. By default, if the model was uploaded via
Eland, the input field is text_field.
POST /_ml/trained_models/sentence-transformers__msmarco-minilm-l-12-v3/_infer
{
  "docs": {
    "text_field": "How is the weather in Jamaica?"
  }
}
The API returns a response similar to the following:
{
  "inference_results": [
    {
      "predicted_value": [
        0.39521875977516174,
        -0.3263707458972931,
        0.26809820532798767,
        0.30127981305122375,
        0.502890408039093,
        ...
      ]
    }
  ]
}
The result is the predicted dense vector transformed from the example text.
Load data
editIn this step, you load the data that you later use in an ingest pipeline to get the embeddings.
The data set msmarco-passagetest2019-top1000 is a subset of the MS MARCO
Passage Ranking data set used in the testing stage of the 2019 TREC Deep
Learning Track. It contains 200 queries and for each query a list of relevant
text passages extracted by a simple information retrieval (IR) system. From that
data set, all unique passages with their IDs have been extracted and put into a
tsv file,
totaling 182469 passages. In the following, this file is used as the example
data set.
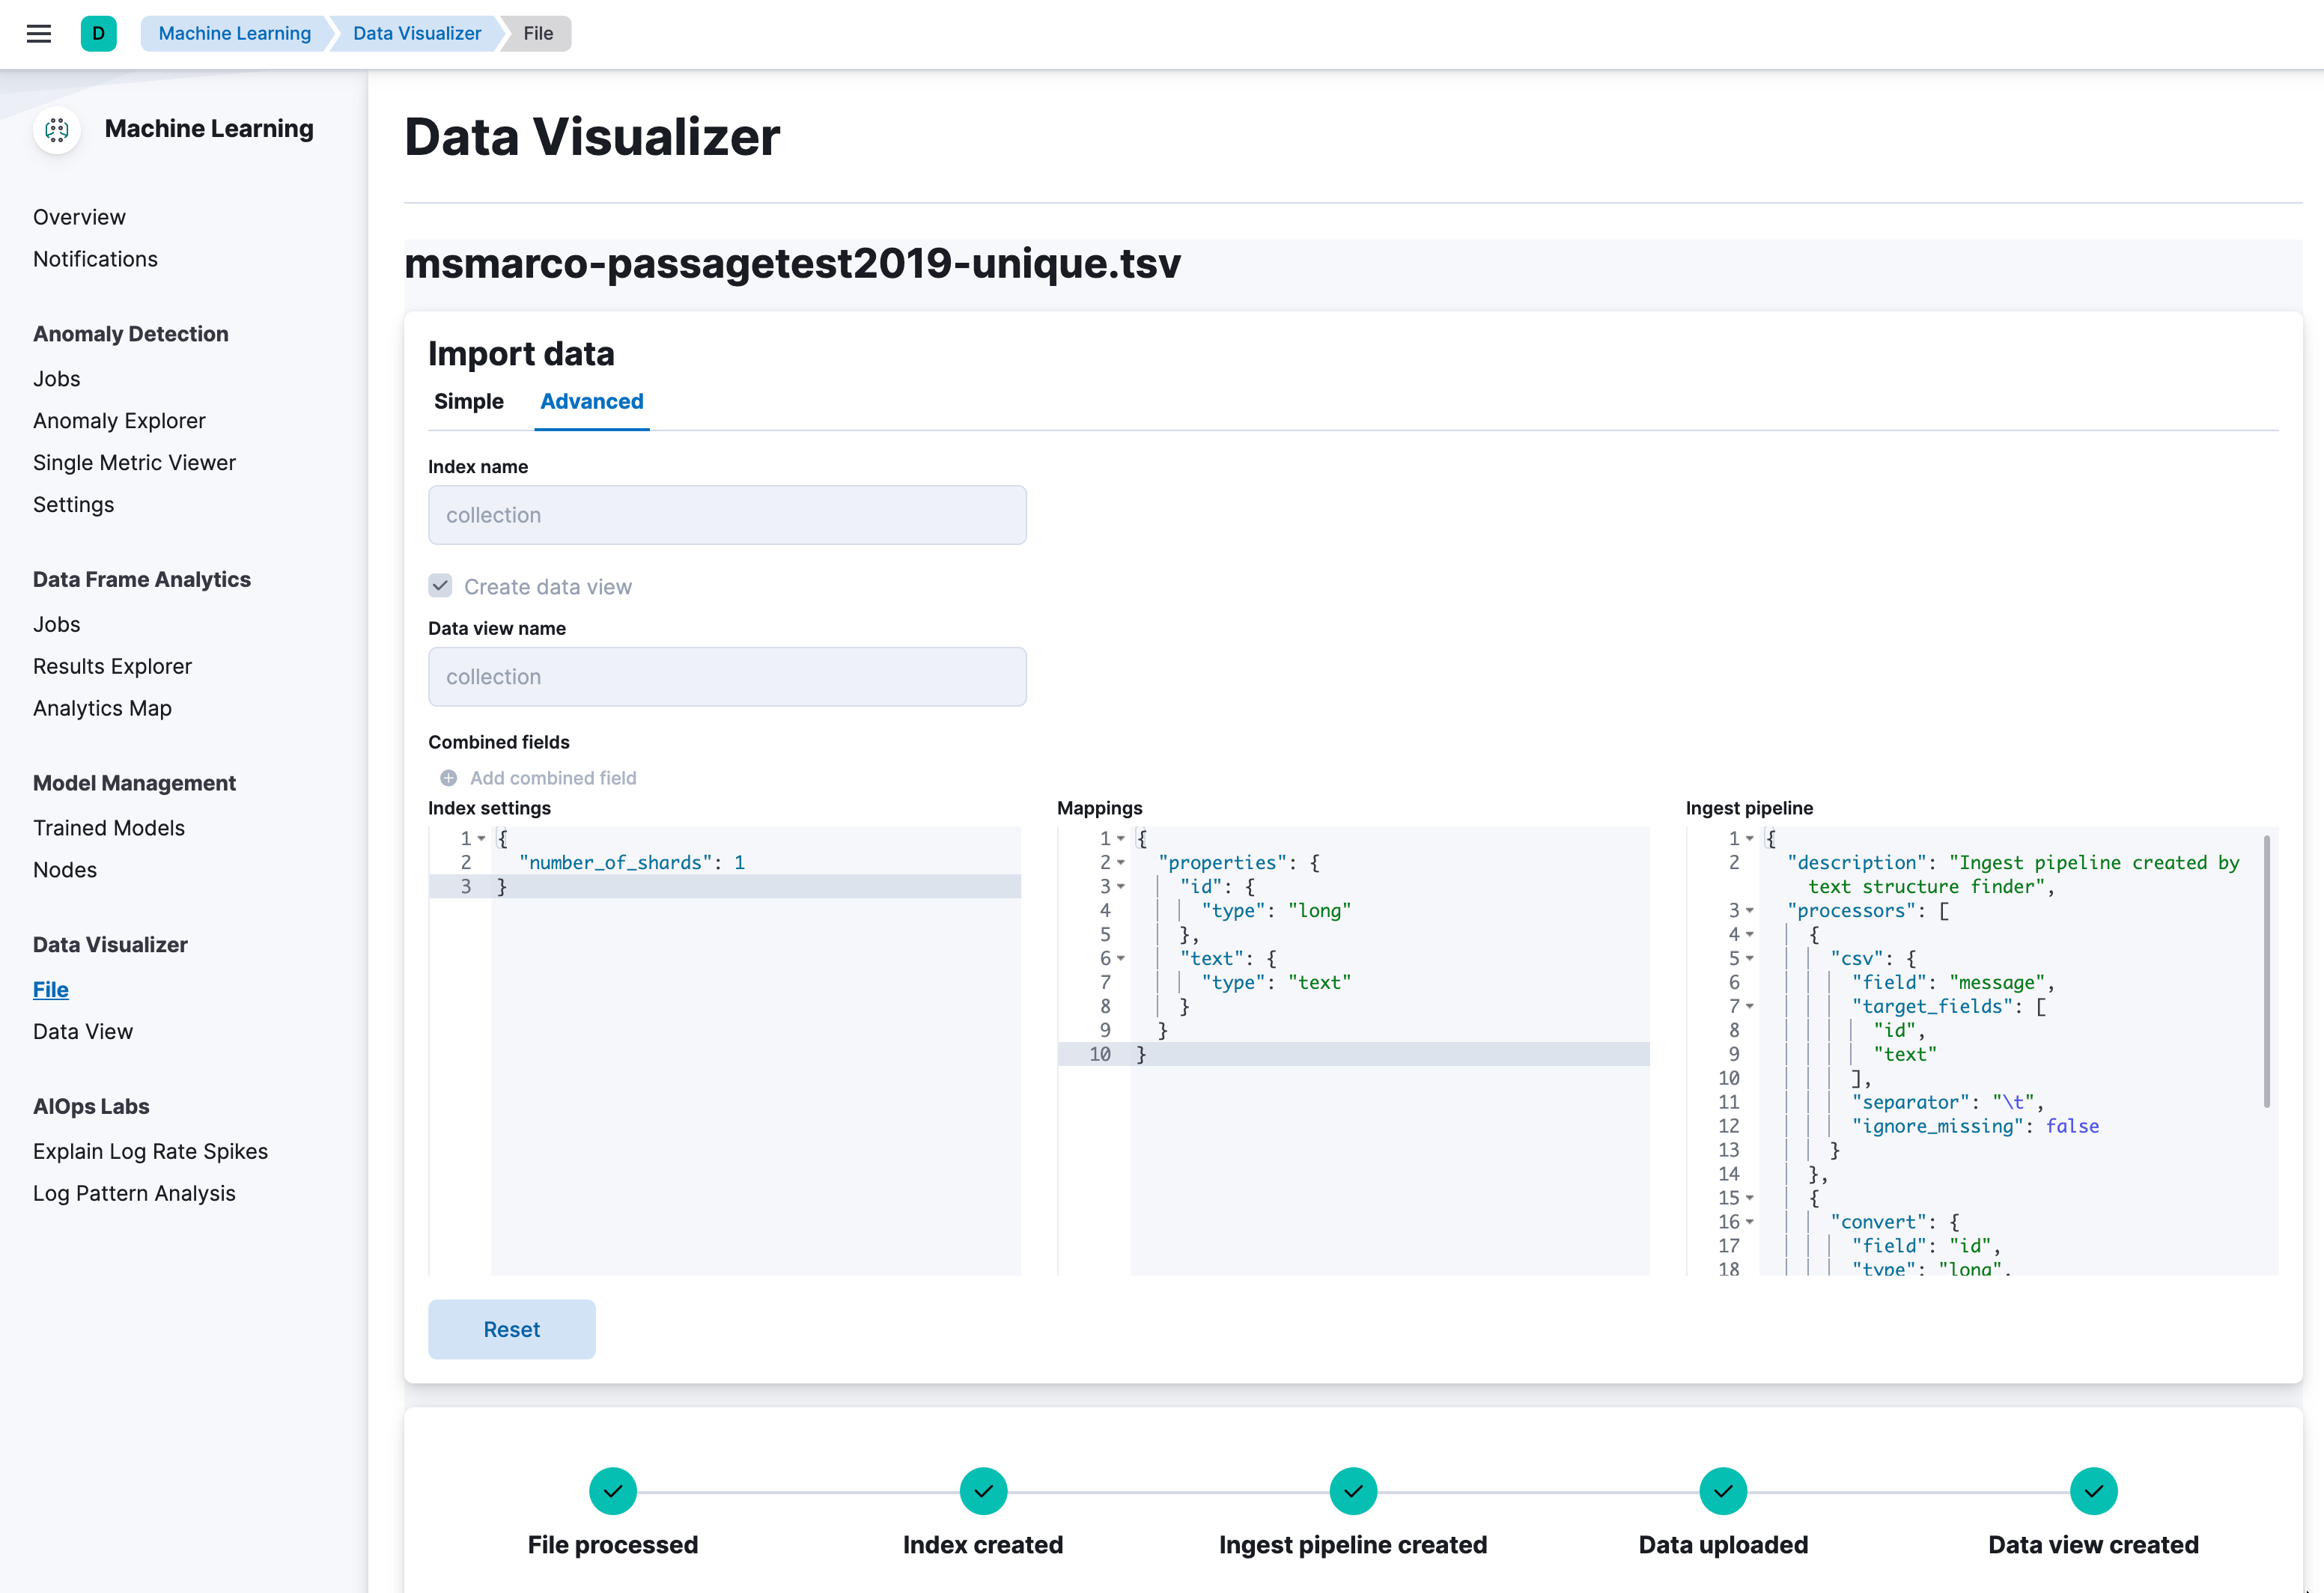
Upload the file by using the
Data Visualizer.
Name the first column id and the second one text. The index name is
collection. After the upload is done, you can see an index named collection
with 182469 documents.

Add the text embedding model to an inference ingest pipeline
editProcess the initial data with an inference processor. It adds an embedding for each passage. For this, create a text embedding ingest pipeline and then reindex the initial data with this pipeline.
Now create an ingest pipeline either in the Stack Management UI or by using the API:
PUT _ingest/pipeline/text-embeddings
{
  "description": "Text embedding pipeline",
  "processors": [
    {
      "inference": {
        "model_id": "sentence-transformers__msmarco-minilm-l-12-v3",
        "target_field": "text_embedding",
        "field_map": {
          "text": "text_field"
        }
      }
    }
  ],
  "on_failure": [
    {
      "set": {
        "description": "Index document to 'failed-<index>'",
        "field": "_index",
        "value": "failed-{{{_index}}}"
      }
    },
    {
      "set": {
        "description": "Set error message",
        "field": "ingest.failure",
        "value": "{{_ingest.on_failure_message}}"
      }
    }
  ]
}
The passages are in a field named text. The field_map maps the text to the
field text_field that the model expects. The on_failure handler is set to
index failures into a different index.
Before ingesting the data through the pipeline, create the mappings of the
destination index, in particular for the field text_embedding.predicted_value
where the ingest processor stores the embeddings. The dense_vector field must
be configured with the same number of dimensions (dims) as the text embedding
produced by the model. That value can be found in the embedding_size option in
the model configuration either under the Trained Models page in Kibana or in the
response body of the Get trained models API call.
The msmarco-MiniLM-L-12-v3 model has embedding_size of 384, so dims is set to
384.
PUT collection-with-embeddings
{
  "mappings": {
    "properties": {
      "text_embedding.predicted_value": {
        "type": "dense_vector",
        "dims": 384,
        "index": true,
        "similarity": "cosine"
      },
      "text": {
        "type": "text"
      }
    }
  }
}
Create the text embeddings by reindexing the data to the
collection-with-embeddings index through the inference pipeline. The inference
ingest processor inserts the embedding vector into each document.
POST _reindex?wait_for_completion=false
{
  "source": {
    "index": "collection",
    "size": 50
  },
  "dest": {
    "index": "collection-with-embeddings",
    "pipeline": "text-embeddings"
  }
}
|
The default batch size for reindexing is 1000. Reducing |
The API call returns a task ID that can be used to monitor the progress:
GET _tasks/<task_id>
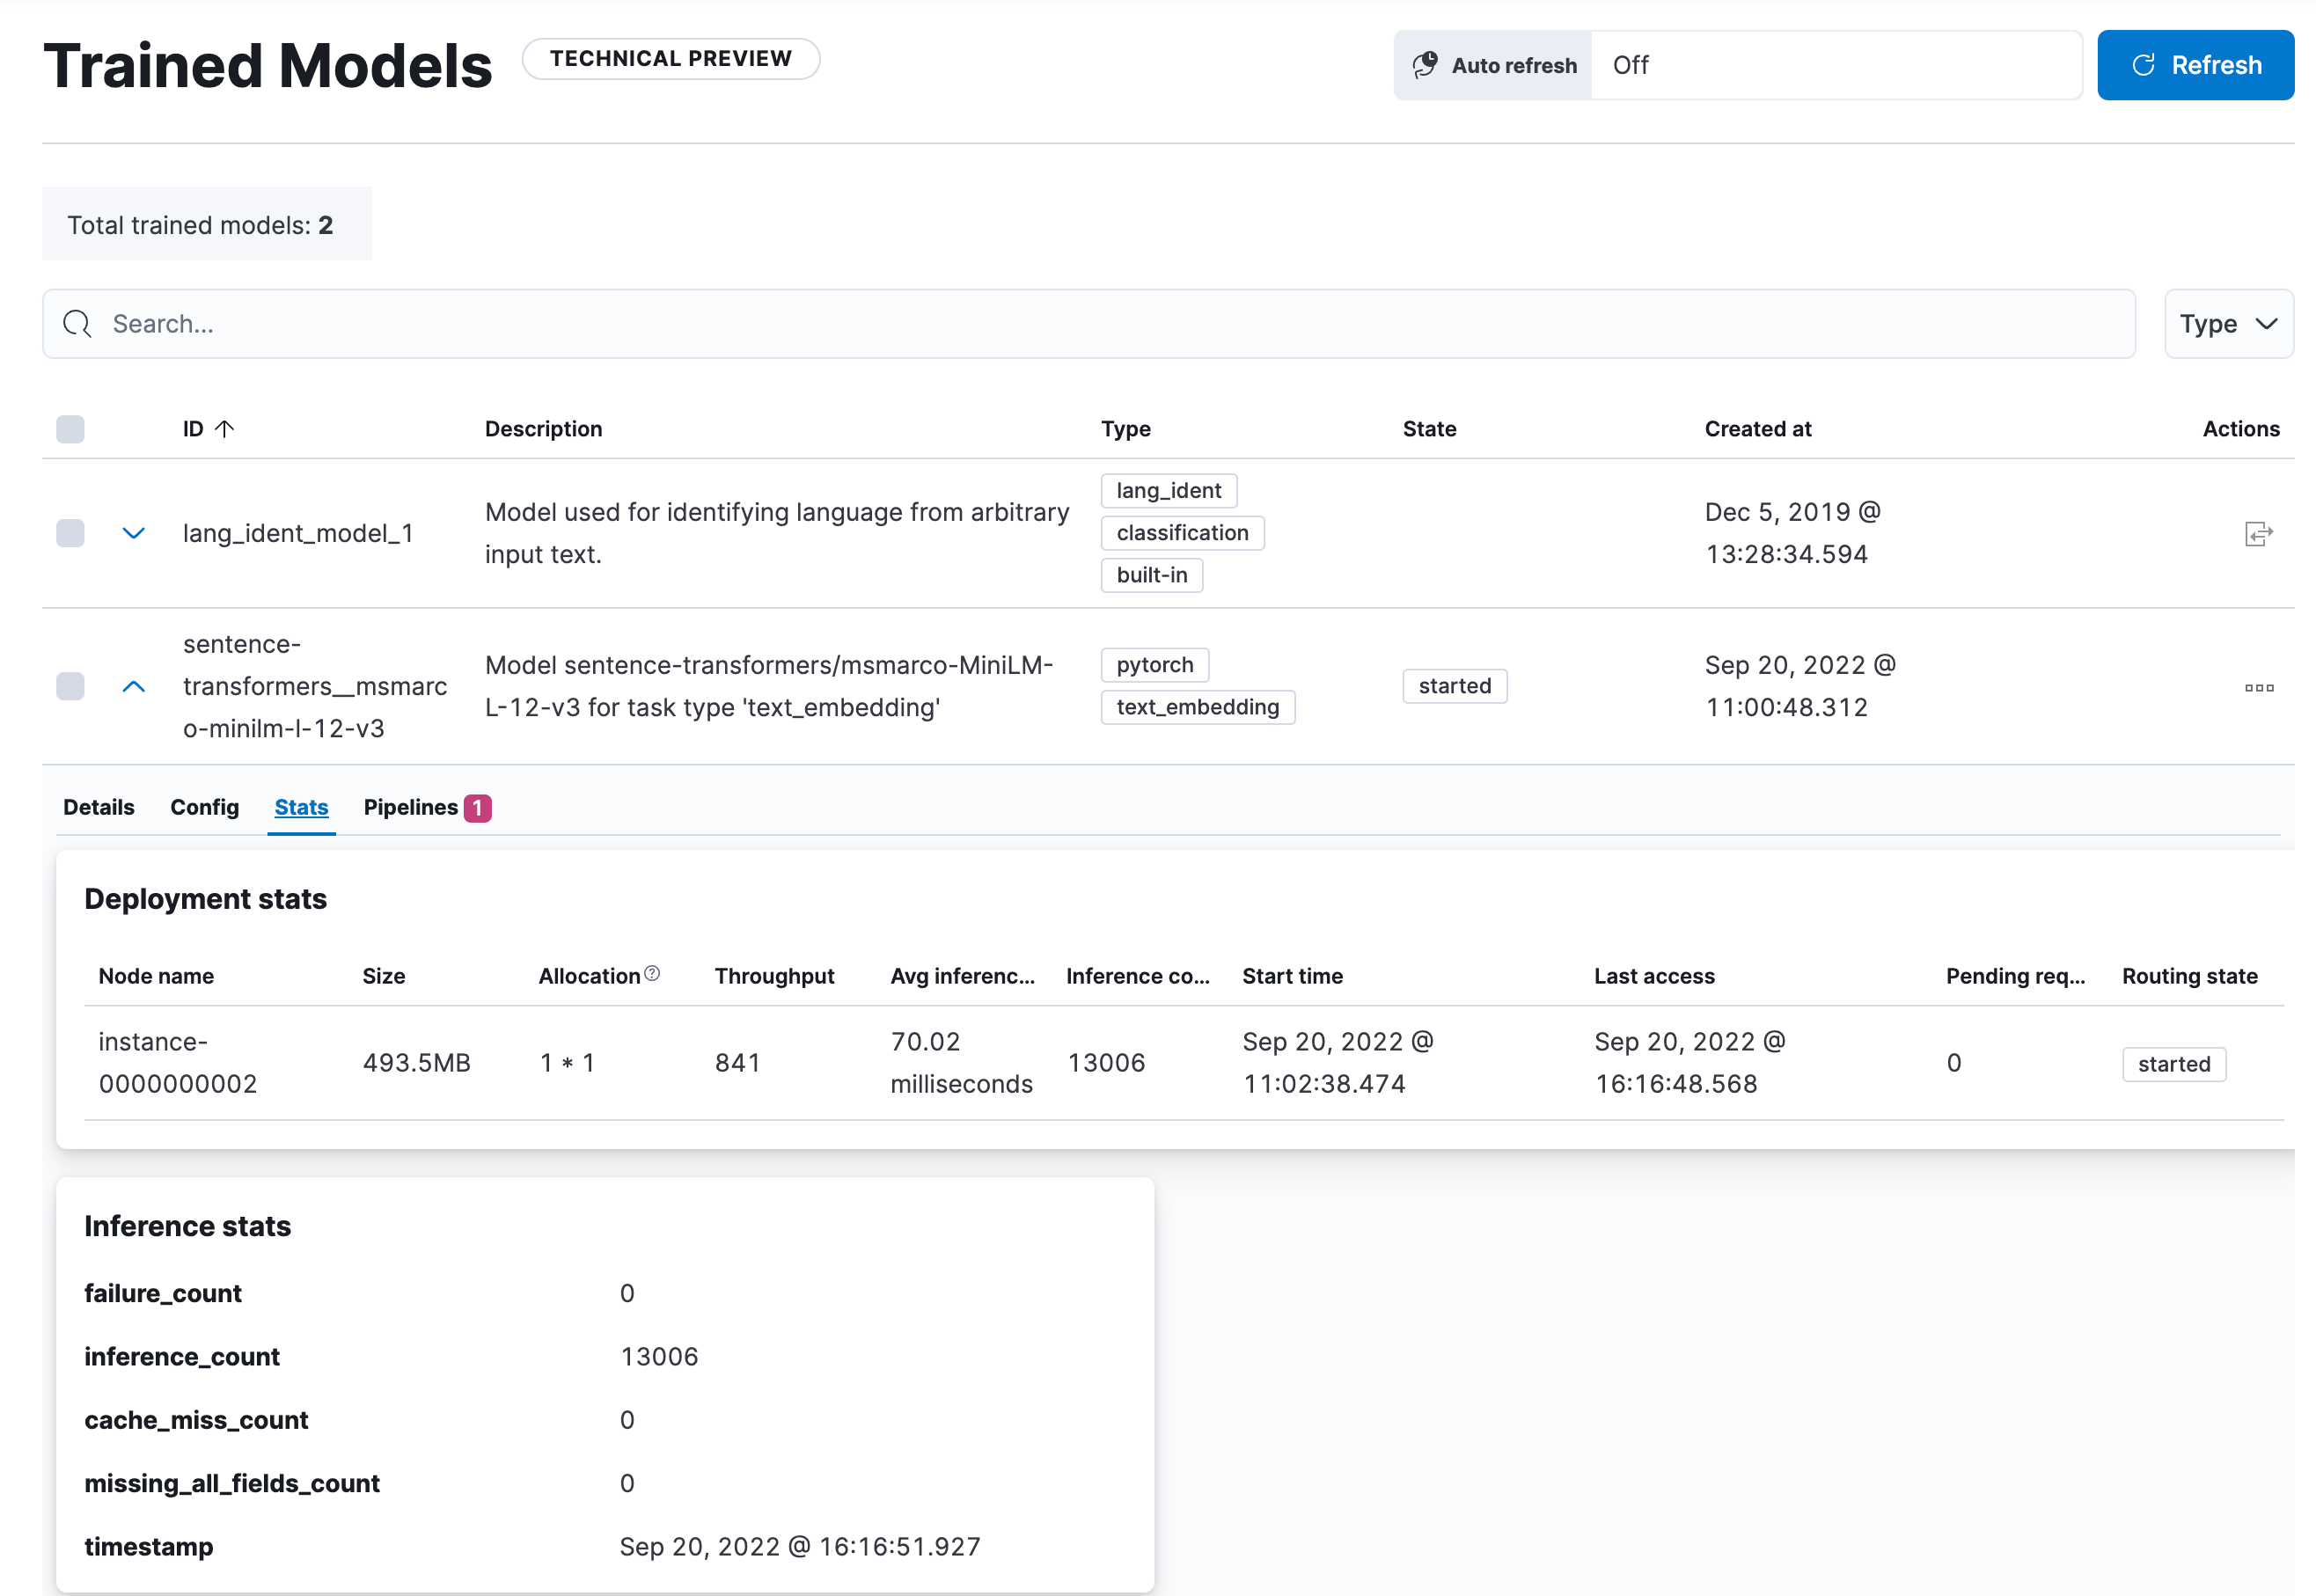
You can also open the model stat UI to follow the progress.

After the reindexing is finished, the documents in the new index contain the inference results – the vector embeddings.
Semantic search
editAfter the dataset has been enriched with vector embeddings, you can query the
data using semantic search. Pass a
query_vector_builder to the k-nearest neighbor (kNN) vector search API, and
provide the query text and the model you have used to create vector embeddings.
This example searches for "How is the weather in Jamaica?":
GET collection-with-embeddings/_search
{
  "knn": {
    "field": "text_embedding.predicted_value",
    "query_vector_builder": {
      "text_embedding": {
        "model_id": "sentence-transformers__msmarco-minilm-l-12-v3",
        "model_text": "How is the weather in Jamaica?"
      }
    },
    "k": 10,
    "num_candidates": 100
  },
  "_source": [
    "id",
    "text"
  ]
}
As a result, you receive the top 10 documents that are closest in meaning to the
query from the collection-with-embedings index sorted by their proximity to
the query:
"hits" : [
      {
        "_index" : "collection-with-embeddings",
        "_id" : "47TPtn8BjSkJO8zzKq_o",
        "_score" : 0.94591534,
        "_source" : {
          "id" : 434125,
          "text" : "The climate in Jamaica is tropical and humid with warm to hot temperatures all year round. The average temperature in Jamaica is between 80 and 90 degrees Fahrenheit. Jamaican nights are considerably cooler than the days, and the mountain areas are cooler than the lower land throughout the year. Continue Reading."
        }
      },
      {
        "_index" : "collection-with-embeddings",
        "_id" : "3LTPtn8BjSkJO8zzKJO1",
        "_score" : 0.94536424,
        "_source" : {
          "id" : 4498474,
          "text" : "The climate in Jamaica is tropical and humid with warm to hot temperatures all year round. The average temperature in Jamaica is between 80 and 90 degrees Fahrenheit. Jamaican nights are considerably cooler than the days, and the mountain areas are cooler than the lower land throughout the year"
        }
      },
      {
        "_index" : "collection-with-embeddings",
        "_id" : "KrXPtn8BjSkJO8zzPbDW",
        "_score" :  0.9432083,
        "_source" : {
          "id" : 190804,
          "text" : "Quick Answer. The climate in Jamaica is tropical and humid with warm to hot temperatures all year round. The average temperature in Jamaica is between 80 and 90 degrees Fahrenheit. Jamaican nights are considerably cooler than the days, and the mountain areas are cooler than the lower land throughout the year. Continue Reading"
        }
      },
      (...)
]
If you want to do a quick verification of the results, follow the steps of the Quick verification section of this blog post.