WARNING: Version 6.2 of Kibana has passed its EOL date.
This documentation is no longer being maintained and may be removed. If you are running this version, we strongly advise you to upgrade. For the latest information, see the current release documentation.
Defining Your Index Patterns
editDefining Your Index Patterns
editIndex patterns tell Kibana which Elasticsearch indices you want to explore. An index pattern can match the name of a single index, or include a wildcard (*) to match multiple indices.
For example, Logstash typically creates a
series of indices in the format logstash-YYYY.MMM.DD. To explore all
of the log data from May 2018, you could specify the index pattern
logstash-2018.05*.
Create patterns for the Shakespeare data set, which has an
index named shakespeare, and the accounts data set, which has an index named
bank. These data sets don’t contain time-series data.
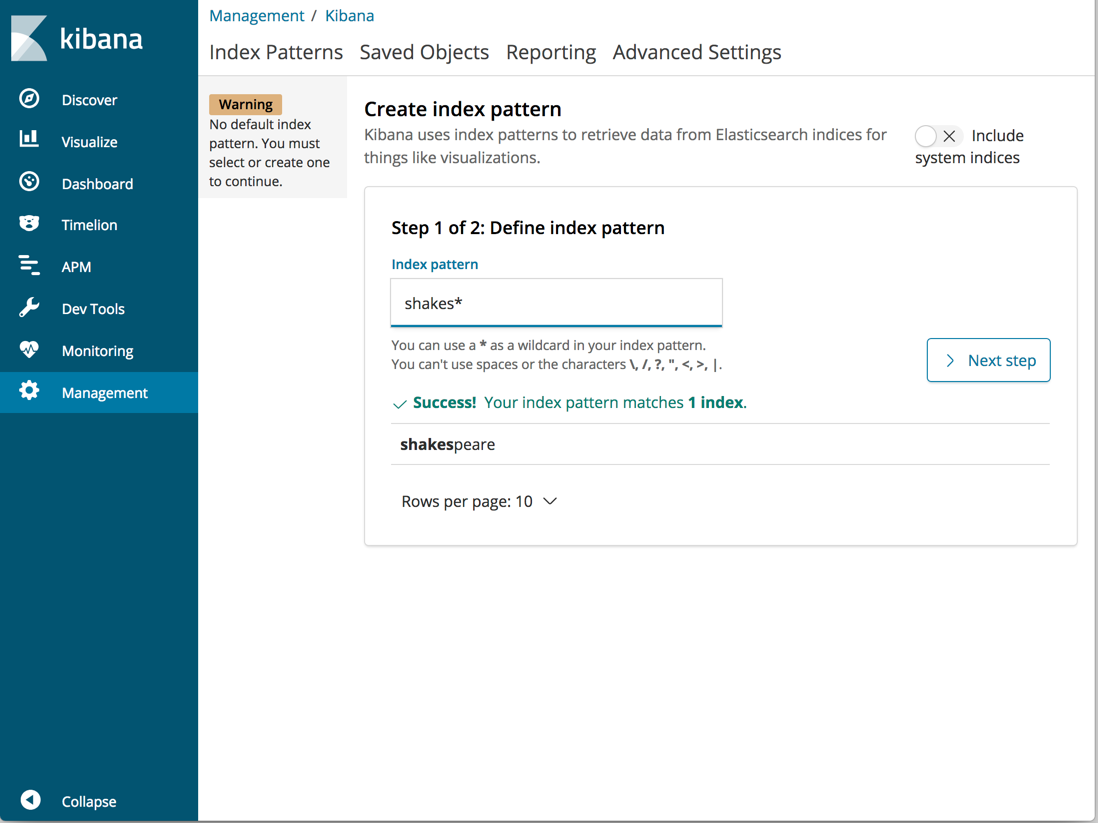
- In Kibana, open Management, and then click Index Patterns.
- If this is your first index pattern, the Create index pattern page opens automatically. Otherwise, click Create index pattern in the upper left.
-
Enter
shakes*in the Index pattern field.
- Click Next step.
- In Configure settings, click Create index pattern. For this pattern, you don’t need to configure any settings.
-
Define a second index pattern named
ba*You don’t need to configure any settings for this pattern.
Now create an index pattern for the Logstash data set. This data set contains time-series data.
-
Define an index pattern named
logstash*. - Click Next step.
- In Configure settings, select @timestamp in the Time Filter field name dropdown menu.
- Click Create index pattern.
When you define an index pattern, the indices that match that pattern must
exist in Elasticsearch and they must contain data. To check which indices are
available, go to Dev Tools > Console and enter GET _cat/indices. Alternately, use
curl -XGET "http://localhost:9200/_cat/indices".